2
Enamel-Cutting Instruments

Parts of an Instrument
Instrument

 . Handle
Grasping end of instrument
Variety of sizes and styles
 . Shank
Connects handle to working end of instrument
May be straight or may have one or more angles to accommodate specific areas of the mouth
 . Working End
May have cutting edge, blade, bevel, point, nib, or beaks
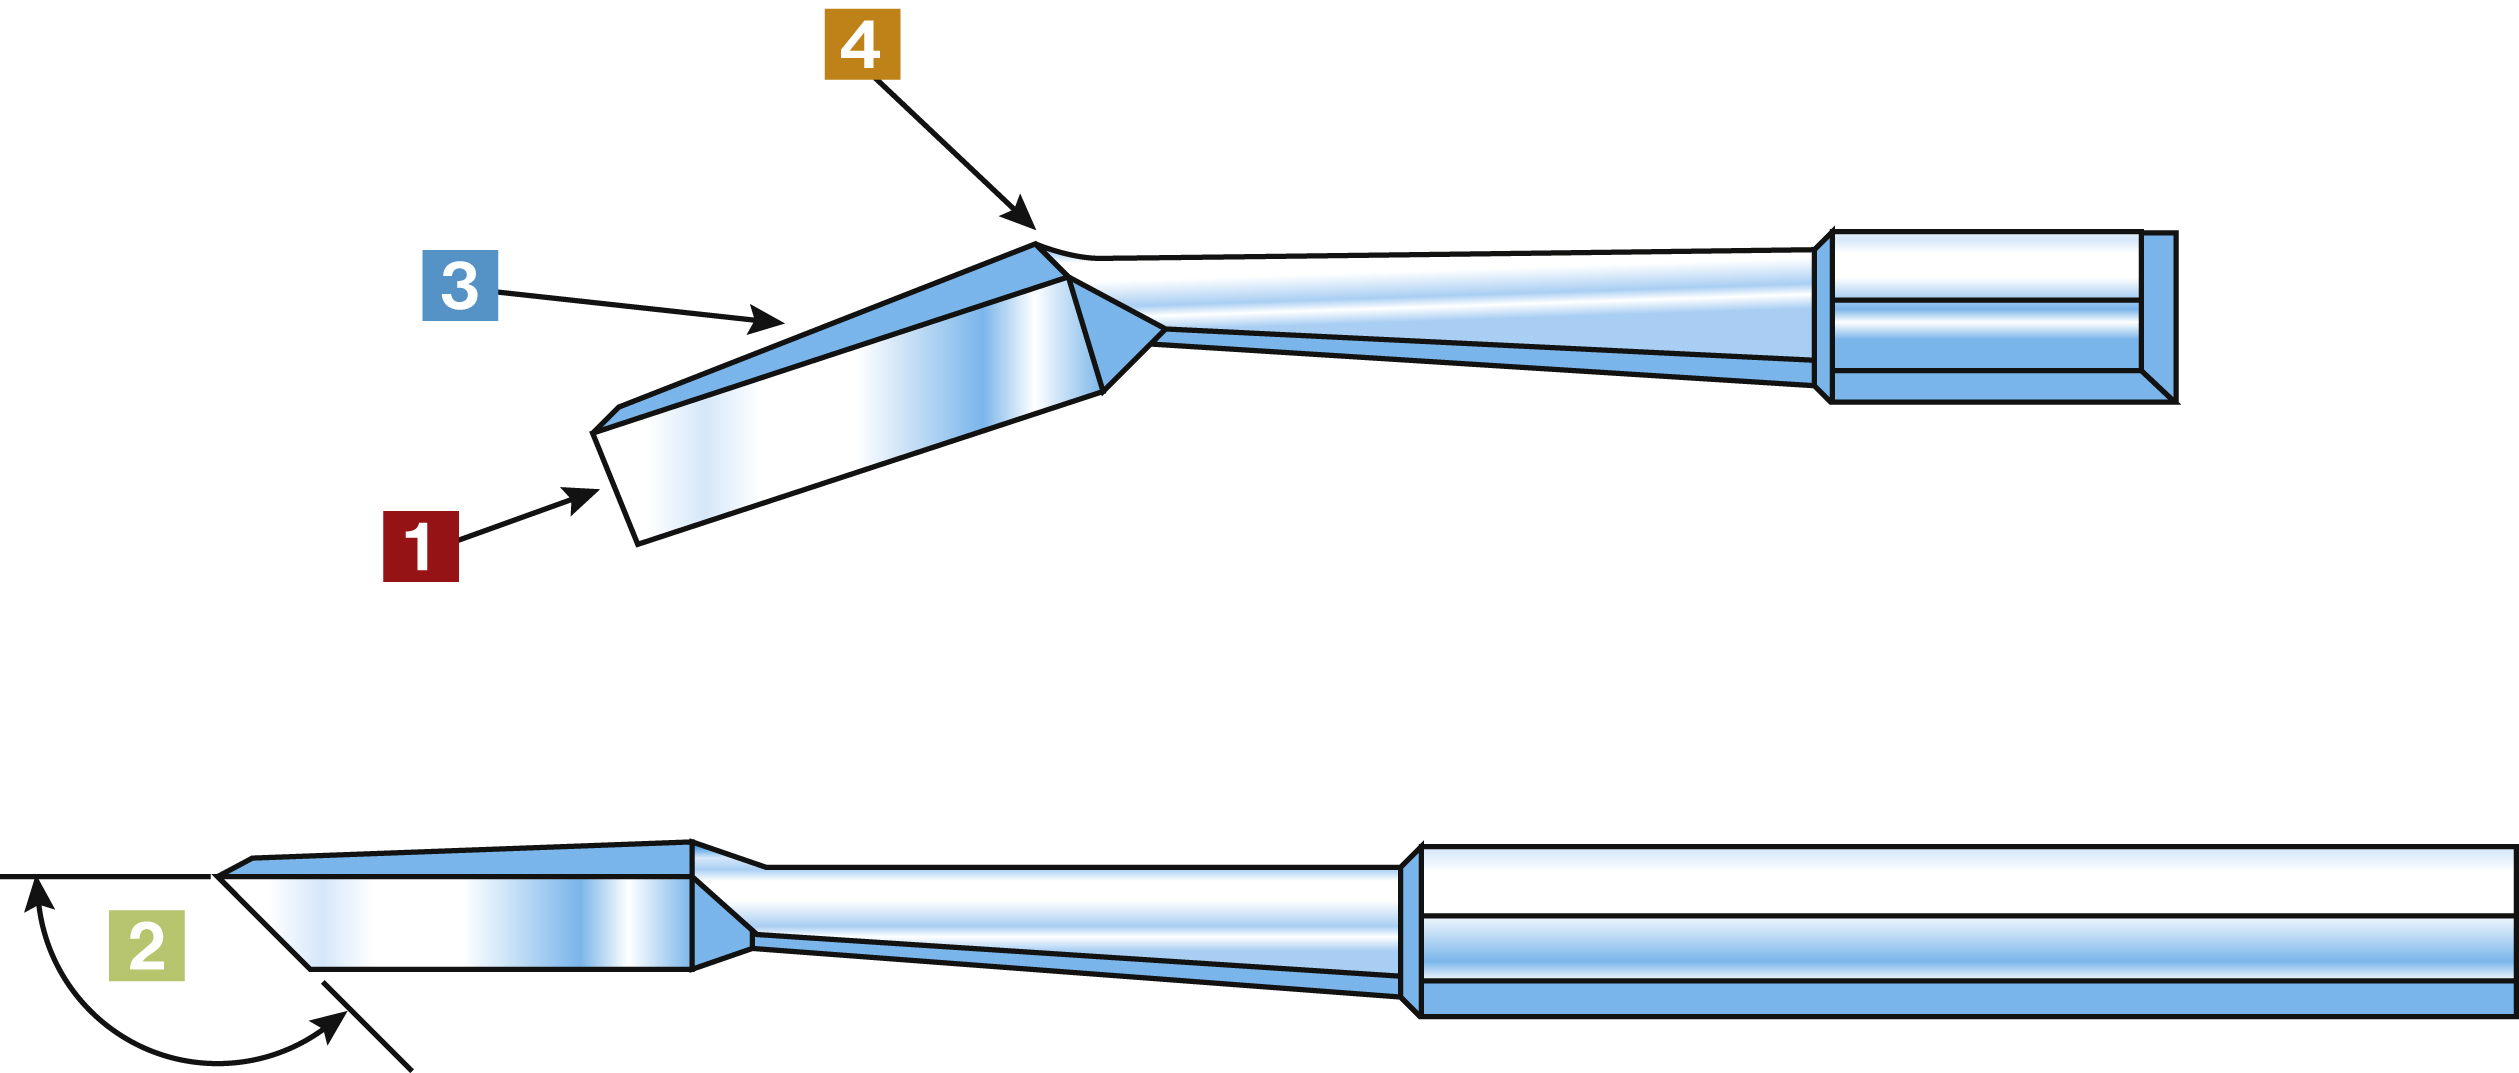
Three-Numbered Instrument∗
Instrument
Function
Numbers on handle indicate width, length, and angle of blade.
Indicates width of blade in tenths of millimetersExample
20 indicates a width of 2 mm
Indicates length of blade in millimetersExample
8 indicates a length of 8 mm
Indicates angle of blade from long axis of shaftExample
12 indicates an angle of 12 degrees
The designation for the instrument described above is 20-8-12; the number of instrument size is indicated on the handle.
Examples of three-numbered instruments
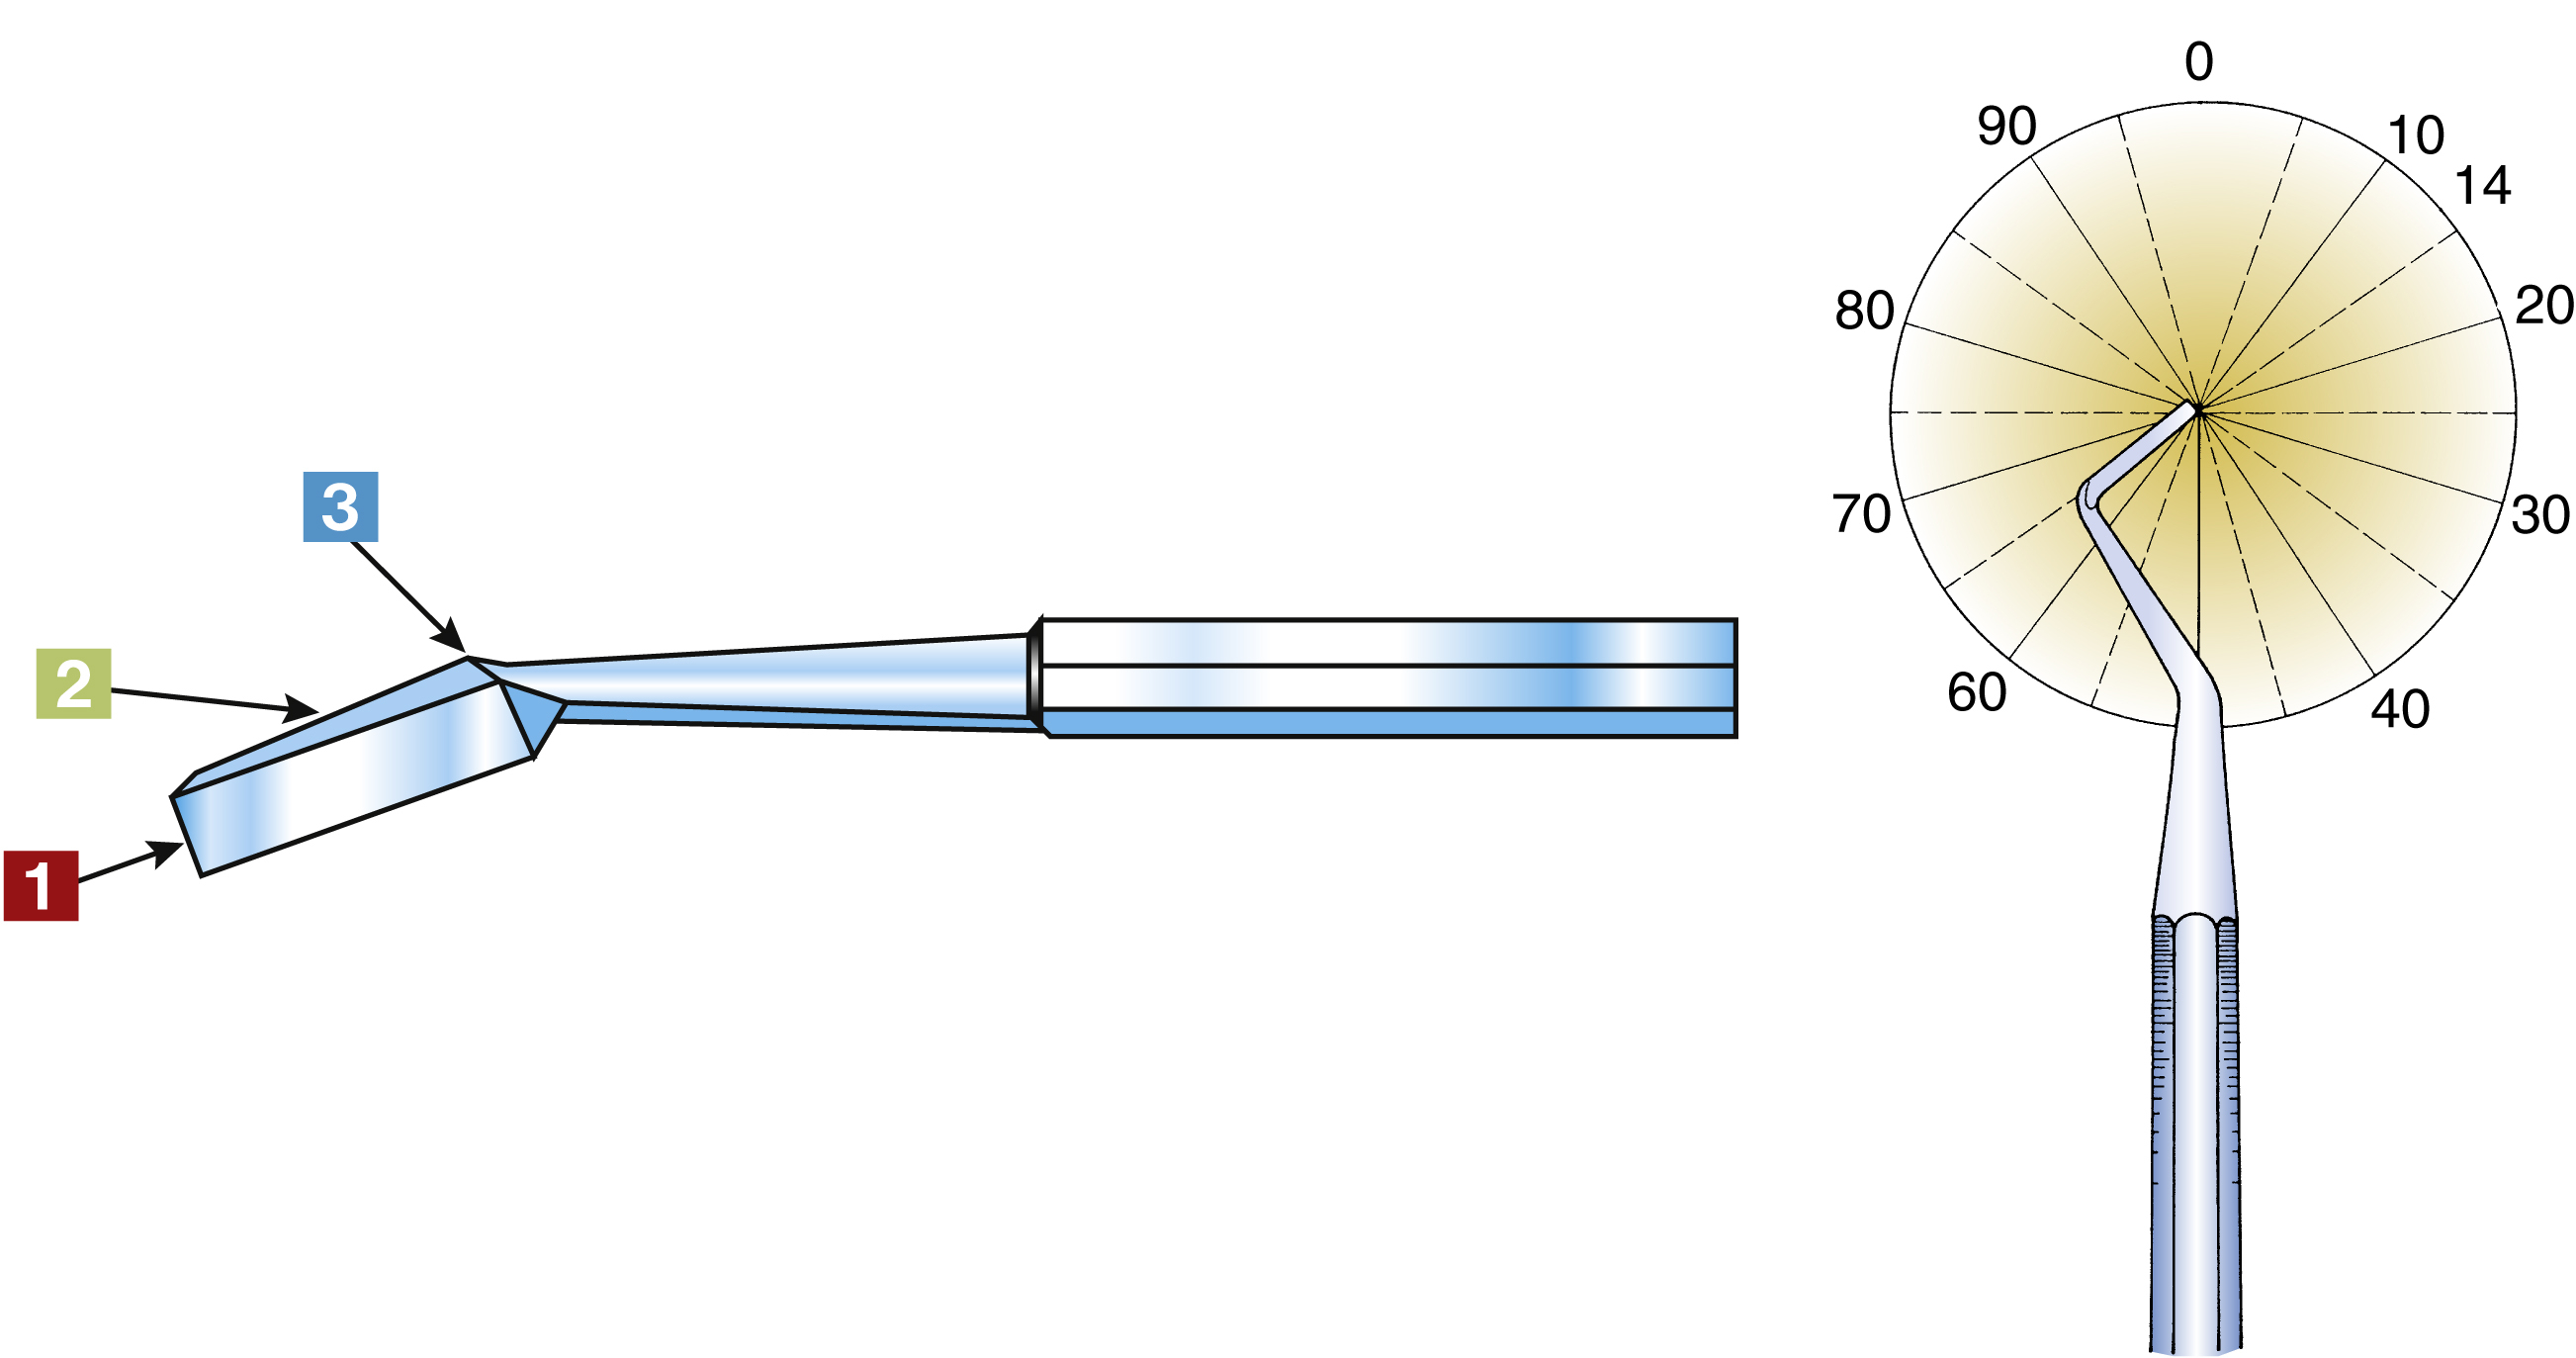
Four-Numbered Instrument∗
Instrument
Function
Numbers on handle indicate width of blade, angle of cutting edge, length of blade, and angle of blade.
Indicates width of blade in tenths of millimetersExample
20 indicates a width of 2 mm
Indicates angle of cutting edge of blade in relation to handleExample
95 indicates a cutting edge angle of 95 degrees
Indicates length of blade in millimetersExample
8 indicates a length of 8 mm
 Indicates angle of blade from long axis of shaft
Example
12 indicates a blade angle of 12 degrees
The designation for the instrument described above is 20-95-8-12; The number of instrument size is indicated on the handle.
Examples of four-numbered instruments
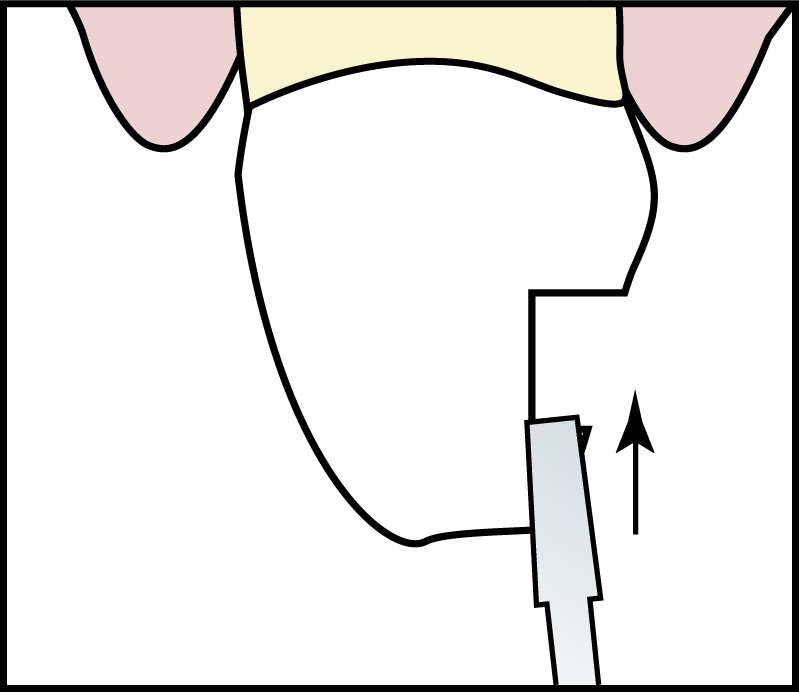
Enamel Hatchet
Instrument

Functions
To cut, clean, and smooth walls in cavity preparation
To remove enamel not supported by dentin
Characteristics
Used with push motion
Cutting edge on same plane as handle
Single or double ended
Is a three-numbered instrument
Examples of instrument numbers
20-9-14
15-8-14
15-8-12
Practice Notes
Enamel Hatchet is used on restorative tray setups.
Sterilization Notes
Enamel Hatchet must be precleaned, either, placed in a sterilizing pouch with an internal process indicator, sealed, then sterilized OR wrapped with an internal process indicator inside and secured on the outside with process indicator tape, then sterilized. Verify appropriate color change has been achieved in external process indicator immediately after removal from sterilizer then check internal process indicator before treatment. Refer to state regulations for any additional state requirements.
Enamel Hoe
Instrument

Function
To clean and smooth floor and walls in cavity preparation
Characteristics
Used with pulling motion
Cutting edge or blade nearly perpendicular to handle
Is a three-numbered instrument
Examples of instrument numbers
10-4-8
10-4-14
Practice Notes
Enamel Hoe is used on restorative tray setups.
Sterilization Notes
Enamel Hoe must be precleaned, either, placed in a sterilizing pouch with an internal process indicator, sealed, then sterilized OR wrapped with an internal process indicator inside and secured on the outside with process indicator tape, then sterilized. Verify appropriate color change has been achieved in external process indicator immediately after removal from sterilizer then check internal process indicator before treatment. Refer to state regulations for any additional state requirements.

Straight Chisel
Instrument

Function
To plane and cleave enamel in cavity preparation
Characteristics
Used with push motion
Single-bevel cutting edge
Single or double ended
Examples of instrument numbers
15
20
Practice Notes
Straight Chisel is used on restorative tray setups.
Sterilization Notes
Straight Chisel must be precleaned, either, placed in a sterilizing pouch with an internal process indicator, sealed, then sterilized OR wrapped with an internal process indicator inside and secured on the outside with process indicator tape, then sterilized. Verify appropriate color change has been achieved in external process indicator immediately after removal from sterilizer then check internal process indicator before treatment. Refer to state regulations for any additional state requirements.
Wedelstaedt Chisel
Instrument

Function
To plane and cleave enamel in cavity preparation
Characteristics
Used with push motion
Curved blade on working end
Single-bevel cutting edge
Single or double ended
Is a three-numbered instrument
Examples of instrument numbers
15-15-3
11.5-15-3
Practice Notes
Wedelstaedt Chisel is used on restorative tray setups.
Sterilization Notes
Wedelstaedt Chisel must be precleaned, either, placed in a sterilizing pouch with an internal process indicator, sealed, then sterilized OR wrapped with an internal process indicator inside and secured on the outside with process indicator tape, then sterilized. Verify appropriate color change has been achieved in external process indicator immediately after removal from sterilizer then check internal process indicator before treatment. Refer to state regulations for any additional state requirements.
Binangle Chisel
Instrument

Function
To plane and cleave enamel in cavity preparation
Characteristics
Used with push motion
Two angles in the shank
Single or double ended
Is an example of three-numbered instrument
Examples of instrument numbers
20-9-8
15-8-8
Practice Notes
Binangle Chisel is used on restorative tray setups.
Sterilization Notes
Binangle Chisel must be precleaned, either, placed in a sterilizing pouch with an internal process indicator, sealed, then sterilized OR wrapped with an internal process indicator inside and secured on the outside with process indicator tape, then sterilized. Verify appropriate color change has been achieved in external process indicator immediately after removal from sterilizer then check internal process indicator before treatment. Refer to state regulations for any additional state requirements.
Angle Former
Instrument
Function
To accentuate line and point angles in internal outline and retention in cavity preparation
Characteristics
Cutting edge at an angle
Single or double ended
Is a four-numbered instrument
Examples of instrument numbers
12-80-5-8
9-80-4-8
Practice Notes
Angle Former is used on restorative tray setups.
Sterilization Notes
Angle Former must be precleaned, either, placed in a sterilizing pouch with an internal process indicator, sealed, then sterilized OR wrapped with an internal process indicator inside and secured on the outside with process indicator tape, then sterilized. Verify appropriate color change has been achieved in external process indicator immediately after removal from sterilizer then check internal process indicator before treatment. Refer to state regulations for any additional state requirements.
Gingival Margin Trimmer—Mesial and Distal
Instrument

Function
To bevel cervical walls of mesial and distal retention areas
Characteristics
Mesial: To create bevels on the mesial cervical margin of the preparation Distal: To create bevels on the distal cervical margin of the preparationCurved blade
Cutting edge at angle to blade
Double ended (one end curves to the right; the other to the left)
Is a four-numbered instrument
Examples of instrument numbers
Mesial: 13-80-8-14 or 15-80-8-12
Distal: 13-95-8-14 or 15-95-8-12
Practice Notes
Gingival Margin Trimmer is used on restorative tray setups.
Gingival Margin Trimmer is placed on tray setups in pairs: mesial and distal.
Refer to the amalgam tray setup in Chapter 8.
Sterilization Notes
Gingival Margin Trimmer must be precleaned, either, placed in a sterilizing pouch with an internal process indicator, sealed, then sterilized OR wrapped with an internal process indicator inside and secured on the outside with process indicator tape, then sterilized. Verify appropriate color change has been achieved in external process indicator immediately after removal from sterilizer then check internal process indicator before treatment. Refer to state regulations for any additional state requirements.

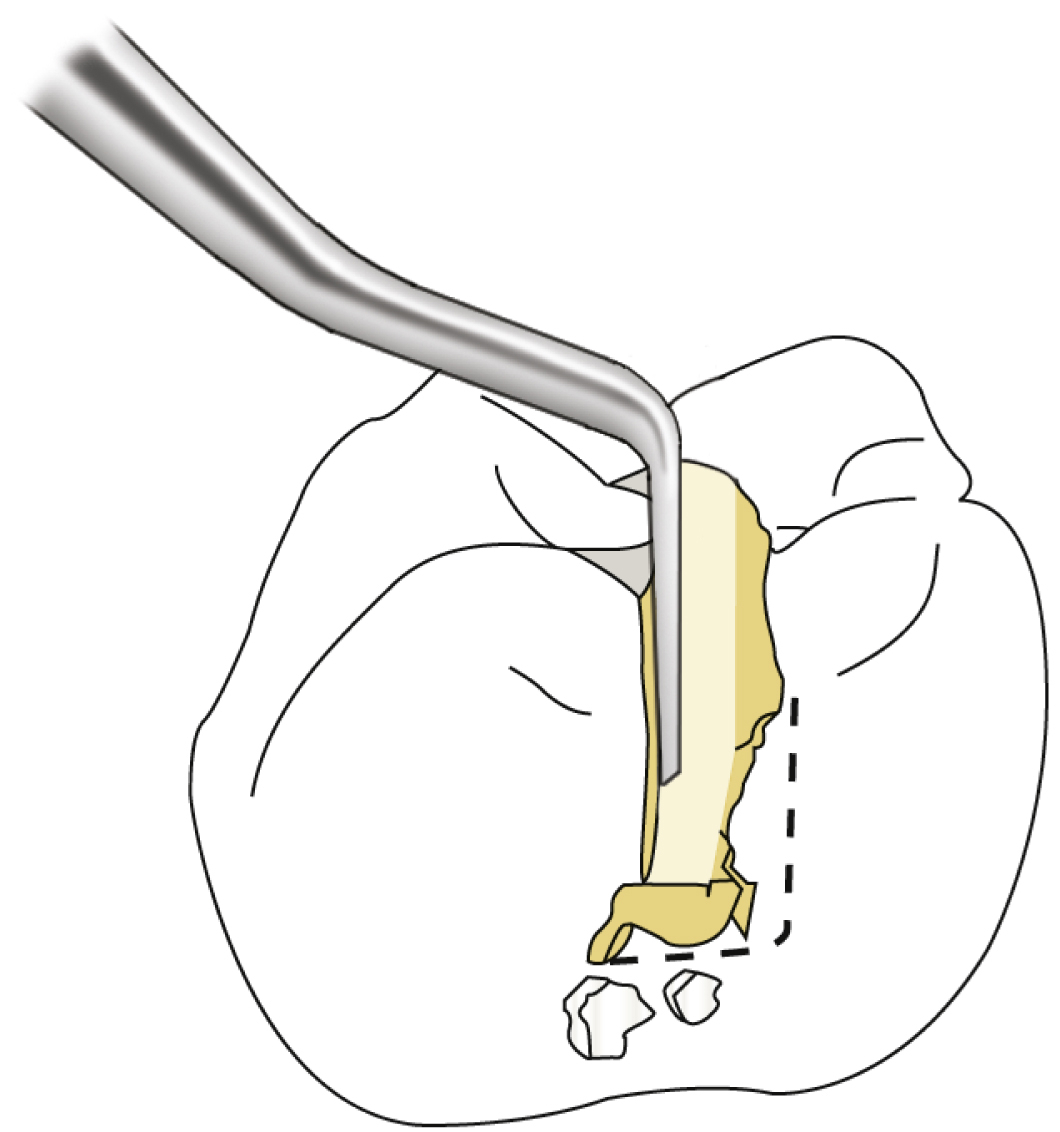
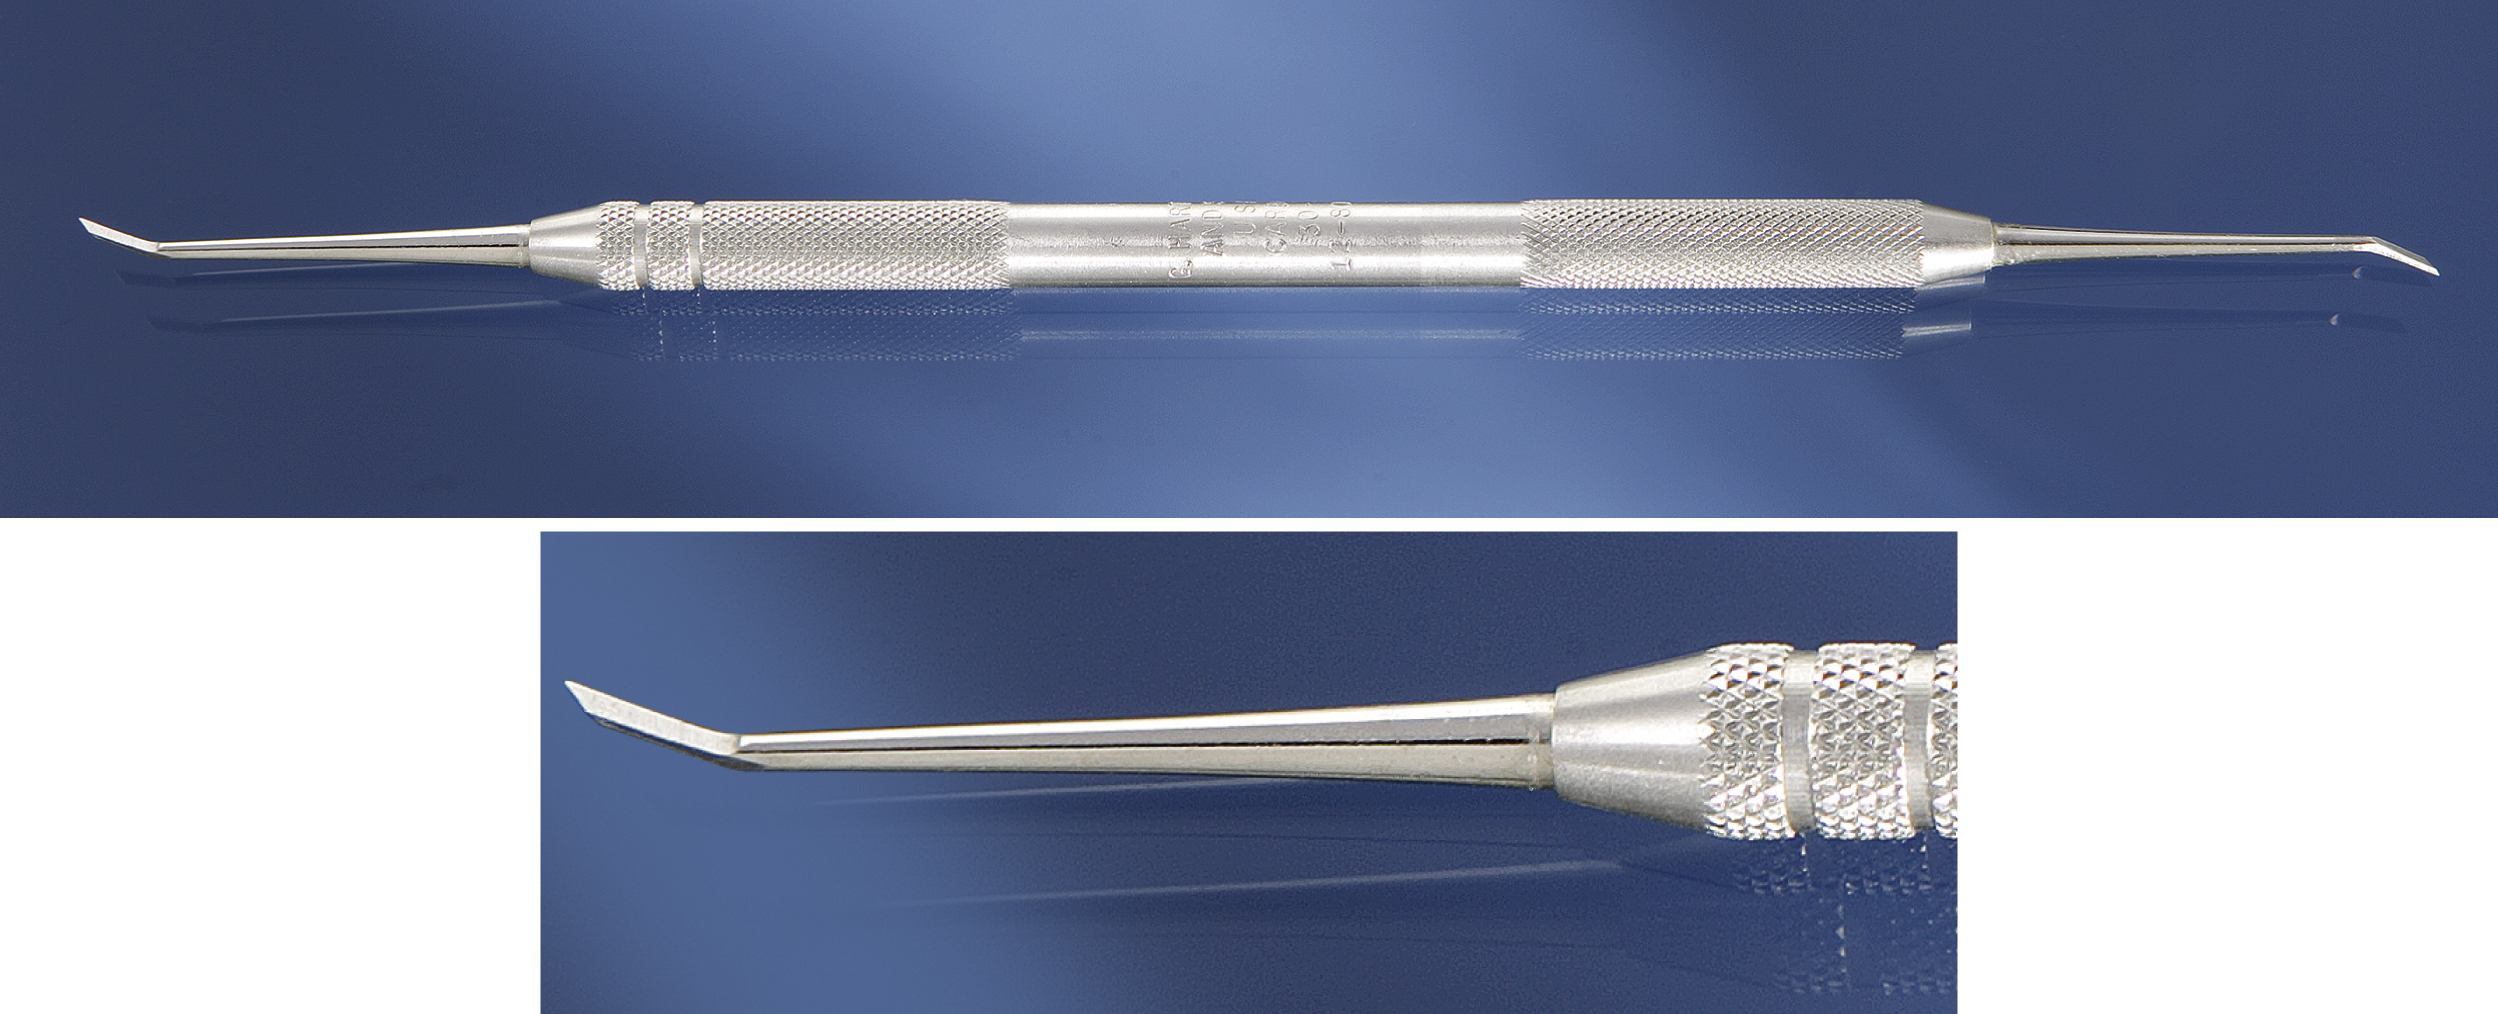
Spoon Excavators
Instrument

Function
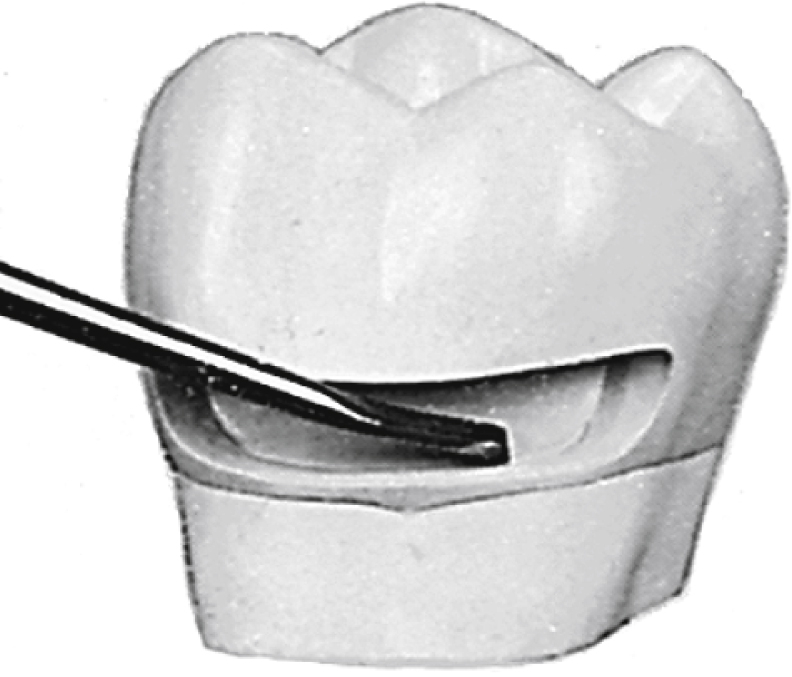
To remove carious dentin
Secondary functions:
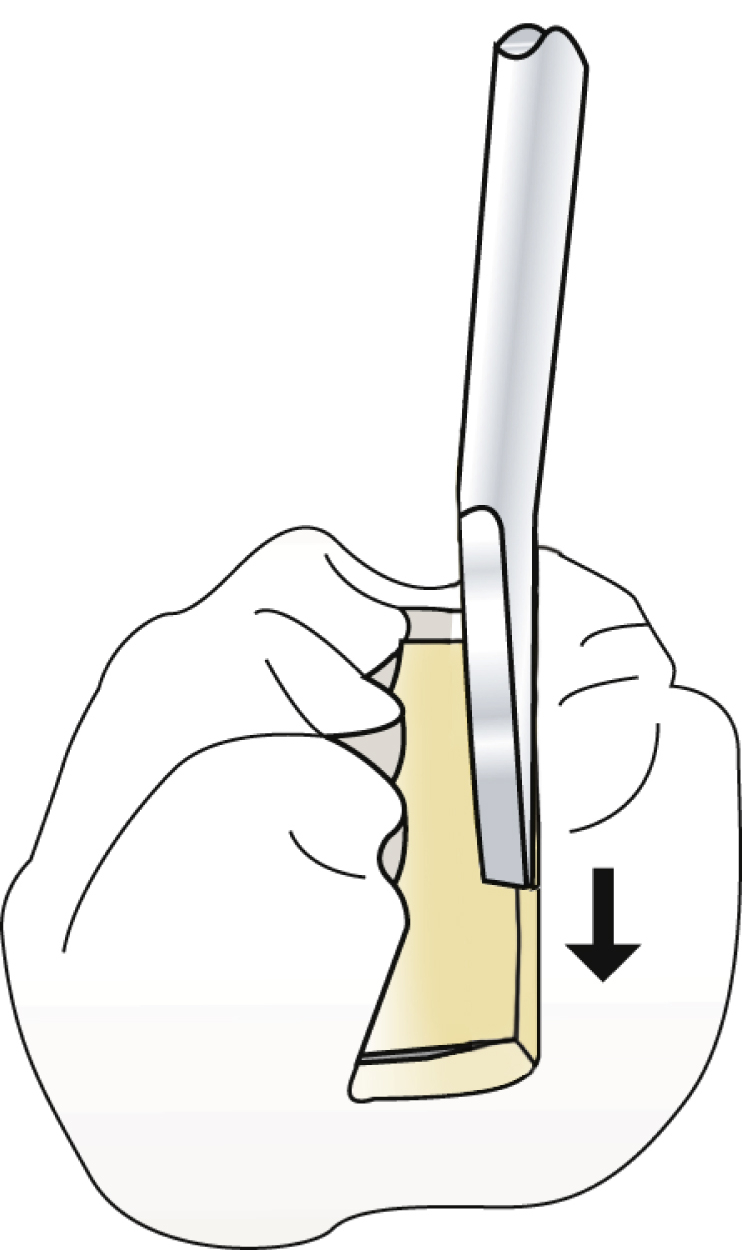
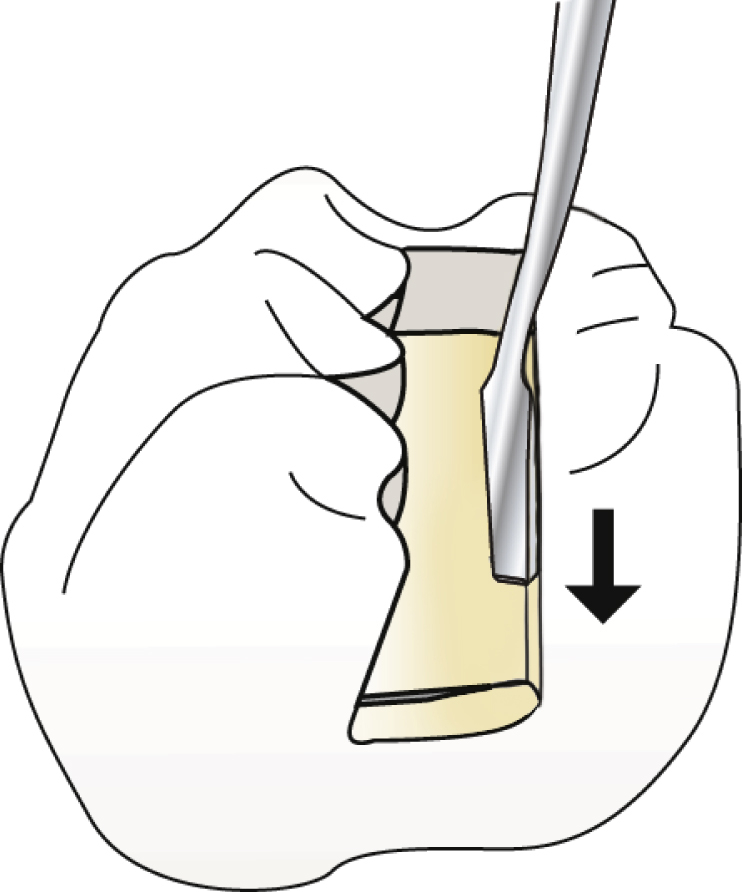
To remove temporary crowns
To remove temporary cement in temporary restoration
To remove permanent crown during try-in
Characteristics
Concave design, spoon-shaped with cutting edge
Range of sizes:
Large—Curved blade—also referred to as Black Spoon Small—Round bladeSingle or double ended
Practice Notes
Spoon Excavator is used on restorative tray setups.
Refer to the amalgam tray setup (see Chapter 8), composite tray setups (see Chapter 9), and crown and bridge restorative tray setups (see Chapter 10).
Sterilization Notes
Spoon Excavator must be precleaned, either, placed in a sterilizing pouch with an internal process indicator, sealed, then sterilized OR wrapped with an internal process indicator inside and secured on the outside with process indicator tape, then sterilized. Verify appropriate color change has been achieved in external process indicator immediately after removal from sterilizer then check internal process indicator before treatment. Refer to state regulations for any additional state requirements.
