Chapter 3 The ankle joint
Chapter 3 The ankle joint
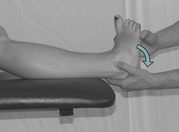
The patient is positioned in supine lying on the plinth, their knee is slightly flexed and their foot is in neutral – 0°.
The axis of the goniometer is placed 1.5 cm below the lateral malleolus of the fibula.
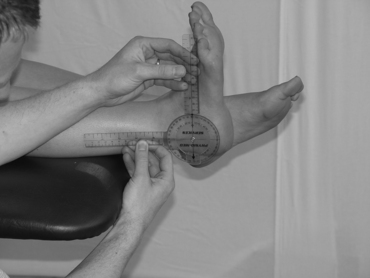
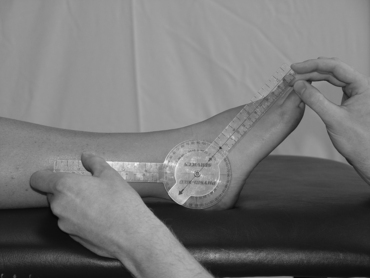
The patient is positioned in supine lying on the plinth, their knee is slightly flexed and their foot is in neutral – 0°.
The axis of the goniometer is placed 1.5 cm below the lateral malleolus of the fibula.
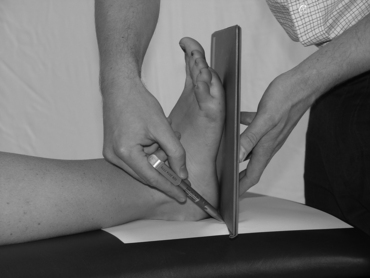
The patient is positioned in supine lying on the plinth; a roll is placed under the knee. The ankle is in neutral – 0°.
A piece of paper is placed under the foot, a book is placed against the sole of the foot, and a line is drawn parallel to the book.
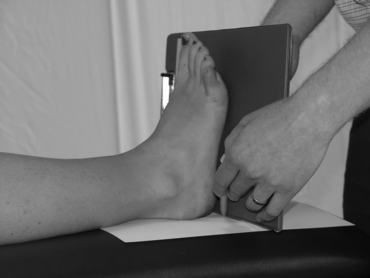
The patient is positioned in supine lying on the plinth; a roll is placed under the knee. The ankle is in neutral – 0°.
A piece of paper is placed under the foot, a book is placed against the sole of the foot, and a line is drawn parallel to the book.
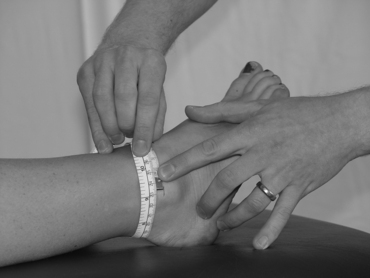
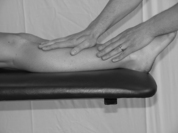
The ankle joint girth can be measured by taking a circumferential measurement with a tape measure around the ankle joint line.
The ankle joint line can be recognized by identifying three points around the ankle. Firstly, mark 1.5 cm above the medial malleolus of the tibia. Secondly, mark 2 cm above the lateral malleolus of the fibula.
Owing to the possibility of a different length or bony changes to the tips of either malleoli, a third point to aid in the triangulation of all the points is identified. The clinician runs their thumb down the anterior border of the tibia until they feel their thumb fall into the dip of the ankle, the anterior joint line.
To confirm this position the clinician can move the ankle joint through plantarflexion and dorsiflexion and feel the talus move against the thumb. This enables confirmation of the anterior joint line of the ankle.
The joint is encircled with a tape measure around the joint line. The circumferential measurement is then recorded.
Repeat the procedure three times and produce an average reading.
Repeat the procedure on the other limb to compare the joint girth.
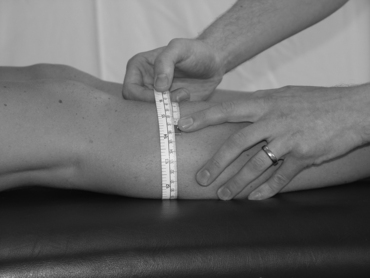
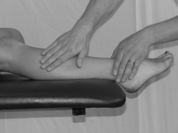
The patient is positioned in long sitting or half lying on the plinth, well supported. The knees are in passive extension so that the calf and thigh muscles are relaxed.
Mark two or three points – 5 cm (2 inches), 10 cm (4 inches) and 15 cm (6 inches) below the distal end of the tibial tuberosity. (If the patient is small in stature, the measure at 15 cm (6 inches) may not be necessary.)
The limb is encircled with a tape measure at each marked point. The circumferential measurements are then recorded. Repeat the procedure three times and produce an average reading. Repeat the procedure on the other limb to compare the measurements.
Muscle Strength: Oxford Muscle Grading
Patient’s position:
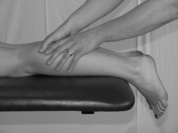
The patient is positioned in prone lying on the plinth, their feet resting over the end of the plinth.
Clinician’s position:
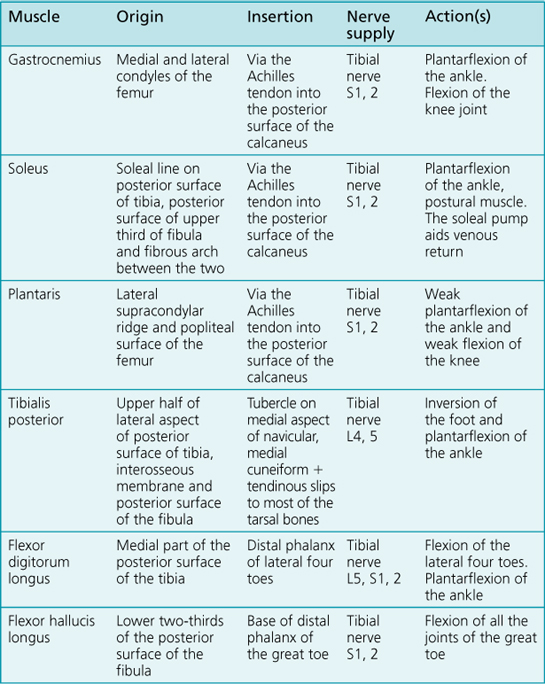
The clinician is standing at the foot of the plinth with both hands palpating the gastrocnemius muscle for a contraction.
Patient’s position:
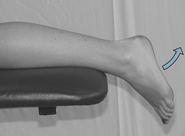
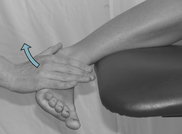
The patient is positioned in side lying on the plinth. Their foot is supported in full dorsiflexion.
Clinician’s position:
The clinician is standing by the patient, supporting the limb with one hand just below the knee and the other supporting the foot.
Patient’s position:
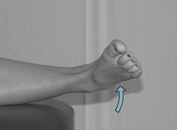
The patient is positioned in prone lying, with their feet over the end of the plinth. The foot is in full dorsiflexion.
Command to patient:
‘Move your foot upwards towards the ceiling as far as you can.’
The ankle has to move through its full range of movement – full dorsiflexion to full plantarflexion.
Patient’s position:
The patient is positioned in prone lying, with their feet over the end of the plinth. Their foot is in full dorsiflexion.
Clinician’s position:
The clinician is standing at the foot of the plinth, applying a minimal resistance to the patient’s foot.
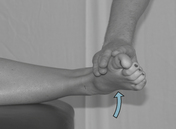
Patient’s position:
The patient is positioned in prone lying, with their feet over the end of the plinth (see Fig. 3.11).
Clinician’s position:
The clinician is standing at the foot of the plinth, applying a maximal resistance to the patient’s lower leg.
Command to patient:
‘Push your foot up as far as you can against the maximal resistance.’
The ankle has to move through its full range of movement – full dorsiflexion to full plantarflexion.
Clinical tip:
Use the length of lever arm principle to make sure you can apply a consistent resistance to the limb. Ask the patient to start slowly so they can appreciate the amount of resistance. Remember, the patient’s calf muscles may be stronger than your applied resistance; use a safe and mechanically advantageous position to enable you to perform this technique safely and effectively.
Patient’s position:
The patient is positioned in prone lying or long sitting on the plinth, their feet over the end of the plinth.
Clinician’s position:
The clinician is standing at the foot of the plinth, with both hands palpating the tibialis anterior muscle for a contraction
Command to patient:
‘Try and tighten the muscles on the front of your leg/pull your foot up towards you.’
Clinical tip:
Closely observing and feeling the muscle is essential in enabling the clinician to pick up on even the smallest flicker of a contraction.
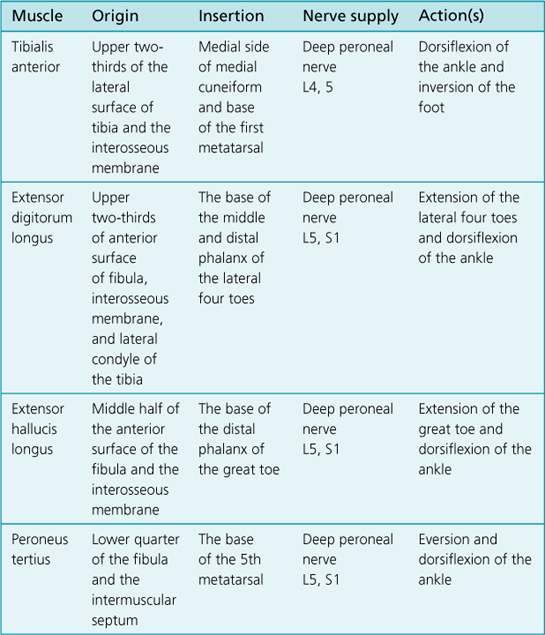
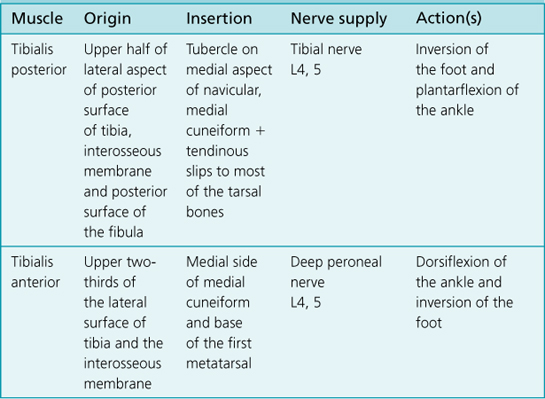
Tibialis anterior is a prominent muscle on the anterior aspect of the leg. The tendon is the most medial of the tendons at the front of the ankle joint.
Patient’s position:
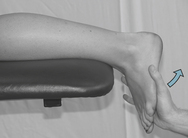
The patient is positioned in side lying on the plinth. The foot is supported in full plantarflexion.
Clinician’s position:
The clinician is standing by the patient, supporting the right limb with one hand under the knee area and the other supporting the foot.
Command to patient:
‘Try and pull your foot up as far as you can.’
The ankle has to move through its full range of movement – full plantarflexion to full dorsiflexion.
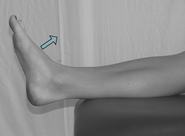
Patient’s position:
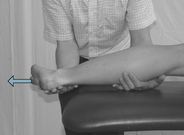
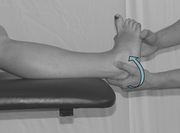
The patient is positioned in supine lying or long sitting on the plinth. Their foot is hanging over the end of the plinth in full plantarflexion.
Command to patient:
‘Pull your foot upwards as far as you can.’
The ankle has to move through its full range of movement – full plantarflexion to full dorsiflexion.
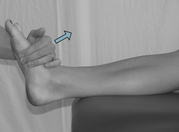
Patient’s position:
The patient is positioned in supine lying or long sitting on the plinth. Their foot is hanging over the end of the plinth in full plantarflexion.
Clinician’s position:
The clinician is standing at the foot of the plinth, applying a minimal resistance to the top of the patient’s foot.
Patient’s position:
The patient is positioned in supine lying or long sitting on the plinth. Their foot is hanging over the end of the plinth in full plantarflexion (see Fig. 3.15).
Clinician’s position:
The clinician is standing at the foot of the plinth, applying a maximal resistance to the patient’s lower leg.
Command to patient:
‘Push your foot up as far as you can against the maximal resistance.’
The ankle has to move through its full range of movement – full plantarflexion to full dorsiflexion.
Clinical tip:
Use the length of lever arm principle to make sure you can apply a consistent resistance to the limb. Ask the patient to start slowly so they can appreciate the amount of resistance. Remember, the patient’s anterior tibial muscles may be stronger than your applied resistance. You must use a safe and mechanically advantageous position to enable you to perform this technique safely and effectively.
Patient’s position:
The patient is positioned in long sitting on the plinth, with their foot over the end of the plinth.
Clinician’s position:
The clinician is standing at the foot of the plinth with both hands palpating the lateral aspect of the leg, over the peroneal muscles (peroneus longus and brevis).
Command to patient:
‘Try and turn your foot outwards (by using the muscles on the side of your leg).’
Clinical tip:
Closely observing and feeling the muscles is essential in enabling the clinician to pick up on even the smallest flicker of a contraction.
Peroneus longus and brevis can be felt to contract on the lateral side of the leg, below the head of the fibula. The tendons can be palpated as they pass behind the lateral malleolus of the fibula.
Patient’s position:
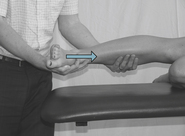
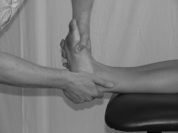
The patient is positioned in supine lying or long sitting on the plinth, their inverted foot over the end of the plinth.
Clinician’s position:
The clinician is standing at the foot of the plinth, supporting the calcaneus and the foot.
Command to patient:
‘Try and turn your foot outwards as far as you can.’
The ankle has to move through its full range of movement – full inversion to full eversion.
Clinical tip:
The leg and foot can be heavy, so the safe positioning of the clinician is an essential part of this measurement technique. This has to be balanced against being able to take the weight of the foot, but not actually assisting the patient’s efforts to evert the foot.
Patient’s position:
The patient is positioned in side lying on the plinth, their inverted foot over the end of the plinth.
Patient’s position:
The patient is positioned in side lying on the plinth, their inverted foot over the end of the plinth.
Patient’s position:
The patient is positioned in side lying on the plinth, their inverted foot over the end of the plinth (see Fig. 3.19).
Patient’s position:
The patient is positioned in long sitting on the plinth, their everted foot over the end of the plinth.
Clinician’s position:
The clinician is standing at the foot of the plinth with their hand palpating the tendon of tibialis posterior on the medial aspect of the ankle joint.
Command to patient:
‘Try and turn your foot inwards by using the muscles on the inside of your leg.’
Patient’s position:
The patient is positioned in supine lying or long sitting on the plinth, their everted foot over the end of the plinth.
Clinician’s position:
The clinician is standing at the foot of the plinth, supporting the calcaneus and the foot.
Command to patient:
‘Try and turn your foot inwards as far as you can.’
The ankle has to move through its full range of movement – full eversion to full inversion.
Clinical tip:
The foot can be heavy, so the safe positioning of the clinician is an essential part of this measurement technique. This has to be balanced against being able to take the weight of the foot, but not actually assisting the patient’s efforts to invert the foot.
Patient’s position:
The patient is positioned in side lying on the plinth, their everted foot over the end of the plinth.
Patient’s position:
The patient is positioned in side lying on the plinth, their everted foot over the end of the plinth.
Patient’s position:
The patient is positioned in side lying on the plinth, their everted foot over the end of the plinth (see Fig. 3.23).