Chapter 5 Key Taping Techniques
Most taping applications are variations on basic key taping strategies. The differences in taping techniques lie in the manner and application of each strip of tape and the type of taping material used. Each particular taping strategy has to meet the requirements and needs of the patient, remain within the rules of the sport, if relevant, take into account the type of joint and related structures to be taped, as well as the type and severity of the injury.
When tape is to be applied circumferentially around a limb it is usually applied from distal (lower) to proximal (upper) so as not to adversely affect blood flow. The veins have valves in them which stop the blood from flowing in the reverse direction and these valves could be damaged if blood is forced back into them by taping from proximal to distal. When taping circumferentially from proximal to distal (as in closing up) the tape must be applied lightly.
This short chapter will familiarize the reader with the most common elements of our taping strategies, including the functional descriptive names of individual strips of tape, their purpose and method of application.
The strips illustrated include:
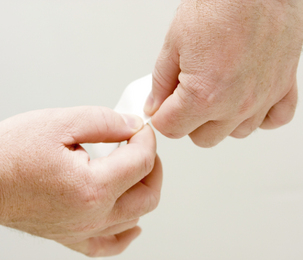
TAPE TEARING/RIPPING
Before attempting these strips it is worthwhile learning how to tear tape efficiently. Tape tearing is an acquired skill and not as easy as it sounds or looks when done by an experienced taper! The types of tape that are readily torn are non-elastic tape (zinc oxide) and cohesive bandage. The steps shown in Figures 5.1 and 5.2 will be useful in learning this practical skill.

PREPARATION OF PRACTICE STRIPS
To acquire taping skills, practice strips can be prepared. Because the precise applications of figure of eight and locking strips are tricky to learn, it is advisable to apply numerous practice strips to perfect the technique. Practice strips can be applied to the limb as though they were regular strips and the various complicated techniques can be practised without wasting tape. By experimenting with the ‘take-off’ angle and the degree of lateral shearing, the taper can learn to accommodate for the varieties of ankle shapes and thickness. It is important to be able to control the direction of the strip and thus adapt the final supporting result.


COMMONLY USED TAPE STRIPS
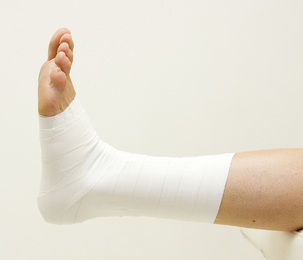
ANCHORS
Description:The first tape strip applied to each tape job. They may be non-elastic or elastic, depending on the expansion requirements of underlying structures.
Purpose:To form a base for subsequent supporting strips of tape.
Method:Place these strips around the circumference of the limb to be supported, above and below the injury. They must be placed directly on the skin (after appropriate preparation) and they must follow the natural anatomical contours for optimal adherence.
STIRRUPS
Description:A U-shaped loop of non-elastic tape.
Purpose:To directly support an injured ligament and to support (in this case) the sub-talar joint.
Method:Attaching one end to the anchor, place the tape so that a lateral and medial component lends stability. Pull the tape tighter on the injured side and attach firmly to the anchor.
 NOTE:
NOTE: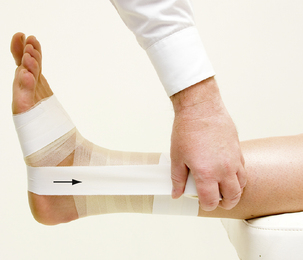
VERTICAL STRIPS
Description:Non-elastic tape strips applied under tension from one anchor to another.
Purpose:To limit mobility by drawing the distal segment of the injured structure towards the proximal.
Method:Affix one end of the vertical strip to the distal anchor. Apply tension to the tape over the injured structure and affix the tape strip to the proximal anchor. The structure should now be in a shortened position.
 NOTE:
NOTE: NOTE:
NOTE: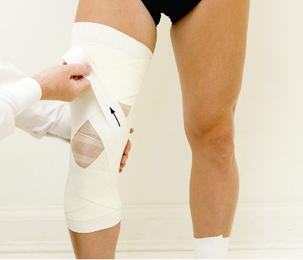
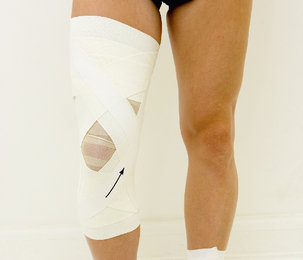
‘BUTTERFLY’ OR CHECK-REIN
Description:A combination of three or more vertical strips applied at angles of between 10 ° and 45 ° to each other, placed at the axis of rotation of the joint to be taped. These strips can be of either non-elastic or elastic tape depending on the injured structure and the goal of the taping.
Purpose:To restrict movement in more than a simple uniplanar direction, as so often found in normal motion. This ‘butterfly’ or check-rein can resist stresses with inherent torsion components as well as those that are purely unidirectional.
 NOTE:
NOTE: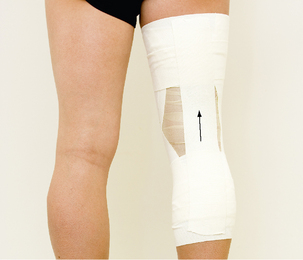
LOCKS
Description:A non-elastic tape strip attached firmly to the underlying tape reinforcing stabilization of the injured structure.
Purpose:To reinforce stability of the sub-talar joint and the talo-crural joint medially and laterally while allowing functional movements.
Method:Strong tension is applied at specific points in the application to reinforce the tape job, to ensure that selected ranges of motion are limited at end of range of motion to avoid overstressing of the injured structure.
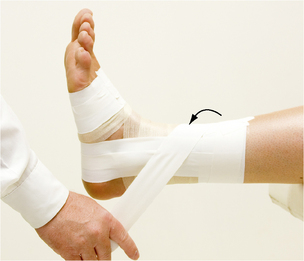
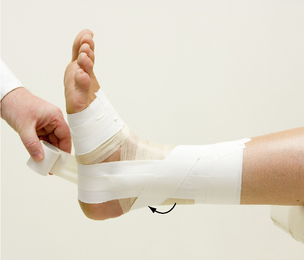
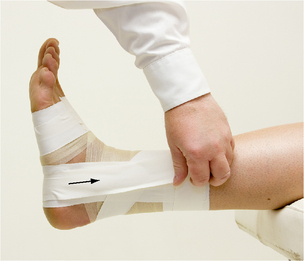
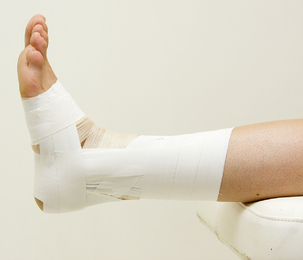
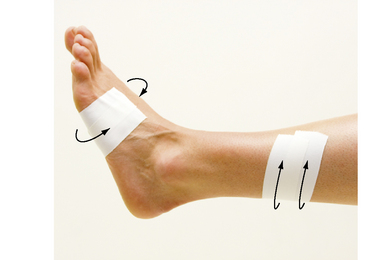
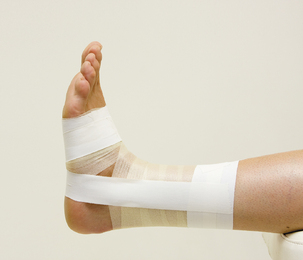
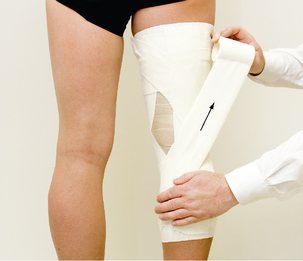
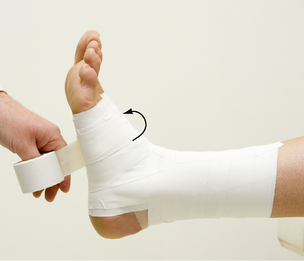
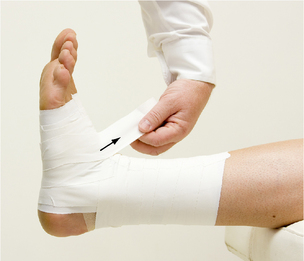
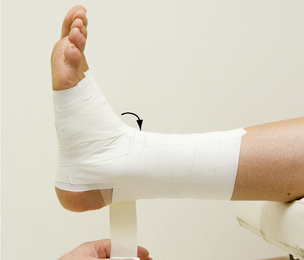
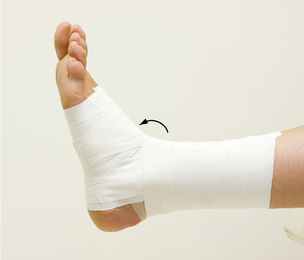
FIGURE OF EIGHT
Description:A strip of non-elastic tape forming a figure of eight; usually applied as one of the last strips in an ankle or thumb taping.
Purpose:To give added stability; to cover any remaining open areas and/or tape ends; to close the tape application neatly.
Method:Apply the tape by encircling one segment of the limb in one direction before crossing over to encircle the adjacent segment in the opposite direction, thus forming a figure of eight.
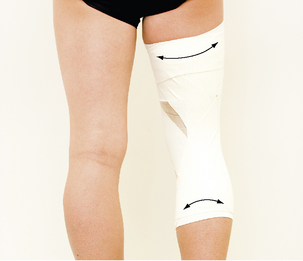
COMPRESSION STRIPS
Description:Elastic adhesive tape strips applied with localized compression over a muscle injury.
Purpose:To provide ample compression forces localized to the injured area without compromising circulation; limit swelling; decrease the chances of further damage to the injury site; allow continued activity.
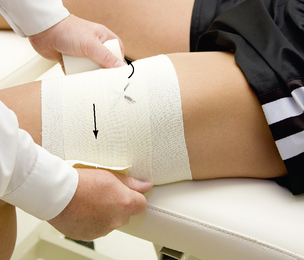
1. Apply one layer of elastic adhesive tape directly to the skin of the injury site (Comfeel™ may be applied as a barrier), with minimal tension, from distal to proximal.
2. Apply pressure strips by pulling the tape in opposite directions until fully stretched, and then apply firmly directly over the injury site, covering about 50% of the limb circumference. Maintain the pressure on the limb and gradually release the tape to ensure tension over the injury site. Continue around the limb without tension (to avoid a tourniquet effect) until the ends overlap.
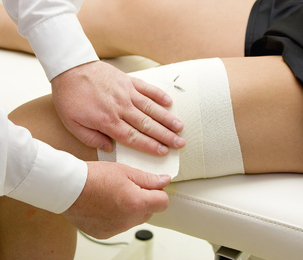
3. Repeat the compression strips, with each subsequent strip overlapping the previous one by half until the entire injured area (distal to proximal) is covered.
 NOTE:
NOTE: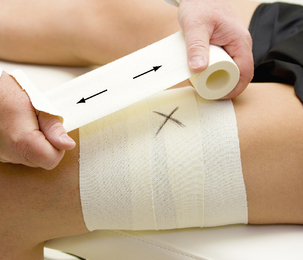
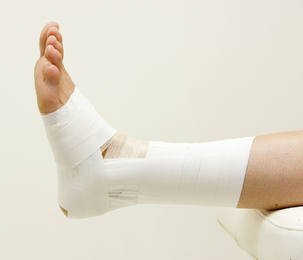
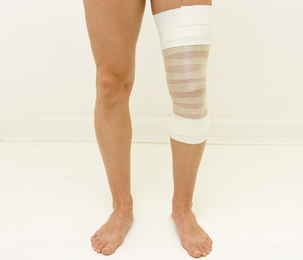
CLOSING-UP STRIPS
Description:Lightly placed strips of elastic or non-elastic tape, which cover any remaining open areas or tape ends, neatly finishing the taping job.
Purpose:To reduce the risk of skin blisters by covering all open areas. It also makes the tape job less likely to unravel during sporting activity.
Method:Lightly apply the strips of tape around the circumference of the limb, with one-third to one-half width of overlap.