Humerus and Shoulder Girdle
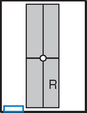
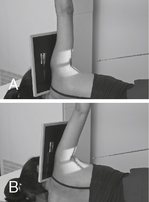
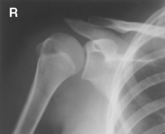
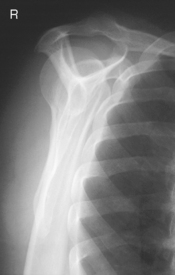
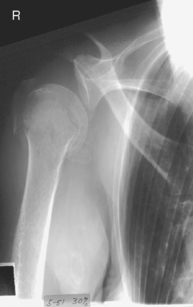
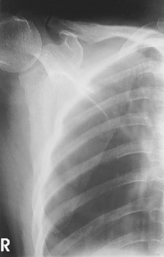
 AP external and internal rotation (R)
AP external and internal rotation critique
Inferosuperior axial (Lawrence method) (S)
PA transaxillary projection (Hobbs modification) (S)
PA transaxillary projection critique
Inferosuperior axial (Clements modification) (S)
Inferosuperior axial (Clements modification) critique
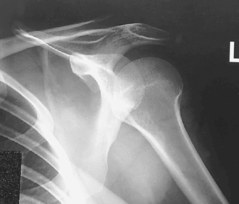
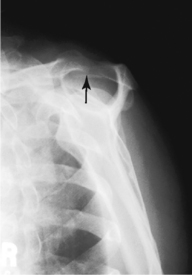
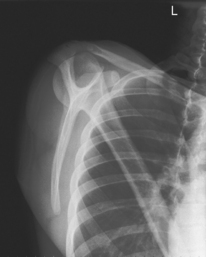
Posterior oblique (Grashey method) (S)
Posterior oblique (Grashey method) critique
Tangential projection—intertubercular (bicipital) groove (Fisk modification) (S)
Tangential projection intertubercular groove critique
Scapular Y lateral—anterior oblique position and Neer method (S)
Scapular Y lateral and Neer method critique
AP trauma projection (neutral rotation) (S)
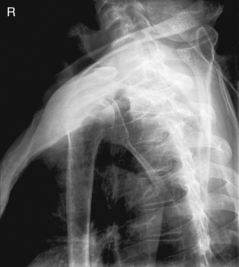
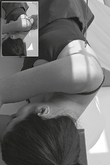
Transthoracic lateral (Lawrence method) (S)
Transthoracic lateral critique
Important for humerus and shoulder projections: Do not attempt to rotate upper limb if fracture or dislocation is suspected without special orders by a physician.
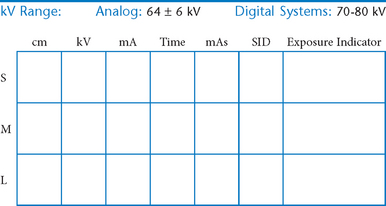
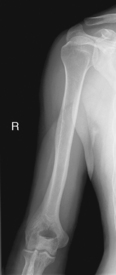
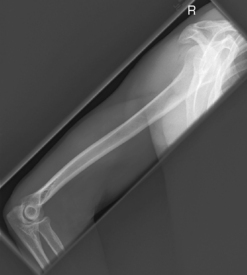
AP Humerus*
Rotational Lateral Humerus*
Position (May Be Taken Erect AP or PA, or Supine)
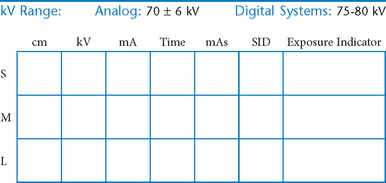
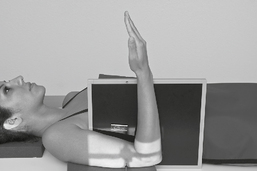
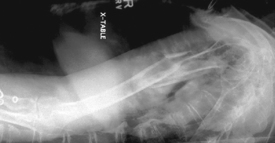
Trauma Lateral Humerus*
(Midhumerus and Distal Humerus)

For proximal humerus, see transthoracic lateral or scapular Y.


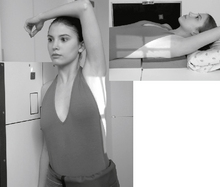
Transthoracic Lateral Proximal Humerus
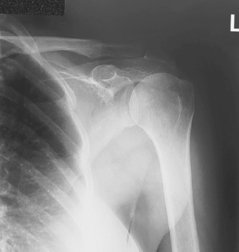
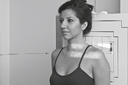
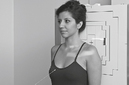
AP Shoulder*
(External and Internal Rotation)

Warning: Do not attempt if fracture or dislocation is suspected.

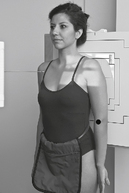
Position
• Erect (seated or standing) or supine, arm slightly abducted
• Rotate thorax as needed to place posterior shoulder against IR
External Rotation:
Rotate arm externally until hand is supinated and epicondyles are parallel to IR.
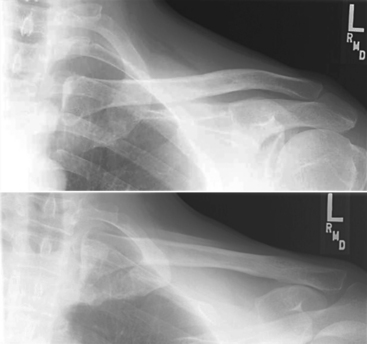
AP Shoulder—External and Internal Rotation
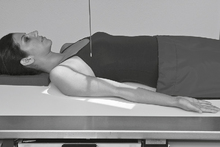
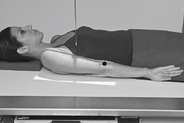
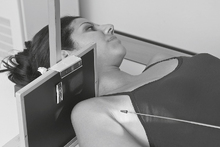
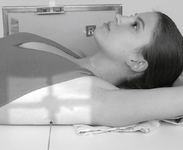
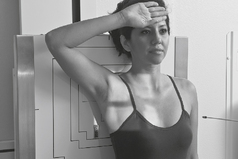
Inferosuperior Axial*

Warning: Do not attempt if fracture or dislocation is suspected.
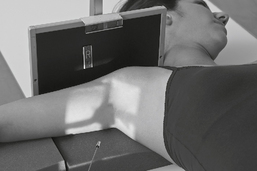
Position
• Patient supine, to front edge of table or stretcher, with support under shoulder to center anatomy to IR, head turned away from IR
Inferosuperior Axial
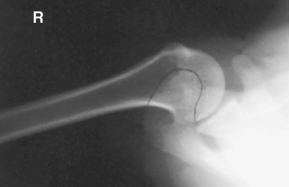


Inferosuperior Axial*

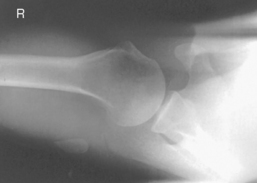
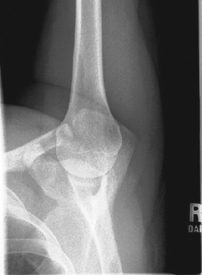
Posterior Oblique*

A special projection for visualizing glenoid cavity in profile with open joint space
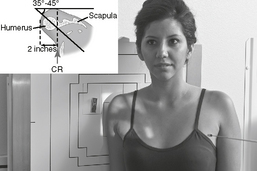

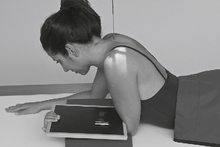

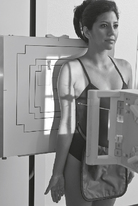
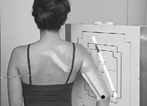
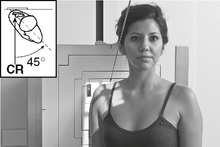
Scapular Y Lateral—Anterior Oblique Position and Neer Method*

Position
• Erect or recumbent (erect preferred)
• Rotate patient into a 45°–60° anterior oblique as for a lateral scapula (body of scapula perpendicular to IR).
• Unaffected arm up in front of patient, affected arm down (don’t move with possible fracture or dislocation)
Scapular Y Lateral—Anterior Oblique Position and Neer Method
AP Shoulder Trauma Projection*

• 24 × 30 cm C.W. (10 × 12″) (or lengthwise to show more of humerus if injury includes proximal half of humerus)

Lateral Shoulder Trauma Projection*
Transthoracic Lateral (Lawrence Method)


AP Apical Oblique Axial Shoulder*


AP and AP Axial Clavicle*


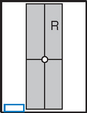
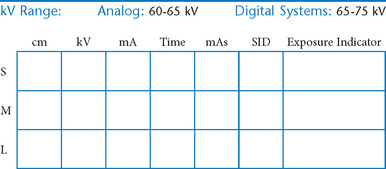
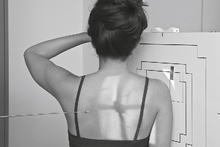
AP Scapula*

Position
• Erect or supine (erect preferred with pain in scapula area)
• Gently abduct arm 90° if possible, supinate hand (abduction results in less superimposition of scapula by ribs).

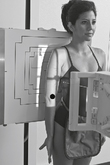
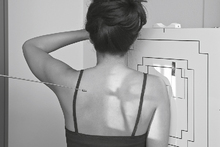
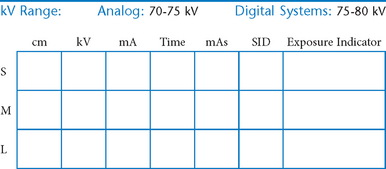
Lateral Scapula*


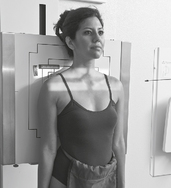
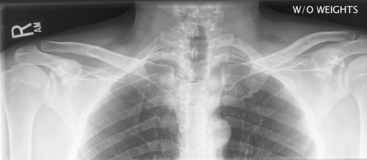
Acromioclavicular (AC) Joints*
(AP—Bilateral with and without Weights)
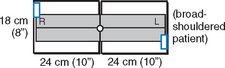
Warning: Rule out fracture first before taking “with weight” projection.
• 35 × 43 cm C.W. (14 × 17″) or (2) 18 × 24 cm (8 × 10″) for broad shoulders

*Bontrager Textbook, 8th ed, p. 183.
*Bontrager Textbook, 8th ed, p. 184.
*Bontrager Textbook, 8th ed, p. 185.
*Bontrager Textbook, 8th ed, p. 186.
*Bontrager Textbook, 8th ed, pp. 187 and 188.
*Bontrager Textbook, 8th ed, p. 189.
*Bontrager Textbook, 8th ed, p. 190.
*Bontrager Textbook, 8th ed, p. 191.
*Bontrager Textbook, 8th ed, p. 192.
*Bontrager Textbook, 8th ed, p. 193.
*Bontrager Textbook, 8th ed, pp. 196 and 197.
*Bontrager Textbook, 8th ed, p. 194.
*Bontrager Textbook, 8th ed, p. 195.
*Bontrager Textbook, 8th ed, p. 198.
*Bontrager Textbook, 8th ed, p. 199.
*AP lordotic position can be performed rather than angling CR for AP axial.
*Bontrager Textbook, 8th ed, p. 202.
*Bontrager Textbook, 8th ed, pp. 203 and 204.
*Bontrager Textbook, 8th ed, p. 200.