Appendix
Patient self-help exercises
These sheets are designed for photocopying for patient use
Patient self-help. PRT exercise
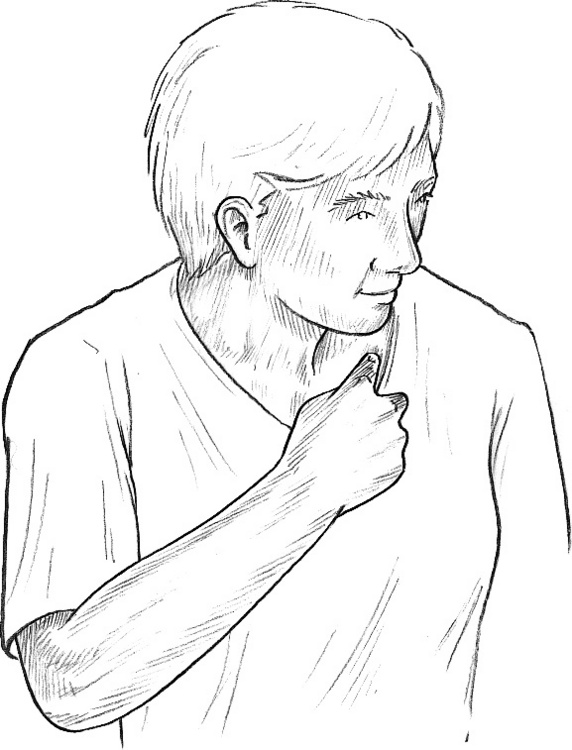
• Sit in a chair and, using a finger, search around in the muscles of the side of your neck, just behind your jaw, directly below your ear lobe about an inch. Most of us have painful muscles here. Find a place which is sensitive to pressure.
• Press just hard enough to hurt a little and grade this pain for yourself as a ‘10’ (where 0 = no pain at all). However, do not make it highly painful; the 10 is simply a score you assign.
• While still pressing the point bend your neck forward, very slowly, so that your chin moves toward your chest.
• Keep deciding what the ‘score’ is in the painful point.
• As soon as you feel it ease a little start turning your head a little toward the side of the pain, until the pain drops some more.
• By ‘fine tuning’ your head position, with a little turning, sidebending or bending forward some more, you should be able to get the score close to ‘0’ or at least to a ‘3’.
• When you find that position you have taken the pain point to its ‘position of ease’ and if you were to stay in that position (you don’t have to keep pressing the point) for up to a minute and a half, when you slowly return to sitting up straight the painful area should be less sensitive and the area will have been flushed with fresh oxygenated blood.
• If this were truly a painful area and not an ‘experimental’ one, the pain would ease over the next day or so and the local tissues would become more relaxed.
• You can do this to any pain point anywhere on the body, including a trigger point, which is a local area which is painful on pressure and which also refers a pain to an area some distance away or which radiates pain while being pressed. It may not cure the problem (sometimes it will) but it usually offers ease.
The rules for self-application of PRT are as follows.
• Locate a painful point and press just hard enough to score ‘10’.
• If the point is on the front of the body, bend forward to ease it and the further it is from the mid-line of your body, the more you should ease yourself toward that side (by slowly sidebending or rotating).
• If the point is on the back of the body ease slightly backward until the ‘score’ drops a little and then turn away from the side of the pain, and then ‘fine tune’ to achieve ease.
• Hold the ‘position of ease’ for not less than 30 seconds (up to 90 seconds) and very slowly return to the neutral starting position.
• Make sure that no pain is being produced elsewhere when you are fine tuning to find the position of ease.
• Do not treat more than five pain points on any one day as your body will need to adapt to these self-treatments.
• Expect improvement in function (ease of movement) fairly soon (minutes) after such self-treatment but reduction in pain may take a day or so and you may actually feel a little stiff or achy in the previously painful area the next day. This will soon pass.
• If intercostal muscle (between the ribs) tender points are being self-treated, in order to ease feelings of tightness or discomfort in the chest, breathing should be felt to be easier and less constricted after PRT self-treatment. Tender points to help release ribs are often found either very close to the sternum (breast bone) or between the ribs, either in line with the nipple (for the upper ribs) or in line with the front of the axilla (armpit) (for ribs lower than the 4th) (Fig. 7.1).
• If you follow these instructions carefully, creating no new pain when finding your positions of ease and not pressing too hard, you cannot harm yourself and might release tense, tight and painful muscles.
Patient self-help. MET neck relaxation exercise
Phase 1
• Sit close to a table with your elbows on the table and rest your hands on each side of your face.
• Turn your head as far as you can comfortably turn it in one direction, say to the right, letting your hands move with your face, until you reach your pain-free limit of rotation in that direction.
• Now use your left hand to resist as you try to turn your head back toward the left, using no more than a quarter of your strength and not allowing the head to actually move. Start the turn slowly, building up force which is matched by your resisting left hand, still using 25% or less of your strength.
• Hold this push, with no movement at all taking place, for about 7–10 seconds and then slowly stop trying to turn your head left.
• Now turn your head round to the right as far as is comfortable.
• You should find that you can turn a good deal further than the first time you tried, before the isometric contraction. You have been using MET to achieve what is called postisometric relaxation in tight muscles which were restricting you.
Phase 2
• Your head should be turned as far as is comfortable to the right and both your hands should still be on the sides of your face.
• Now use your right hand to resist your attempt to turn (using only 25% of strength again) even further to the right starting slowly, and maintaining the turn and the resistance for a full 7–10 seconds.
• If you feel any pain you may be using too much strength and should reduce the contraction effort to a level where no pain at all is experienced.
• When your effort slowly stops see if you can now go even further to the right than after your first two efforts. You have been using MET to achieve a different sort of release called reciprocal inhibition.
Patient self-help. Prevention: flexion exercise
Perform daily but not after a meal.
• Sit on the floor with both legs straight out in front of you, toes pointing toward the ceiling. Bend forward as far as is comfortable and grasp one leg with each hand.
• Hold this position for about 30 seconds – approximately four slow deep breathing cycles. You should be aware of a stretch on the back of the legs and the back. Be sure to let your head hang down and relax into the stretch. You should feel no actual pain and there should be no feeling of strain.
• As you release the fourth breath ease yourself a little further down the legs and grasp again. Stay here for a further half minute or so before slowly returning to an upright position, which may need to be assisted by a light supporting push upward by the hands.
• Bend one leg and place the sole of that foot against the inside of the other knee, with the bent knee lying as close to the floor as possible.
• Stretch forward down the straight leg and grasp it with both hands. Hold for 30 seconds as before (while breathing in a similar manner) and then, on an exhalation, stretch further down the leg and hold for a further 30 seconds (while continuing to breathe).
• Slowly return to an upright position and alter the legs so that the straight one is now bent; and the bent one straight. Perform the same sequence as described above.
• Perform the same sequence with which you started, with both legs out straight.
Patient self-help. Prevention: extension exercises – whole body
Excessive backward bending of the spine is not desirable and the ‘prevention’ exercises outlined are meant to be performed very gently, without any force or discomfort at all. For some people, the expression ‘no pain no gain’ is taken literally, but this is absolutely not the case where spinal mobilization exercises such as these are concerned. If any pain at all is felt then stop doing the exercise.
Repeat daily after flexion exercise.
• Lie on your side (either side will do) on a carpeted floor with a small cushion to support your head and neck. Your legs should be together, one on top of the other.
• Bend your knees as far as comfortably possible, bringing your heels toward your backside. Now slowly take your legs (still together and still with knees fully flexed) backward of your body as far as you can, without producing pain, so that your back is slightly arched. Your upper arm should rest along your side.
• Now take your head and shoulders backward to increase the backward bending of your spine. Again, this should be done slowly and without pain, although you should be aware of a stretching sensation along the front of your body and some ‘crowding’ in the middle of the back.
• Hold this position for approximately 4 full slow breaths and then hold your breath for about 15 seconds. As you release this try to ease first your legs and then your upper body into a little more backward bending. Hold this final position for about half a minute, breathing slowly and deeply all the while.
• Bring yourself back to a straight sidelying position before turning onto your back and resting. Then move into a seated position (still on the floor) for the rotation exercise.
Patient self-help. Prevention: rotation exercises – whole body
It is most important that when performing these exercises no force is used, just take yourself to what is best described as an ‘easy barrier’ and never as far as you can force yourself. The gains that are achieved by slowly pushing the barrier back, as you become more supple, arise over a period of weeks or even months, not days, and at first you may feel a little stiff and achy in newly stretched muscles, especially the day after first performing them. This will soon pass and does not require treatment of any sort.
Repeat daily following the flexion and extension exercises.
• Sit on a carpeted floor with legs outstretched.
• Cross your left leg over your right leg at the knees.
• Bring your right arm across your body and place your right hand over the uppermost leg and wedge it between your crossed knees, so locking the knees in position.
• Your left hand should be taken behind your trunk and placed on the floor about 12–15 cm behind your buttocks with your fingers pointing backwards. This twists your upper body to the left.
• Now turn your shoulders as far to the left as is comfortable, without pain. Then turn your head to look over your left shoulder, as far as possible, again making sure that no pain is being produced, just stretch.
• Stay in this position for five full, slow breaths after which, as you breathe out, turn your shoulders and your head a little further to the left, to their new ‘restriction barriers’.
• Stay in this final position for a further five full, slow breaths before gently unwinding yourself and repeating the whole exercise to the right, reversing all elements of the instructions (i.e cross right leg over left, place left hand between knees, turn to right, etc.).
Ideally, repeat the next exercise twice daily following the flexion and extension exercises and the previous rotation exercise.
• Lie face upward on a carpeted floor with a small pillow or book under your head.
• Flex your knees so that your feet, which should be together, are flat on the floor.
• Keep your shoulders in contact with the floor during the exercise. This is helped by having your arms out to the side slightly, palms upward.
• Carefully allow your knees to fall to the right as far as possible without pain - keeping your shoulders and your lower back in contact with the floor. You should feel a tolerable twisting sensation, but not a pain, in the muscles of the lower and middle parts of the back.
• Hold this position while you breathe deeply and slowly for about 30 seconds, as the weight of your legs ‘drags’ on the rest of your body, which is stationary, so stretching a number of back muscles.
• On an exhalation slowly bring your knees back to the mid-line and then repeat the process, in exactly the same manner, to the left side.
• Repeat the exercise to both right and left one more time, before straightening out and resting for a few seconds.
Patient self-help. Chair-based exercises for spinal flexibility
These chair-based exercises are intended to be used when back pain already exists or has recently been experienced. They should only be used if they produce no pain during their performance or if they offer significant relief from current symptoms. Use a chair with NO wheels.
Chair exercise to improve spinal flexion
• Sit in a straight chair so that your feet are about 20 cm apart.
• The palms of your hands should rest on your knees so that the fingers are facing each other.
• Lean forward so that the weight of your upper body is supported by the arms and allow the elbows to bend outward, as your head and chest come forward. Make sure that your head is hanging freely forward.
• Hold the position where you feel the first signs of a stretch in your lower back and breathe in and out slowly and deeply, two or three times.
• On an exhalation ease yourself further forward until you feel a slightly increased, but not painful, stretch in the back and repeat the breathing.
• After a few breaths, ease further forward. Repeat the breathing and keep repeating the pattern until you cannot go further without feeling discomfort.
• When, and if, you can fully bend in this position you should alter the exercise so that, sitting as described above, you are leaning forward, your head between your legs, with the backs of your hands resting on the floor.
• All other aspects of the exercise are the same, with you easing forward and down, bit by bit, staying in each new position for 3–4 breaths, before allowing a little more flexion to take place.
• Sit in an upright chair with your feet about 20 cm apart.
• Twist slightly to the right and bend forward as far as comfortably possible, so that your left arm hangs between your legs.
• Make sure your neck is free so that your head hangs down.
• You should feel stretching between the shoulders and in the low back.
• Stay in this position for about 30 seconds (four slow deep breaths).
• On an exhalation, ease your left hand toward your right foot a little more and stay in this position for a further 30 seconds.
• On an exhalation, stop the left hand stretch and now ease your right hand toward the floor, just to the right of your right foot, and hold this position for another 30 seconds.
• Slowly sit up again and turn a little to your left, bend forward so that this time your right arm hangs between your legs.
• Make sure your neck is free so that your head hangs down.
• Once again you should feel stretching between the shoulders and in the low back.
• Stay in this position for about 30 seconds and on an exhalation ease your right hand toward your left foot and stay in this position for another 30 seconds.
• On another exhalation stop this stretch with your right hand and begin to stretch your left hand to the floor, just to the left of your left foot, and hold this position for another 30 seconds.
• Sit up slowly and rest for a minute or so before resuming normal activities or doing the next exercise.
To encourage spinal mobility in all directions
• Sit in an upright (four-legged) chair and lean sideways so that your right hand grasps the back right leg of the chair.
• On an exhalation slowly slide your hand down the leg as far as is comfortable and hold this position, partly supporting yourself with your hand-hold.
• Stay in this position for two or three breaths before sitting up on an exhalation.
• Now ease yourself forward and grasp the front right chair leg with your right hand and repeat the exercise as described above.
• Follow this by holding on to the left front leg and finally the left back leg with your left hand and repeating all the elements as described.
• Make two or three ‘circuits’ of the chair in this way to slowly increase your range of movement.
Patient self-help. For abdominal muscle tone
For low back tightness and abdominal weakness
• Lie on your back on a carpeted floor, with a pillow under your head.
• Bend one knee and hip and hold the knee with both hands. Inhale deeply and as you exhale, draw that knee to the same side shoulder (not your chest), as far is comfortably possible. Repeat this twice more.
• Rest that leg on the floor and perform the same sequence with the other leg.
• Replace this on the floor and now bend both legs, at both the knee and hip, and clasp one knee with each hand.
• Hold the knees comfortably (shoulder width) apart and draw the knees toward your shoulders –not your chest. When you have reached a point where a slight stretch is felt in the low back, inhale deeply and hold the breath and the position for 10 seconds, before slowly releasing the breath and, as you do so, easing the knees a little closer toward your shoulders.
• Repeat the inhalation and held breath sequence, followed by the easing of the knees closer to the shoulders, a further four times (five times altogether).
• After the fifth stretch to the shoulders stay in the final position for about half a minute while breathing deeply and slowly.
• This exercise effectively stretches many of the lower and middle muscles of the back and this helps to restore tone to the abdominal muscles, which the back muscle tightness may have weakened.
For low back and pelvic muscles
• Lie on the floor on your back with a pillow under your head and with your legs straight.
• Keep your low back flat to the floor throughout the exercise.
• As you exhale, draw your right hip upward toward your shoulder - as though you are ‘shrugging’ it (the hip, not the shoulder) - while at the same time stretch your left foot (push the heel away, not the pointed toe) away from you, trying to make the leg longer while making certain that your back stays flat to the floor throughout.
• Hold this position for a few seconds before inhaling again and relaxing both efforts.
• Repeat in the same way on the other side, drawing the left leg (hip) up and stretching the right leg down.
• Repeat the sequence five times altogether on each side.
• This exercise stretches and tones the muscles just above the pelvis and is very useful following a period of inactivity due to back problems.
For abdominal muscles and pelvis
• Lie on your back on a carpeted floor, no pillow, knees bent, arms folded over abdomen.
• Inhale and hold your breath, while at the same time pulling your abdomen in (‘as though you are trying to staple your navel to your spine’).
• Tilt the pelvis by flattening your back to the floor.
• Squeeze your buttocks tightly together and at the same time, lift your hips toward the ceiling a little.
• Hold this combined contraction for a slow count of five before exhaling and relaxing onto the floor for a further cycle of breathing.
To tone upper abdominal muscles
• Lie on the floor with knees bent and arms folded across your chest.
• Push your low back toward the floor and tighten your buttock muscles and as you inhale, raise your head, neck and, if possible, your shoulders from the floor - even if it is only a small amount.
• Hold this for 5 seconds and, as you exhale, relax all tight muscles and lie on the floor for a full cycle of relaxed breathing before repeating.
• Do this up to 10 times to strengthen the upper abdominal muscles.
• When you can do this easily add a variation in which, as you lift yourself from the floor, you ease your right elbow toward your left knee. Hold as above and then relax.
• The next lift should take the left elbow toward the right knee.
• This strengthens the oblique abdominal muscles. Do up to 10 cycles of this exercise daily.
To tone lower abdominal muscles
• Lie on the floor with knees bent and arms lying alongside the body.
• Tighten the lower abdominal muscle to curl your pubic bone (groin area) toward your navel. Avoid tightening your buttock muscles.
• Keep your shoulders, spine and (at this point) pelvis on the floor by just tightening the lower abdominal muscles but without actually raising the pelvis. Breathe in as you tighten.
• Continue breathing in as you hold the contraction for 5 seconds and, as you exhale, slowly relax all tight muscles.
• Do this up to 10 times to strengthen the lower abdominal muscles.
• When you can do this easily, add a variation in which the pelvis curls toward the navel and the buttocks lift from the floor in a slow curling manner. Be sure to use the lower abdominal muscles to create this movement and do not press up with the legs or contract the buttocks instead.
• When this movement is comfortable and easy to do, the procedure can be altered so that (while inhaling) the pelvis curls up to a slow count of 4–5, then is held in a contraction for a slow count of 4–5 while the inhale is held, then slowly uncurled to a slow count of 4–5 while exhaling. This can be repeated 10 times or more to strengthen lower abdominals and buttocks.
‘Dead-bug’ abdominal stabilizer exercise
• Lie on your back and hollow your abdomen by drawing your navel toward your spine.
• When you can hold this position, abdomen drawn in, spine toward the floor, and can keep breathing at the same time, raise both arms into the air and, if possible, also raise your legs into the air (knees can be bent), so that you resemble a ‘dead bug’ lying on its back.
• Hold this for 10–15 seconds and slowly lower your limbs to the floor and relax.
• This tones and increases stamina in the transverse muscles of the abdomen which help to stabilize the spine. Repeat daily at the end of other abdominal exercises.
Releasing exercise for the low back muscles (‘cat and camel’)
• Warm up the low back muscles first by getting on to all fours, supported by your knees (directly under hips) and hands (directly under shoulders).
• Slowly arch your back toward the ceiling (like a camel), with your head hanging down, and then slowly let your back arch downward, so that it hollows as your head tilts up and back (like a cat).
‘Superman’ pose to give stamina to back and abdominal muscles
• First do the ‘cat and camel’ exercise and then, still on all fours, make your back as straight as possible, with no arch to your neck.
• Raise one leg behind you, knee straight, until the leg is in line with the rest of your body.
• Try to keep your stomach muscles in and back muscles tight throughout and keep your neck level with the rest of the back, so that you are looking at the floor.
• Hold this pose for a few seconds, then lower the leg again, repeating the raising and lowering a few times more.
• When, after a week or so of doing this daily, you can repeat the leg raise 10 times (either leg at first, but each leg eventually), raise one leg as before and also raise the opposite arm and stretch this out straight ahead of you (‘superman’ pose) and hold this for a few seconds.
• If you feel discomfort, stop the pose and repeat the ‘cat and camel’ a few times to stretch the muscles.
• Eventually, by repetition, you should build up enough stamina to hold the pose, with either left leg/right arm or right leg/left arm, and eventually both combinations, for 10 seconds each without strain and your back and abdominal muscles will be able to more efficiently provide automatic support for the spine.
Patient self-help. Brügger relief position
Brügger (1960) devised a simple postural exercise known as the ‘relief position’ which achieves a reduction of the slumped, rounded back (kyphotic) posture which often results from poor sitting and so eases the stresses which contribute to neck and back pain (see also Box 4.4, p. 118, where this exercise is illustrated).
• Perch on the edge of a chair.
• Place your feet directly below the knees and then separate them slightly and turn them slightly outward, comfortably.
• Roll the pelvis slightly forward to lightly arch the low back
• Ease the sternum forward and upward slightly.
• With your arms hanging at your sides, rotate the arms outward so that the palms face forward.
• Separate the fingers so that the thumbs face backward slightly.
• Remain in this posture as you breathe slowly and deeply into the abdomen, then exhale fully and slowly.
• Repeat the breathing 3–4 times.
• Repeat the process several times each hour if you are sedentary.
Patient self-help. Cold (‘warming’) compress
This is a simple but effective method involving a piece of cold, wet cotton material well wrung out in cold water and then applied to a painful or inflamed area after which it is immediately covered (usually with something woolen) in a way that insulates it. This allows your body heat to warm the cold material. Plastic can be used to prevent the damp from spreading and to insulate the material. The effect is for a reflex stimulus to take place when the cold material first touches the skin, leading to a flushing away of congested blood followed by a return of fresh blood. As the compress slowly warms there is a relaxing effect and a reduction of pain.
This is an ideal method for self-treatment or first aid for any of the following:
• sore throat (compress on the throat from ear to ear and supported over the top of the head)
• backache (ideally the compress should cover the abdomen and the back)
Materials
• A single or double piece of cotton sheeting large enough to cover the area to be treated (double for people with good circulation and vitality, single thickness for people with only moderate circulation and vitality)
• One thickness of woolen or flannel material (toweling will do but is not as effective) larger than the cotton material so that it can cover it completely with no edges protruding
Method
Wring out the cotton material in cold water so that it is damp but not dripping wet. Place this over the painful area and immediately cover it with the woolen or flannel material, and also the plastic material if used, and pin the covering snugly in place. The compress should be firm enough to ensure that no air can get in to cool it but not so tight as to impede circulation. The cold material should rapidly warm and feel comfortable and after few hours it should be dry.
Wash the material before reusing it as it will absorb acid wastes from the body.
Use a compress up to four times daily for at least an hour each time if it is found to be helpful for any of the conditions listed above. Ideally, leave it on overnight.
Patient self-help. Neutral (body heat) bath
Placing yourself in a neutral bath in which your body temperature is the same as that of the water is a profoundly relaxing experience. A neutral bath is useful in all cases of anxiety, for feelings of being ‘stressed’ and for relief of chronic pain.
Method
• Run a bath as full as possible and with the water close to 97°F (36.1°C). The bath has its effect by being as close to body temperature as you can achieve.
• Get into the bath so that the water covers your shoulders and support the back of your head on a towel or sponge.
• A bath thermometer should be in the bath so that you can ensure that the temperature does not drop below 92°F (33.3°C). The water can be topped up periodically, but should not exceed the recommended 97°F (36.1°C).
• The duration of the bath should be anything from 30 minutes to an hour; the longer the better for maximum relaxation.
• After the bath, pat yourself dry quickly and get into bed for at least an hour.
Because of the large amount of heat it needs to absorb as it turns from solid back to liquid, ice can dramatically reduce inflammation and reduce the pain it causes. Ice packs can be used for all sprains and recent injuries and joint swellings (unless pain is aggravated by it). Avoid using ice on the abdomen if there is an acute bladder infection or over the chest if there is asthma and stop its use if cold aggravates the condition.
Method
• Place crushed ice into a towel to a thickness of at least an inch, fold the towel and safety pin it together. To avoid dripping, the ice can also be placed in a plastic ‘zip-close’ bag before applying the towel.
• Place a wool or flannel material over the area to be treated and put the ice pack onto this.
• Cover the ice pack with plastic to hold in any melting water and bandage, tape or safety pin everything in place.
• Leave this on for about 20 minutes and repeat after an hour if helpful.
• Protect surrounding clothing or bedding from melting water.
Patient self-help. Constitutional hydrotherapy (CH)
CH has a non-specific ‘balancing’ effect, inducing relaxation, reducing chronic pain and promoting healing when it is used daily for some weeks.
Note: Help is required to apply CH
Materials
• A full-sized sheet folded in half or two single sheets
• Two blankets (wool if possible)
• Three bath towels (when folded in half each should be able to reach side to side and from shoulders to hips)
• One hand towel (each should, as a single layer, be the same size as the large towel folded in half)
Method
• Undress and lie face up between the sheets and under the blanket.
• Place two hot folded bath towels (four layers) to cover the trunk, shoulders to hips (towels should be damp, not wet).
• Cover with a sheet and blanket and leave for 5 minutes.
• Return with a single layer (small) hot towel and a single layer cold towel.
• Place ‘new’ hot towel onto top of four layers ‘old’ hot towels and ‘flip’ so that hot towel is on skin and remove old towels. Immediately place cold towel onto new hot towel and flip again so that cold is on the skin, remove single hot towel.
• Cover with a sheet and leave for 10 minutes or until the cold towel warms up.
• Remove previously cold, now warm, towel and turn onto stomach.
Suggestions and notes
• If using a bed take precautions not to get this wet.
• ‘Hot’ water in this context is a temperature high enough to prevent you leaving your hand in it for more than 5 seconds.
• The coldest water from a running tap is adequate for the ‘cold’ towel. On hot days, adding ice to the water in which this towel is wrung out is acceptable if the temperature contrast is acceptable to the patient.
• If the person being treated feels cold after the cold towel is placed, use back massage, foot or hand massage (through the blanket and towel) to warm up.
• There are no contraindications to constitutional hydrotherapy.
Patient self-help. Foot and ankle injuries: first aid
If you strain, twist or injure your foot or ankle this should receive immediate attention from a suitably trained podiatrist or other appropriate health-care professional. This is important to avoid complications.
Even if you can still move the joints of your feet it is possible that a break has occurred (possibly only a slightly cracked bone or a chip) and walking on this can create other problems. Don’t neglect foot injuries or poorly aligned healing may occur!
If an ankle is sprained there may be serious tissue damage and simply supporting it with a bandage is often not enough; it may require a cast. Follow the RICE protocol outlined below and seek professional advice.
First aid (for before you are able to get professional advice)
Rest. Reduce activity and get off your feet.
Ice. Apply a plastic bag of ice, or ice wrapped in a towel, over the injured area, following a cycle of 15–20 minutes on, 40 minutes off.
Compression. Wrap an Ace bandage around the area, but be careful not to pull it too tight.
Elevation. Place yourself on a bed, couch or chair so that the foot can be supported in an elevated position, higher than your waist, to reduce swelling and pain.
• When walking, wear a soft shoe or slipper which can accommodate any bulky dressing.
• If there is any bleeding, clean the wound well and apply pressure with gauze or a towel, and cover with a clean dressing.
• Don't break blisters, and if they break, apply a dressing.
• Carefully remove any superficial foreign objects (splinters, glass fragment, etc.) using sterile tweezers. If deep, get professional help.
• If the skin is broken (abrasion) carefully clean and remove foreign material (sand, etc.), cover with an antibiotic ointment and bandage with a sterile dressing.
Do not neglect your feet – they are your foundations and deserve respect and care.
Patient self-help. Reducing shoulder movement during breathing
Stand in front of a mirror and breathe normally, and notice whether your shoulders rise. If they do, this means that you are stressing these muscles and breathing inefficiently. There is a simple strategy you can use to reduce this tendency.
• An anti-arousal (calming) breathing exercise is described next. Before performing this exercise, it is important to establish a breathing pattern which does not use the shoulder muscles when inhaling.
• Sit in a chair which has arms and place your elbows and forearms fully supported by the chair arms.
• Slowly exhale through pursed lips (‘kiss position’) and then as you start to inhale through your nose, push gently down onto the chair arms, to ‘lock’ the shoulder muscles, preventing them from rising.
• As you slowly exhale again release the downward pressure.
• Repeat the downward pressure each time you inhale at least 10 more times.
As a substitute for the strategy described above, if there is no armchair available, sit with your hands interlocked, palms upward, on your lap.
Patient self-help. Anti-arousal (‘calming’) breathing exercise
There is strong research evidence showing the efficacy of particular patterns of breathing in reducing arousal and anxiety levels, which is of particular importance in chronic pain conditions. (Cappo & Holmes 1984, Readhead 1984).
• Place yourself in a comfortable (ideally seated/reclining) position and exhale fully but slowly through your partially open mouth, lips just barely separated.
• Imagine that a candle flame is about 6 inches from your mouth and exhale (blowing a thin stream of air) gently enough so as to not blow this out.
• As you exhale, count silently to yourself to establish the length of the outbreath. An effective method for counting one second at a time is to say (silently) ‘one hundred, two hundred, three hundred’, etc. Each count then lasts about one second.
• When you have exhaled fully, without causing any sense of strain to yourself in any way, allow the inhalation which follows to be full, free and uncontrolled.
• The complete exhalation which preceded the inhalation will have emptied the lungs and so creates a ‘coiled spring’ which you do not have to control in order to inhale.
• Once again, count to yourself to establish how long your inbreath lasts which, due to this ‘springiness’, will probably be shorter than the exhale.
• Without pausing to hold the breath, exhale fully, through the mouth, blowing the air in a thin stream (again you should count to yourself at the same speed).
• Continue to repeat the inhalation and the exhalation for not less than 30 cycles of in and out.
• The objective is that in time (some weeks of practicing this daily) you should achieve an inhalation phase which lasts for 2–3 seconds while the exhalation phase lasts from 6–7 seconds, without any strain at all.
• Most importantly, the exhalation should be slow and continuous and you should strictly avoid breathing the air out quickly and then simply waiting until the count reaches 6, 7 or 8 before inhaling again.
• By the time you have completed 15 or so cycles any sense of anxiety which you previously felt should be much reduced. Also if pain is a problem this should also have lessened.
• Apart from always practicing this once or twice daily, it is useful to repeat the exercise for a few minutes (about five cycles of inhalation/exhalation takes a minute) every hour, especially if you are anxious or whenever stress seems to be increasing.
• At the very least it should be practiced on waking and before bedtime and, if at all possible, before meals.
Patient self-help. Method for alternate nostril breathing
• Place your left ring finger pad onto the side of your right nostril and press just hard enough to close it while at the same time breathing in slowly through your left nostril.
• When you have inhaled fully, use your left thumb to close the left nostril and at the same time remove the pressure of your middle finger and very slowly exhale through the right nostril.
• When fully exhaled, breathe in slowly through the right nostril, keeping the left side closed with your thumb.
• When fully inhaled, release the left side, close down the right side, and breathe out, slowly, through your left nostril.
• Continue to exhale with one side of the nose, inhale again through the same side, then exhale and inhale with the other side, repeatedly, for several minutes.
Patient self-help. Autogenic training (AT) relaxation
Every day, ideally twice a day, for 10 minutes at a time, do the following.
• Lie on the floor or bed in a comfortable position, small cushion under the head, knees bent if that makes the back feel easier, eyes closed. Do the yoga breathing exercise described above for five cycles (one cycle equals an inhalation and an exhalation) then let breathing resume its normal rhythm.
• When you feel calm and still, focus attention on your right hand/arm and silently say to yourself ‘my right arm (or hand) feels heavy’. Try to see/sense the arm relaxed and heavy, its weight sinking into the surface it is resting on as you ‘let it go’. Feel its weight. Over a period of about a minute repeat the affirmation as to its heaviness several times and try to stay focused on its weight and heaviness.
• You will almost certainly lose focus as your attention wanders from time to time. This is part of the training in the exercise – to stay focused – so when you realize your mind has wandered, avoid feeling angry or judgmental of yourself and just return your attention to the arm and its heaviness.
• You may or may not be able to sense the heaviness – it doesn’t matter too much at first. If you do, stay with it and enjoy the sense of release, of letting go, that comes with it.
• Next, focus on your left hand/arm and do exactly the same thing for about a minute.
• Move to the left leg and then the right leg, for about a minute each, with the same messages and focused attention.
• Go back to your right hand/arm and this time affirm a message which tells you that you sense a greater degree of warmth there. ‘My hand is feeling warm (or hot).’
• After a minute or so, turn your attention to the left hand/arm, the left leg and then finally the right leg, each time with the ‘warming’ message and focused attention. If warmth is sensed, stay with it for a while and feel it spread. Enjoy it.
• Finally focus on your forehead and affirm that it feels cool and refreshed. Stay with this cool and calm thought for a minute before completing the exercise. By repeating the whole exercise at least once a day (10 – 15 minutes is all it will take) you will gradually find you can stay focused on each region and sensation. ‘Heaviness’ represents what you feel when muscles relax and ‘warmth’ is what you feel when your circulation to an area is increased, while ‘coolness’ is the opposite, a reduction in circulation for a short while, usually followed by an increase due to the overall relaxation of the muscles. Measurable changes occur in circulation and temperature in the regions being focused on during these training sessions and the benefits of this technique to people with Raynaud's phenomenon and to anyone with pain problems are proven by years of research. Success requires persistence - daily use for at least 6 weeks - before benefits are noticed, notably a sense of relaxation and better sleep.
Patient self-help. Progressive muscular relaxation
• Wearing loose clothing, lie with arms and legs outstretched.
• Clench one fist. Hold for 10 seconds.
• Release your fist, relax for 10–20 seconds and then repeat exactly as before.
• Do the same with the other hand (twice).
• Draw the toes of one foot toward the knee. Hold for 10 seconds and relax.
• Repeat and then do same with the other foot.
• Perform the same sequence in five other sites (one side of your body and then the other, making 10 more muscles) such as:
• After one week combine muscle groups:
• After another week abandon the ‘tightening up’ part of the exercise - simply lie and focus on different regions, noting whether they are tense. Instruct them to relax if they are.
• There are no contraindications to these relaxation exercises.
Patient self-help. Exclusion diet
In order to identify foods which might be tested to see whether they are aggravating your symptoms, make notes of the answers to the following questions.
1. List any foods or drinks that you know disagree with you or which produce allergic reactions (skin blotches, palpitations, feelings of exhaustion, agitation, or other symptoms).
2. List any food or beverage that you eat or drink at least once a day.
3. List any foods or drink that would make you feel really deprived if you could not get them.
4. List any food that you sometimes definitely crave.
5. What sorts of food or drink do you use for snacks?
6. Are there foods which you have begun to eat (or drink) more frequently/more of recently?
7. Read the following list of foods and highlight in one color any that you eat at least every day and in another color those that you eat three or more times a week: bread (and other wheat products); milk; potato; tomato; fish; cane sugar or its products; breakfast cereal (grain mix, such as muesli or granola); sausages or preserved meat; cheese; coffee; rice; pork; peanuts; corn or its products; margarine; beetroot or beet sugar; tea; yogurt; soya products; beef; chicken; alcoholic drinks; cake; biscuits; oranges or other citrus fruits; eggs; chocolate; lamb; artificial sweeteners; soft drinks; pasta.
To test by ‘exclusion’, choose the foods which appear most often on your list (in questions 1–6 and the ones highlighted in the first color, as being eaten at least once daily).
• Decide which foods on your list are the ones you eat most often (say, bread) and test wheat, and possibly other grains, by excluding these from your diet for at least 3–4 weeks (wheat, barley, rye, oats and millet).
• You may not feel any benefit from this exclusion (if wheat or other grains have been causing allergic reactions) for at least a week and you may even feel worse for that first week (caused by withdrawal symptoms).
• If after a week your symptoms (muscle or joint ache or pain, fatigue, palpitations, skin reactions, breathing difficulty, feelings of anxiety, etc.) are improving, you should maintain the exclusion for several weeks before reintroducing the excluded foods - to challenge your body - to see whether symptoms return. If the symptoms do return after you have resumed eating the excluded food and you feel as you did before the exclusion period, you will have shown that your body is better, for the time being at least, without the food you have identified.
• Remove this food from your diet (in this case, grains - or wheat if that is the only grain you tested) for at least 6 months before testing it again. By then you may have become desensitized to it and may be able to tolerate it again.
• If nothing was proven by the wheat/grain exclusion, similar elimination periods on a diet free of dairy produce, fish, citrus, soya products, etc. can also be attempted, using your questionnaire results to guide you and always choosing the next most frequently listed food (or food family).
This method is often effective. Wheat products, for example, are among the most common irritants in muscle and joint pain problems. A range of wheat-free foods are now available from health stores which makes such elimination far easier.
Patient self-help. Oligoantigenic diet
To try a modified oligoantigenic exclusion diet, evaluate the effect of excluding the foods listed below for 3–4 weeks.
Miscellaneous
Forbidden: all yeast products, chocolate, preservatives, all food additives, herbs, spices, honey, sugar of any sort
• If benefits are felt after this exclusion, a gradual introduction of one food at a time, leaving at least 4 days between each reintroduction, will allow you to identify those foods which should be left out altogether - if symptoms reappear when they are reintroduced.
• If a reaction occurs (symptoms return, having eased or vanished during the 3–4 week exclusion trial), the offending food is eliminated for at least 6 months and a 5-day period of no new reintroductions is followed (to clear the body of all traces of the offending food), after which testing (challenge) can start again, one food at a time, involving anything you have previously been eating, which was eliminated on the oligoantigenic diet.