Preparation of the Armamentarium
Proper care and handling of the local anesthetic armamentarium can prevent or at least minimize the development of complications associated with the needle, syringe, and cartridge. Many of these have been discussed in the preceding chapters. Other complications and minor annoyances may be prevented through proper preparation of the armamentarium.
Breech-Loading, Metallic Or Plastic, Cartridge-Type Syringe
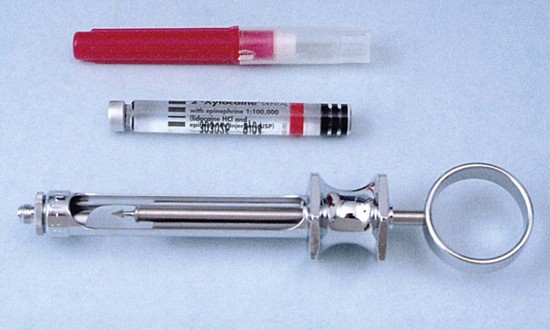
1. Remove the sterilized syringe from its container (Fig. 9-1).
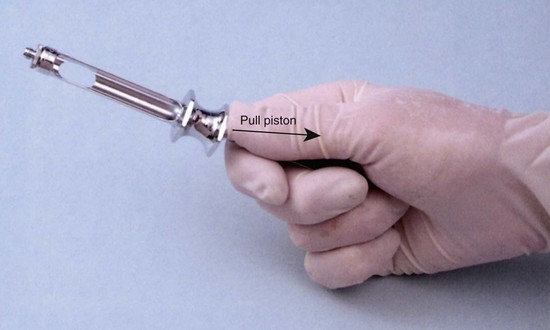
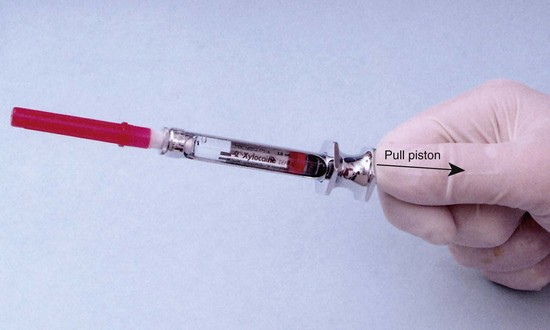
2. Retract the piston fully before attempting to load the cartridge (Fig. 9-2).
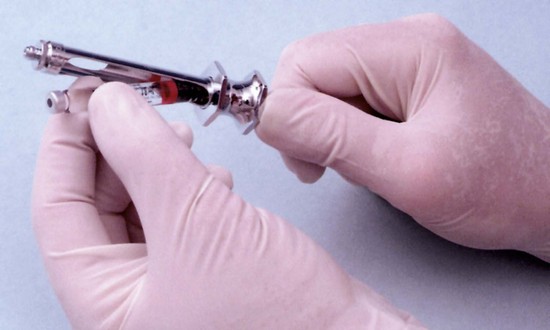
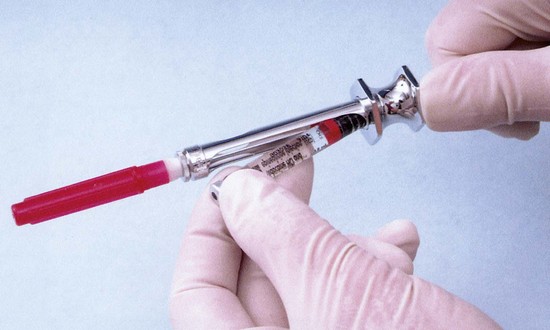
3. Insert the cartridge, while the piston is fully retracted, into the syringe. Insert the rubber stopper end of the cartridge first (Fig. 9-3).
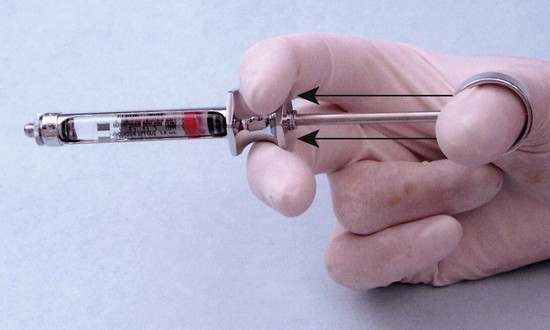
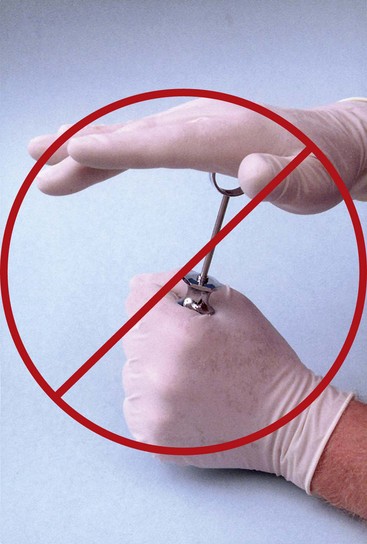
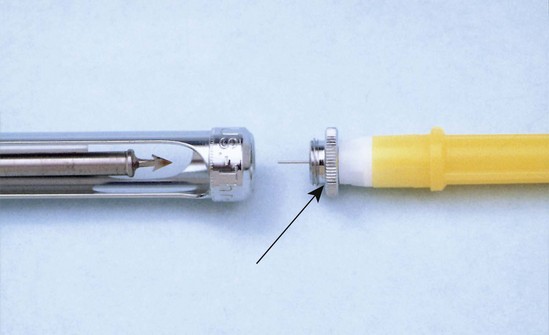
4. Engage the harpoon. While holding the syringe as if injecting, gently push the piston forward until the harpoon is firmly engaged in the plunger (Fig. 9-4). Excessive force is not necessary. Do NOT hit the piston in an effort to engage the harpoon because this frequently leads to cracked or shattered glass cartridges (Fig. 9-5).
5. Attach the needle to the syringe. Remove the white or clear protective plastic cap from the syringe end of the needle and screw the needle onto the syringe (Fig. 9-6). Most metal and plastic hubbed needles are prethreaded, making it easy for them to be screwed onto the syringe; however, some plastic hubbed syringes are not prethreaded, requiring the needle to be pushed toward the metal hub of the syringe while being turned.
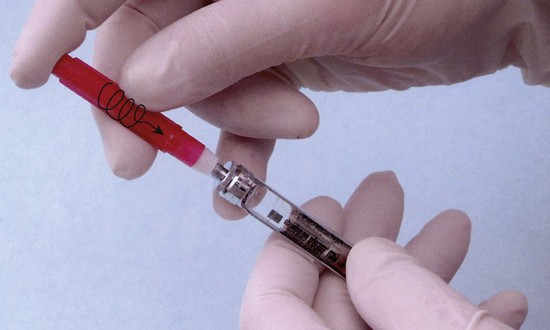
Figure 9-6 If the plastic hubbed needle is not prethreaded, it must be screwed onto the syringe while simultaneously being pushed into the metal needle adaptor of the syringe.
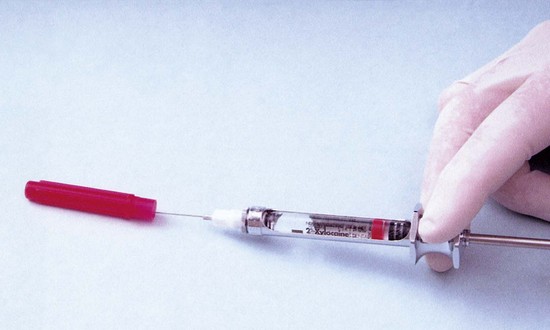
6. Carefully remove the colored plastic protective cap from the opposite end of the needle, and expel a few drops of solution to test for proper flow.
Note: It is common practice in dentistry to attach the needle to the syringe before placing the cartridge. This sequence requires hitting the piston hard to engage the harpoon in the rubber stopper—a process that can lead to broken glass cartridges or leakage of anesthetic solution into the patient’s mouth during the injection. The recommended sequence, as already described, virtually eliminates this possibility and should always be used.
Recapping the Needle
After removal of the syringe from the patient’s mouth, the needle should be recapped immediately. Recapping is one of the two times when health professionals are most likely to be injured (stuck) with a needle*; it is probably the most dangerous time to be stuck because the needle is now contaminated with blood, saliva, and debris. Although a variety of techniques and devices for recapping have been suggested, the technique recommended by most state safety and health agencies is termed the scoop technique (Fig. 9-7), in which the uncapped needle is slid into the needle sheath lying on the instrument tray or table. Until a better method is designed, the scoop technique should be used for needle recapping.
Safety needles and syringes for use in dentistry are still in their developmental stage. Most systems currently available for dental use leave much to be desired.
Various needle cap holders are available—commercially made (Fig. 9-8) or self-made (from acrylic)—that hold the cap stationary while the needle is being inserted into it, making recapping somewhat easier to accomplish.
Unloading the Breech-Loading, Metallic or Plastic, Cartridge-Type Syringe
After administration of the local anesthetic, the following sequence is suggested for removing the used cartridge:
1. Retract the piston and pull the cartridge away from the needle with your thumb and forefinger as you retract the piston (Fig. 9-9), until the harpoon disengages from the plunger.
2. Remove the cartridge from the syringe by inverting the syringe, permitting the cartridge to fall free (Fig. 9-10).
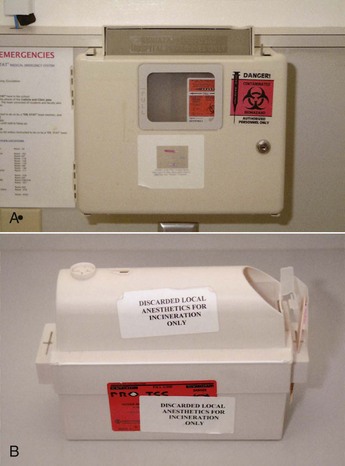
3. Properly dispose of the used needle. All needles must be discarded after use to prevent injury or intentional misuse by unauthorized persons. Carefully unscrew the now recapped needle, being careful not to accidentally discard the metal needle adaptor (Fig. 9-11). The use of a sharps container is recommended (Fig. 9-12) for needle disposal.
Placing An Additional Cartridge In A (Traditional) Syringe
On occasion it is necessary to deposit an additional cartridge of local anesthetic solution. To do this, the following sequence is suggested with the metallic or plastic breech-loading syringe:
1. Recap the needle using the scoop (or other appropriate) technique, and remove it from the syringe.
2. Retract the piston (disengaging the harpoon from the rubber stopper).
The estimated time necessary to complete this procedure is 10 to 15 seconds.
Self-Aspirating Syringe*
Because of the absence of a harpoon, loading and unloading the self-aspirating syringe are simple procedures.
Ultrasafe Aspirating Syringe†
1. While gripping the barrel firmly, fully insert the anesthetic cartridge into the open end of the injectable system (Fig. 9-13).
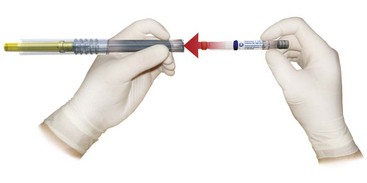
Figure 9-13 Insert the local anesthetic cartridge into the safety syringe. (Courtesy Septodont, Inc., Lancaster, PA.)
2. Grip the plunger handle, putting the thumb behind the finger holder. Introduce the handle tip into the barrel of the injectable system, behind the cartridge (Fig. 9-14).
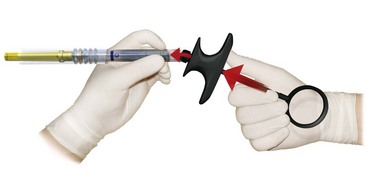
Figure 9-14 Introduce the handle tip into the barrel of the injectable system, behind the cartridge. (Courtesy Septodont, Inc., Lancaster, PA.)
3. Next, slide the sheath protecting the needle backward, toward the handle, until it CLICKS (the click is made as the sheath hits the handle and locks the unit together) (Fig. 9-15).
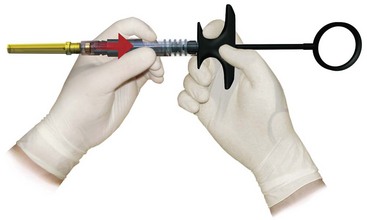
Figure 9-15 While protecting the needle, slide the sheath backward toward the handle until it CLICKS. (Courtesy Septodont, Inc., Lancaster, PA.)
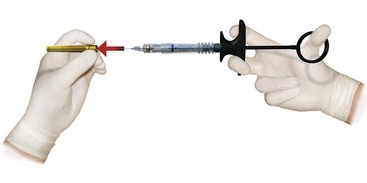
4. All movements now are away from the needle. Remove the needle cap and discard. The system is now ready to use (Fig. 9-16).
Aspiration
Passive Aspiration (Self-Aspiration)
At the base of the cartridge barrel of the injectable system, you will see there is a small protuberance. It appears as a blob of glue holding the centered needle, the needle-end that penetrates the diaphragm of the cartridge when inserted. At the start of the injection, the diaphragm is pressed against the protuberance; a depression occurs, and when released (injection stopped), the diaphragm moves back away from the protuberance and aspiration occurs (Fig. 9-17, A).
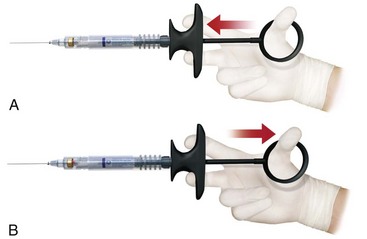
Active Aspiration
Active aspiration is obtained by the silicone top of the plunger handle creating a vacuum when, thumb in ring, the practitioner pulls back (Fig. 9-17, B). The bung follows the plunger tip, providing active aspiration, which is best observed when a minimum of 0.25 to 0.35 mL of solution (providing space) has been expelled or used from the cartridge.
5. When using only one cartridge:
Note: During multiple injection procedures using one cartridge, the practitioner may safely retain the syringe for further use by moving the sheath toward the needle until it reaches the holding position (Fig. 9-18). Should you need to insert a second cartridge, follow from step 7 onward.
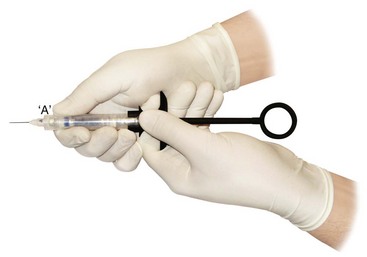
Figure 9-18 Move the sheath toward the needle until it reaches the holding position (A) so that the syringe may be used again. (Courtesy Septodont, Inc., Lancaster, PA.)
To complete the procedure, slide the protective sheath toward the locking position, which is the second notch at the end of the barrel (Fig. 9-19, A and B). This has now locked the needle safely in the protective sheath.
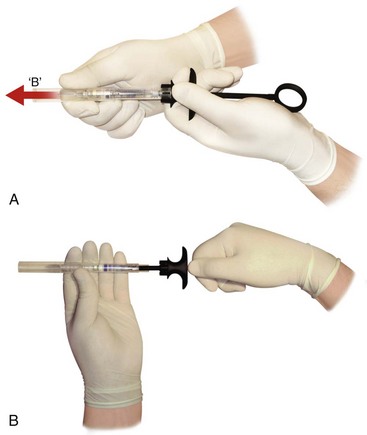
Figure 9-19 A, To lock the syringe, slide the protective sheath toward the locking position (B), which is the second notch at the end of the barrel. B, Locked safety syringe. (Courtesy Septodont, Inc., Lancaster, PA.)
6. Remove the plunger handle after use. After you have locked the injectable system in the (B) position, hold the barrel of the injectable system with one hand, and, while using the other hand, place a finger in the ring of the plunger handle and pull backward until the plunger is fully retracted. After you have fully retracted the plunger, peel off the handle in one movement (Fig. 9-20). Now the injectable system can be disposed of safely and the handle autoclaved.
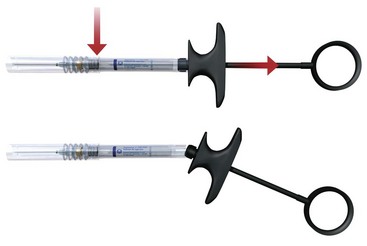
Figure 9-20 Remove the plunger handle after use. After locking the injectable system in the (B) position (see Fig. 9-19, A), hold the barrel of the injectable system with one hand, and while using the other hand, place a finger in the ring of the plunger handle and pull backward until the plunger is fully retracted. After you have fully retracted the plunger, peel off the handle in one movement. (Courtesy Septodont, Inc., Lancaster, PA.)
7. When inserting a second cartridge:
Note: During procedures that require more than one cartridge, retract the sheath to the holding position (A) as a needle-stick prevention device. Should the system be inadvertently fully locked into position (B), no attempt whatsoever should be made to unlock it. Use a new injection system.
Hold the barrel of the injectable system with one hand, and, while using the other hand, place a finger in the ring of the plunger handle and pull backward until the plunger is fully retracted. Now that you have fully retracted the plunger, peel off the handle in one movement.
8. Take hold of the plunger handle of the injection system, and pull the grip handle back toward the ring. Now insert the tip of the plunger into the empty cartridge, which is inside the injectable system. Pull out the cartridge attached to the plunger by the silicone tip, remove the cartridge from the plunger, and dispose of safely. You are now ready to insert a fresh cartridge and proceed as from step 1.
*The other common time for needle-stick injury is during injection, when a finger of the opposite hand is accidentally stuck as a result of sudden unexpected patient movement.
*From Dentsply, www.dentsply.com. This is a portion of the instructions that Dentsply encloses with its syringes.
†From Safety Syringes, Arcadia, Calif (www.safetysyringes.com). This is a portion of the instructions that Safety Syringes encloses with its syringes.