1 Upper Extremity
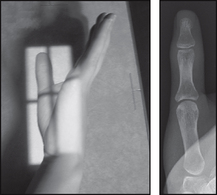
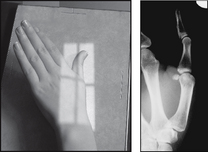
FINGERS
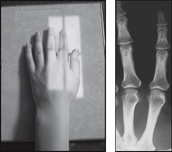
Points to consider
Technique

PA (dorsipalmar) – affected finger
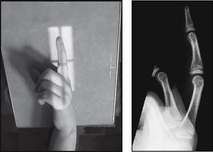
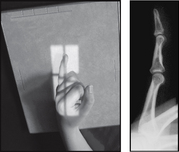
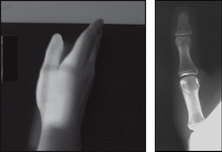
THUMB
Points to consider

AP
THUMB

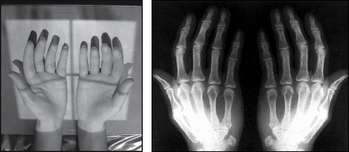
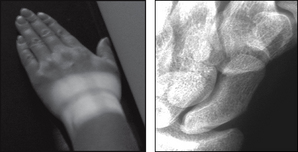
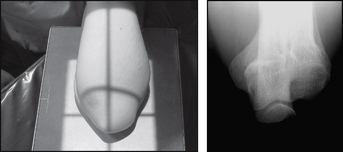
HAND
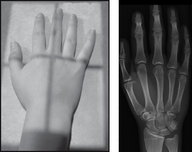

Points to consider
Technique

Radiological assessment
 #s metacarpal neck – usually the result of a direct blow
Common site for #s – head of the fifth metacarpal – Boxer’s #
Look for vertical # through the base with dislocation of joint
Secondary ossification centres appear at age 2–3 years
 PA poor at showing #s of the articular surface of the metacarpal heads
PA (dorsipalmar)
HAND
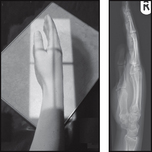
Projection: AP OBLIQUE (BALL CATCHER’s)
Centring Point: Midway between both hands at the level of the head of the fifth metacarpal
Points to consider
Technique

Radiological assessment
Look for bone alignment – displacement and dislocation
Look for # through the articular surface at the base of phalanx
Check the base of the fourth and fifth metacarpals – dislocation is common
Ball catcher’s – look for early rheumatoid arthritis with loss of bony outline and associated demineralisation
Lateral
AP oblique (ball catcher’s)
• Patient seated facing the X-ray table (use lead rubber gonad protection)
• Both forearms and hands are supinated
• Dorsa of both hands are in contact with the cassette and fifth metacarpals and phalanges are touching
• Hands are then internally rotated 45° as if to catch a ball
• Hands where indicated are supported in position with non-opaque pads
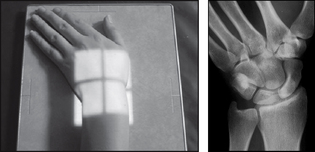
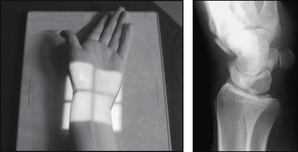
WRIST
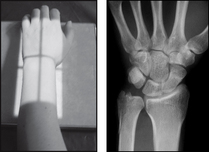
Points to consider
Technique
AP – elbow and wrist at the same level
Is there ulnar deviation if a scaphoid # is suspected?
Slightly curl fingers so that carpals are in contact with cassette
Dry plaster of Paris cast increase 1 stud kV + 1 stud mAs
Wet plaster of Paris cast increase 2 stud kV + 1 stud mAs

WRIST

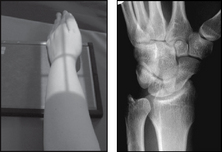
SCAPHOID
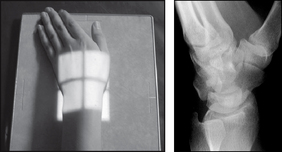
Points to consider
Technique

Radiological assessment
PA – the scaphoid and joint spaces should be demonstrated
80% of #s occur at the waist of the scaphoid and jeopardise blood supply to the proximal part
Scaphoid # may not be evident for 5–10 days after injury – must have a follow-up examination
# of the proximal pole of scaphoid – increased chance of avascular necrosis
SCAPHOID
SCAPHOID
Centring Point: To the scaphoid – just distal to the anatomical snuff box. Central ray 45° towards the elbow

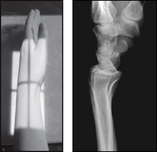
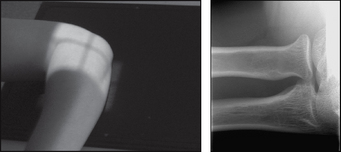
FOREARM
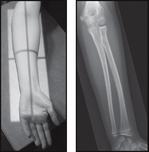
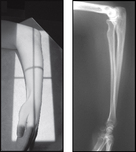
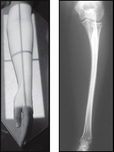
Points to consider
Radiological assessment
AP – slight superimposition of radial head over proximal ulna
Lateral 2 – Good for bone alignment – radius and ulna superimposed
But Lateral 2 – poor projection of the elbow – oblique elbow
Lateral 1 – Good projection of the elbow and wrist joints
Lateral 1 – Radius and ulna superimposed at the wrist, but separated at elbow
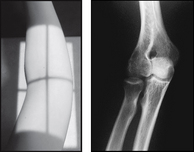
ELBOW
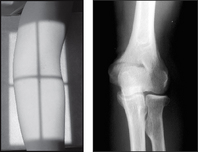
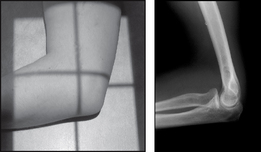
Points to consider
Technique
AP – epicondyles equidistant from the cassette
AP – hand should be fully supinated
Lateral – raise and immobilise the wrist on non-opaque pad; alternatively ask the patient to support the wrist with their opposite hand placed beneath the wrist of the affected limb
Children – both elbows may be required for ossification centres

Radiological assessment
AP
ELBOW
Points to consider

1. Possible injury to the radial head – general projection of the elbow joint
RADIAL HEAD
Projection: ALTERNATIVE PROJECTION
Centring Point: To the radial head. Central ray 45° to the humerus

HUMERUS
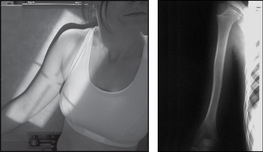
Points to consider
Technique

Radiological assessment
#s occur at all levels – direct or indirect violence
AP – head and greater tuberosity of humerus seen in profile
Lateral – are the epicondyles superimposed?
Common site in children – solitary bone cyst
Adults – metastatic deposits – breast or bronchus
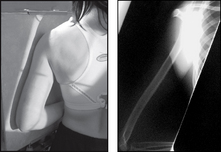
Lateral – head of humerus not seen well – shoulder projection may be required
Lateral
• Patient may be prone or erect
• Body is rotated slightly onto the affected side so that the arm is in contact with the cassette – where possible and safe to do so the humerus is positioned completely clear of the thoracic wall
• Affected arm is carefully flexed and the hand is placed upon the upper abdomen
• Opposite arm is placed down by the side or the elbow flexed and hand used to support the hand/forearm of the injured side