CHAPTER 35 Impressions, Study Casts, and Oral Stents
 Use alginate impression material to make dental impressions for the construction of study casts and baseplate wax to register a bite.
A dental impression is a negative imprint of the teeth and surrounding tissues. A dental impression is used to create an accurate three-dimensional reproduction of the teeth and surrounding tissues. This positive reproduction is called a study model or a diagnostic cast. There are three main types of dental impressions used in dentistry: a preliminary impression, a final impression, and a bite registration. Preliminary impressions are taken to construct study models for diagnosing, documenting clients' dental arches as part of permanent records, and enhancing client education as a visual aid. Final impressions are used to make casts with more accurate detail of the tooth structures and surrounding tissues that are used to make oral stents (molds or devices), temporary crowns, or removable dental appliances. Final impressions also are used by dental laboratory technicians to construct crowns, bridges, partial or full dentures, and restorations placed on titanium implants. The dental hygienist often has the responsibility to take preliminary dental impressions, construct casts, trim models, and fabricate custom-made oral stents and splints.
Stents are molds or devices used for the target delivery of materials (e.g., tooth whitening, home fluoride application) and protection of oral structures. Splints are orthopedic devices used for immobilization, restraint, or support of the teeth and/or jaws. This chapter provides an overview of concepts related to making dental impressions, diagnostic casts, bite registrations, and custom-made stents and splints. The reader is advised to consult a text on dental materials for complete information on properties and manipulation of the different types of dental materials.
DENTAL IMPRESSIONS
Impression Trays
Impression material is placed into the mouth in an impression tray. Because dental impressions are used in oral healthcare for many purposes, there are various types of impression trays. Impression trays are designed for different areas of the mouth and include quadrant trays, which cover half an arch, and full trays, which cover the complete maxillary or mandibular arch (Figure 35-1). Tray selection depends on the purpose of the impression. Metal, plastic, or Styrofoam trays are available in standard small, medium, and large sizes for children and adults. They may be perforated to promote a mechanical lock with the impression material (Box 35-1). Procedure 35-1 describes the details of selecting the correct size tray and preparing it for use.
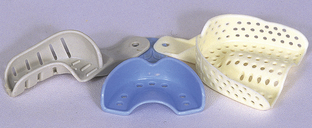
Figure 35-1 Types of impressions trays.
(From Bird DL, Robinson DS: Torres and Ehrlich modern dental assisting, ed 9, St Louis, 2009, Saunders.)
BOX 35-1 Guidelines for Proper Impression Tray Selections
Procedure 35-1 SELECTING THE CORRECT TRAY SIZE AND PREPARING IT FOR USE
EQUIPMENT (FIGURE 35-3)
STEPS
Mandibular Tray Selection
Maxillary Tray Selection
Alginate Impression Material
The impression material used most often in dentistry for preliminary impressions is hydrocolloid (hydro meaning water and colloid meaning gelatin). Because hydrocolloid is in a water suspension, the product is hydrophilic, meaning “loves water.” Hydrocolloids can exist in a sol (solution) or a gel (solid) state. Depending on the type of hydrocolloid used, the physical change from sol to gel is either reversible (changed by thermal factors) or irreversible (changed by chemical factors).1
Gelation is the transformation from sol to gel. An irreversible hydrocolloid does not change its physical state after gelation. Alginate is an irreversible hydrocolloid powder impression material that changes from a sol to a gel state by means of a chemical reaction. Cool water is added to the potassium alginate powder and mixed to produce a sol. The impression material reaches the gel state after the chemical setting reaction in the client's mouth. At this time it is removed from the mouth.1
Packaging and Storage
Alginate impression material is available either in premeasured packages or in bulk canisters. The premeasured packages are more expensive, but they save time by eliminating the need to measure the powder. Because the powder deteriorates when exposed to elevated temperatures or water, it is important to store the powder in a tightly closed container in a cool, nonrefrigerated place. The individual premeasured packages should be used immediately on opening to avoid water condensing on the powder from the humidity in the air. Properly stored alginate impression material has a shelf life of about 1 year.
Although an alginate impression does not change its physical state after gelation, it is subject to distortion as a result of slight changes in its physical surroundings. As a result, alginate impressions must be “poured up” within an hour of having been made. The potential for dimensional change is due to the fact that so much of the material is made of water. For example, if left exposed to the room environment uncovered, the impression may shrink owing to syneresis (the loss of water) from evaporation. Imbibition is the uptake of water in the presence of moisture. It is recommended that a disinfected impression be wrapped in a slightly moistened towel and placed in a plastic biohazard bag or unwrapped in a humidor (a covered container with a moist environment) to cause the least amount of distortion.1
Water/Powder Ratio
When alginate powder stored in canisters is used, a plastic scoop for dispensing the powder and a calibrated plastic cylinder for measuring the water are supplied (Figure 35-2). Mandibular alginate impressions generally require two scoops of powder and two measure lines of water. A large mandible may require three scoops of powder to three measure lines of water. A maxillary impression generally takes three scoops of powder and three measure lines of water.1
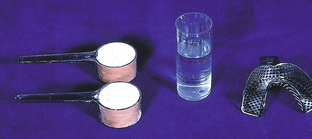
Figure 35-2 A plastic scoop and plastic cylinder are supplied with alginate.
(From Bird DL, Robinson DS: Torres and Ehrlich modern dental assisting, ed 9, St Louis, 2009, Saunders.)
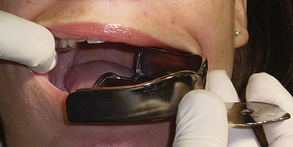
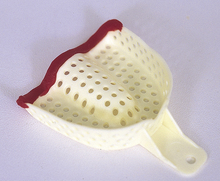
Figure 35-5 Extending impression tray with utility wax.
(From Bird DL, Robinson DS: Torres and Ehrlich modern dental assisting, ed 9, St Louis, 2009, Saunders.)
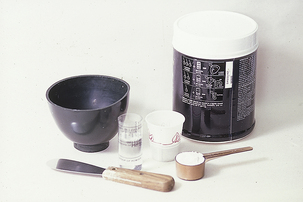
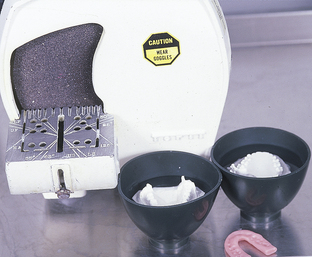
Figure 35-6 Equipment for mixing alginate impression material.
(From Bird DL, Robinson DS: Torres and Ehrlich modern dental assisting, ed 9, St Louis, 2009, Saunders.)
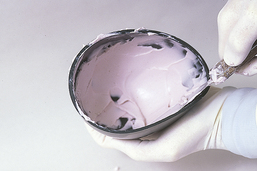
Figure 35-7 Proper consistency of mixed alginate impression material.
(From Bird DL, Robinson DS: Torres and Ehrlich modern dental assisting, ed 9, St Louis, 2009, Saunders.)
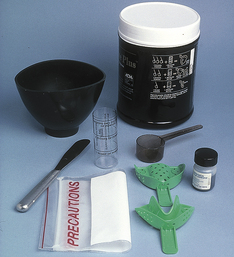
Figure 35-8 Scoop for alginate powder, water dispensers, mixing bowl, spatula, and stock impression tray.
(From Bird DL, Robinson DS: Torres and Ehrlich modern dental assisting, ed 9, St Louis, 2009, Saunders.)
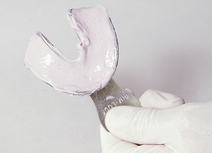
Figure 35-9 The mandibular impression tray is filled with alginate and is smoothed.
(From Bird DL, Robinson DS: Torres and Ehrlich modern dental assisting, ed 9, St Louis, 2009, Saunders.)
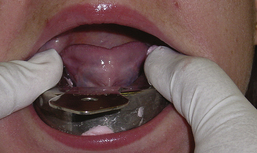
Figure 35-10 The mandibular impression tray is seated in the arch with the tongue out of the way.
(Courtesy Gwen Essex.)

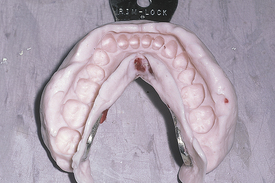
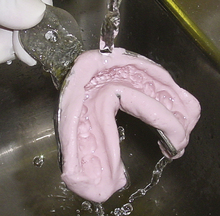
Figure 35-13 Rinsing the impression.
(From Bird DL, Robinson DS: Torres and Ehrlich modern dental assisting, ed 9, St Louis, 2009, Saunders.)
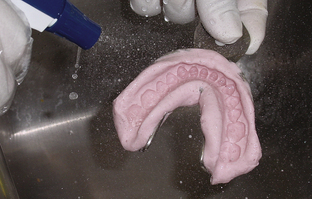
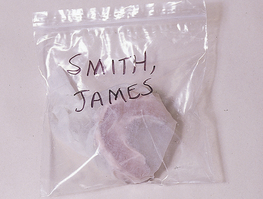
Figure 35-15 Impression in precaution bag with client name.
(From Bird DL, Robinson DS: Torres and Ehrlich modern dental assisting, ed 9, St Louis, 2009, Saunders.)
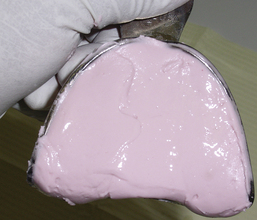
Figure 35-16 The maxillary impression tray is filled with alginate. The filled tray is smoothed on the alginate surface.
(Courtesy Gwen Essex.)
Figure 35-17 A maxillary alginate impression is placed in the arch. The maxillary lip is lifted and positioned outside of the tray.
(Courtesy Gwen Essex.)
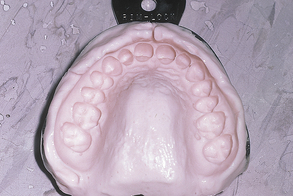
Figure 35-18 How a maxillary impression must look.
(From Bird DL, Robinson DS: Torres and Ehrlich modern dental assisting, ed 9, St Louis, 2009, Saunders.)
Figure 35-19 Supplies for taking a wax-bite registration.
(From Bird DL, Robinson DS: Torres and Ehrlich modern dental assisting, ed 9, St Louis, 2009, Saunders.)
Setting Time
The time needed to mix the impression material, load the tray, and seat it in the client's mouth is called the working time. The time required for gelation, after which the impression tray is removed from the client's mouth, is called setting time. Alginate impression material is available in normal-set powder (a working time of 2 minutes and a setting time of up to 4.5 minutes) and fast-set powder (a working time of 1.25 minutes and a setting time of 1 to 2 minutes). Currently there are several brands of color-changing alginate available. When the alginate powder is mixed with water, it changes color from purple to pink or peach when it is time to place it into the mouth, and it changes to white at gelation.
The alginate powder is mixed with room-temperature water (68° to 70° F or 20° to 21° C). The temperature of the water is measured with a thermometer before the powder is introduced into the water. Powder is incorporated into the water to wet the powder completely and then vigorously mixed until a smooth, creamy consistency is achieved. To allow the chemical reaction to proceed effectively, manufacturer's instructions with regard to mixing time should be followed. Loading the tray and insertion should take no more than 1 minute. The objective is for the impression material to reach the gel state in the client's mouth. Procedure 35-2 describes the details for mixing alginate impression material. Table 35-1 presents factors that affect gelation and therefore the success of the impression.1
Procedure 35-2 MIXING ALGINATE
EQUIPMENT (FIGURE 35-6)
STEPS
TABLE 35-1 Factors That Affect Gelation
| Factor | Comments |
|---|---|
| Ratio of water to alginate powder | Manufacturer's directions must be followed carefully. The water/powder ratio must be exact. Too much water in the mix will make a weak impression that will tear easily during removal from the mouth owing to tension. Too little water creates a grainy impression that will cause an inaccurate reproduction of the hard and soft tissues. If the container holding the alginate is not fluffed before measuring, too much powder will be dispensed, causing a grainy impression. |
| Water temperature | Water temperature affects gelation time. If the water is too warm, the product will gel at a faster rate, resulting in poor detail in the impression. If the water is cool, the product will gel at a slower rate and the final impression will be more accurate in detail. In hot, humid climates, it is recommended to use cooler water and to refrigerate the bowl and spatula. |
| Spatulation technique | Proper mixing (spatulation) will determine setting time. A mechanical device that automatically mixes the material can be used. Too much spatulation will decrease the strength of the impression material because the gel is broken as it forms. Too little spatulation decreases strength up to 50% and will cause a grainy impression that is inaccurate in details of the mouth. |
| Tray movement | Movement of the tray during gelation causes an inaccurate impression. It is important to hold the impression tray steady in the mouth during gelation. |
| Removal of impression | Premature removal of impression from the mouth creates an inaccurate impression because the material has not fully gelled. The most frequent result of premature removal is inaccuracy of the incisor teeth. The elasticity of alginate increases with time. A better impression results from being patient. Rocking the tray back and forth to release it from the client's mouth may cause distortion of the impression. |
| Improper storage of impression | The impression should be poured within 1 hour. Leaving the impression unprotected to the environment can result in imbibitions or syneresis. After disinfection, maintain the integrity of the impression, if it cannot be poured with a gypsum product, immediately by wrapping the impression in a wet towel or storing it in a humidor. A humidor is a closed plastic container with a moist bottom layer of paper towels that create a humid environment. Before taking the maxillary impression, wrap the mandibular impression in a wet towel. |
Impression Taking
Before the impression is taken, the procedure is explained to the client to enhance the client's comfort and cooperation. Specifically, clients should be informed of the following:
That the material will feel cool, what the specific flavor is, and that the material will gel quicklyBox 35-2 lists areas to precoat with alginate. Box 35-3 lists criteria for a quality impression. Procedures 35-3 and 35-4 present details for making mandibular and maxillary dental impressions, respectively. The impression of mandibular teeth should be taken first, because gagging is less likely in the mandibular area and enhances trust in the clinician (see Box 35-4 for additional suggestions to minimize gagging).
Procedure 35-3 MAKING A MANDIBULAR PRELIMINARY IMPRESSION
EQUIPMENT (FIGURE 35-8)
STEPS
Preparation
Loading the Tray
Seating the Tray
Removing the Impression
Postimpression Care
Procedure 35-4 MAKING A MAXILLARY PRELIMINARY IMPRESSION
STEPS
Loading the Tray
Seating the Tray
Removing the Impression
∗ If the same bowl and spatula are used that were used for the mandibular impression, they must be thoroughly cleaned and dried to prevent contamination of the maxillary mix (see Figure 35-8).
BOX 35-4 Guidelines to Minimize Gagging during Impression Taking
Wax-Bite Registration
When an impression is made of both dental arches, the dentist and laboratory technician also need an accurate registration of the normal centric occlusion. Centric occlusion is the maximal stable contact between the occluding surfaces of the maxillary and mandibular teeth when the jaws are closed. This relationship is recorded with a wax-bite registration. The wax-bite registration is made at the time of the impression taking (Procedure 35-5). Wax-bite registration is used to articulate the models or diagnostic casts after the client has left the office. Articulated models can then be trimmed to ensure accurate articulation.
Procedure 35-5 MAKING A WAX-BITE REGISTRATION
EQUIPMENT (FIGURE 35-19)
STEPS
Preparation
Seating
Post–Wax-Bite Care
Baseplate wax and wax wafers are used to record the client's bite registration. Baseplate wax and wax wafers are pliable waxes at room temperature. Baseplate wax is supplied in 1- to 2-mm–thick red or pink sheets, and wax bite wafers are horseshoe shaped. The most common technique used for obtaining a bite registration is to have clients close the teeth into softened wax.
DIAGNOSTIC CASTS
A diagnostic cast is an accurate three-dimensional model of the teeth and surrounding tissues of the client's maxillary and mandibular arches created from a dental impression. Gypsum products are used to make diagnostic casts.
Gypsum Products
Gypsum is a powdered hemihydrate, which means there is one-half part water to one part of calcium sulfate. When mixed with water, the hemihydrate crystals grow to form clusters that grow during the setting process. The interlinking of the crystals results in a stronger and harder final product. There are three types of gypsum products used in pouring casts: model plaster, dental stone, and high-strength stone. These materials consist of hemihydrate crystals that vary in terms of size, shape, and porosity. These differences determine the characteristics of the product.
Plaster, a beta calcium sulfate hemihydrate (plaster of Paris), has very porous crystals that vary in shape. Because of its porosity, it requires the most water when mixing, compared with the other types of gypsum products. It is used for pouring preliminary impressions to construct models when strength is not critical but a detailed reproduction of the mouth is required (e.g., orthodontic models).1
Dental stone, an alpha calcium sulfate hemihydrate, is stronger than plaster. Its crystals are uniform in shape and less porous than plaster. Dental stone is used when a stronger working diagnostic cast is needed to make dentures, orthodontic retainers, custom trays, nightguards, or cast restorations. High-strength stone has very dense crystals and requires the least amount of water for mixing. High-strength stone has a hardness that makes it ideal to create casts used in the production of crowns, bridges, and indirect restoration. Both plaster and stone are mixed by hand with a spatula or mechanically with a vacuum mixer, which eliminates trapping air into the mix.1
Water/Powder Ratio
Each gypsum product has an optimal water/powder ratio specified by the manufacturer. The water/powder ratio affects the setting time and product strength. For one preliminary impression and its base, the commonly used water/powder ratio for plaster is 50 mL of water to 100 g of powder; for dental stone, it is 30 mL water to 100 g of powder; and for high-strength stone it is 24 mL of water to 1000 g of powder.1
Setting Time
Time is another critical factor in the setting reaction of plaster and stone. There is working time immediately after mixing when the mixture will flow into the alginate impression. Initial setting time occurs when a semihard mass forms and is the point at which the mixture can no longer be poured into the impressions. For plaster, the initial setting time is 12 to 14 minutes; final setting time is 45 to 60 minutes. For stone, the initial setting time is 8 to 10 minutes; final setting time is 45 to 60 minutes. Final setting time occurs after the exothermic reaction (a chemical change accompanied by the liberation of heat) and the final product can no longer be manipulated without fracture. After final setting time (45 to 60 minutes) the preliminary alginate impression can be removed from the model or cast. Table 35-2 presents factors that affect setting time of plaster and stone.1
TABLE 35-2 Factors That Affect Setting Time and Quality of Cast
| Factor | Comment |
|---|---|
| Setting Time | |
| Type of gypsum | Dental stone sets more slowly than dental plaster. |
| Water/powder ratio | The less water used, the faster the set. Follow the manufacturer's proportions exactly. Too much water increases setting time and decreases strength. The resultant cast is smooth in appearance. Too little water decreases setting time and decreases strength. The resultant cast is grainy in appearance. |
| Water temperature | The warmer the water, the faster the set. Water that is too warm creates a cast that sets too fast, and water that is too cool creates a cast that sets too slowly. In general, water should be at room temperature and no warmer than 70° F (21.1° C). Cool water increases setting time, and warm water decreases setting time. On a humid day the powder can absorb water, causing a slower set. |
| Mixing time | The longer and faster the spatulation, the faster the set. Prolonged and very rapid mixing shortens the setting time by increasing the chemical reaction and decreases the strength of the study model owing to breakage of the crystals that are forming. Too little mixing also decreases strength and makes the study model grainy. |
| Improper storage of gypsum | Stone and scoop dispenser need to be kept clean and dry. Stone should be stored in a tight container that is closed immediately after use to eliminate exposure to humidity and problems with moisture (see Procedure 35-2). Purchase gypsum products only as needed, because of possible contamination with moisture. |
| Quality of Cast | |
| Factors that affect setting time | See above. |
| Removal of the impression | Premature or improper removal of the alginate impression from the cast will break teeth or crack the cast. |
| Movement of tray or cast | Movement of the alginate impression or cast during the setting process will create a thin, flat base. |
Pouring the Cast
The cast consists of the anatomic portion and the art portion. The anatomic portion includes the teeth, oral mucosa, and muscle attachments. The art portion forms the base (Figure 35-22). The procedure for pouring the cast from a preliminary impression consists of two components: filling the impression with the mixed gypsum material to form the anatomic portion of the cast, and forming its base by mounding mixed gypsum on a smooth, nonabsorbent surface. These two parts are then connected by inverting the poured impression and seating it on the base. Procedure 35-6 provides details for pouring the cast from a preliminary alginate impression using dental plaster.
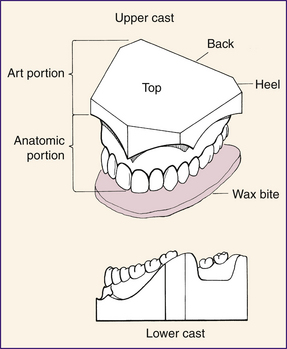
Figure 35-22 Anatomic and art portion of the diagnostic cast.
(From Bird DL, Robinson DS: Torres and Ehrlich modern dental assisting, ed 9, St Louis, 2009, Saunders.)
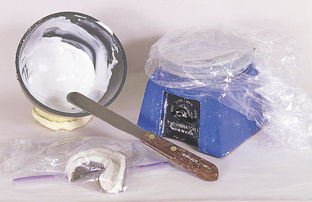
Figure 35-23 Supplies needed for pouring dental casts.
(From Bird DL, Robinson DS: Torres and Ehrlich modern dental assisting, ed 9, St Louis, 2009, Saunders.)
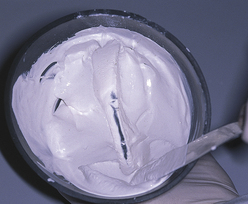
Figure 35-24 Smooth, creamy mix.
(From Bird DL, Robinson DS: Torres and Ehrlich modern dental assisting, ed 9, St Louis, 2009, Saunders.)
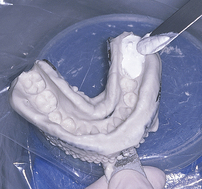
Figure 35-26 Initial placement of material in distal of most posterior tooth.
(From Bird DL, Robinson DS: Torres and Ehrlich modern dental assisting, ed 9, St Louis, 2009, Saunders.)
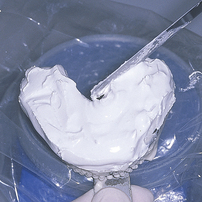
Figure 35-27 Impression filled with large amounts of gypsum.
(From Bird DL, Robinson DS: Torres and Ehrlich modern dental assisting, ed 9, St Louis, 2009, Saunders.)
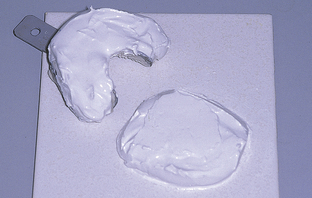
Figure 35-28 Filled impression tray and base on Plexiglas.
(From Bird DL, Robinson DS: Torres and Ehrlich modern dental assisting, ed 9, St Louis, 2009, Saunders.)
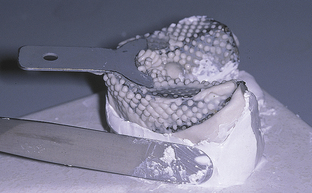
Figure 35-29 Smoothing the plaster base mix up into the margins of the tray.
(From Bird DL, Robinson DS: Torres and Ehrlich modern dental assisting, ed 9, St Louis, 2009, Saunders.)

Procedure 35-6 POURING THE CAST AND THE BASE
EQUIPMENT (FIGURE 35-23)
STEPS
Preparation
Pouring the Mandibular Impression
Pouring the Base for the Mandibular Cast
Separating the Impressions from the Casts
Trimming and Finishing Casts
After the casts have set and the impression trays have been separated from them, the casts are trimmed to a geometric standard by using a model trimmer. The purpose of trimming is to produce attractive diagnostic casts for case presentation or for use as part of the client's permanent record. A model trimmer is a laboratory machine that has a circular abrasive wheel that is set to 90 degrees to the cast (Figure 35-32). The wax-bite registration is used to ensure that the teeth of the casts are in proper occlusion during the trimming process. The desired trimming outcome is to make the bases parallel to themselves and the occlusal plane and to make the base one third and the anatomic portion two thirds of the cast height (see Figure 35-22 and Box 35-5). The reader is advised to refer to a standard dental materials textbook for specific information on the trimming procedure and care of the trimming equipment.
(From Bird DL, Robinson DS: Torres and Ehrlich modern dental assisting, ed 9, St Louis, 2009, Saunders.)
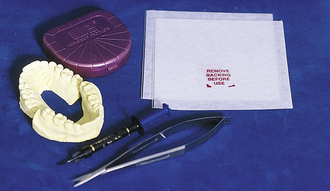
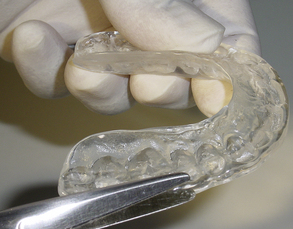
Figure 35-33 Supplies for constructing a custom-made stent.
(From Bird DL, Robinson DS: Torres and Ehrlich modern dental assisting, ed 9, St Louis, 2009, Saunders.)
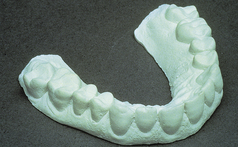
Figure 35-34 Trimmed diagnostic cast.
(From Bird DL, Robinson DS: Torres and Ehrlich modern dental assisting, ed 9, St Louis, 2009, Saunders.)
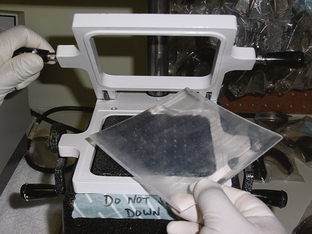
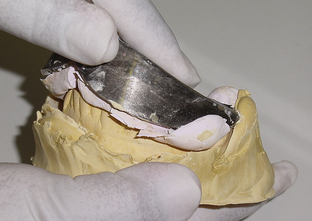
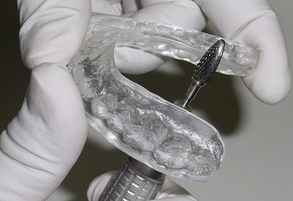
Figure 35-38 Cutting away gross excess material.
(From Bird DL, Robinson DS: Torres and Ehrlich modern dental assisting, ed 9, St Louis, 2009, Saunders.)
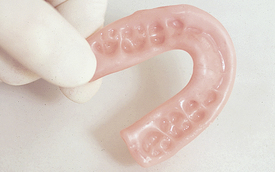
CUSTOM-MADE STENTS
Oral Stents
A stent is a mold or device used for a variety of dental and medical procedures. In dentistry, stents are placed intraorally for the targeted delivery of materials and protection of oral structures. Wearing a stent serves the following purposes:
Protection of teeth during endotracheal anesthesia, bronchoscopy, tonsillectomy, and electric shock therapy Protection of palate during long-term intubation of premature infants and palatal skin graft donor sitesHome Fluoride Trays
Home fluoride trays are constructed for the target delivery of topical fluoride for clients with high caries risk, such as individuals who have xerostomia.
Tooth-Whitening Stents
Clients often seek oral healthcare to improve their appearance. A focus on sexuality and self-image is predominant in the media. Because the smile speaks a thousand words, the appearance of the teeth dominates our image-conscious society and is an important factor in meeting a person's human need for a wholesome facial image. Consequently, tooth discoloration and its removal are often the reasons individuals seek oral healthcare.
Many tooth-whitening procedures require the use of a stent by the client. (See Chapter 27 for dentist-dispensed home-use and in-office tooth whiteners that carry the American Dental Association [ADA] Seal of Acceptance.) This tooth-whitening stent is a custom-made device constructed in the same manner as a mouth guard using an acrylic material. Tooth-whitening trays are filled with carbamide or hydrogen peroxide gels for tooth bleaching.
Not all teeth, however, will respond similarly to whitening procedures. Yellow teeth whiten the best, brown teeth less well, and gray teeth may not bleach well at all. Tetracycline stain and fluorosis may be treated with a combination of tooth whitening, microabrasion and restorative dentistry cosmetic procedures.
Some tooth-whitening systems on the market do not require a stent for delivery. Tooth-whitening strips are a viable option for clients with temporomandibular joint (TMJ) disorder who cannot tolerate stents. Procedure 35-7 describes construction of a custom-made stent. See Chapter 27 for methods of in-office tooth whitening.
Procedure 35-7 CONSTRUCTING A CUSTOM-MADE STENT (A SINGLE-LAYER MOUTH GUARD, FLUORIDE TRAY, OR TOOTH-WHITENING TRAY)
EQUIPMENT (FIGURE 35-33)
STEPS
Oral Splints
A splint is an orthopedic device used for immobilization, restraint, or support of the teeth and/or jaws. Splints are used to stabilize periodontally involved teeth, immobilize the mandible, restrain the teeth, and advance the mandible. In the dental office the most common splints include athletic mouth guards, nightguards, dayguards, periodontal splints, sleepguards, and surgical splints.
Athletic Mouth Guards
A mouth guard is a protective appliance that covers the teeth and palate and fits to the depth of the vestibule to stabilize the mandible. Mouth guards help meet the client's human need for protection from health risks. Wearing a mouth guard serves the following purposes:
Protection of teeth and oral tissues, the maxilla and mandible, the TMJ, and the head and neck against intracranial pressure changes and bone deformation during contact sports.2 Blows transmitted to the TMJ during athletic competition can be absorbed and distributed throughout the mouth guard. Protection of the brainstem against shear stress in contact sports. A properly fitting mouth guard separates the mandible from the maxilla and thus reduces the force transmitted to the base of the brain at the TMJ. Prevention of tooth avulsion. Over 5 million teeth are avulsed yearly in the United States; the most frequent injuries occur in 8- to 15-year-olds.The ADA and the Academy for Sports Dentistry suggest a properly fitted mouth guard be worn while individuals play contact sports or participate in nonimpact sports. Nonimpact sports (e.g., weightlifting) require mouth protectors owing to the clenching of teeth involved in these strenuous sports (see Box 35-6 for sports in which participants should wear mouth protection).2,3
BOX 35-6 Sports in Which Participants Should Wear Mouth Protection
From Academy for Sports Dentistry: Frequently asked questions. Available at: http://www.sportsdentistry-asd.org/faqs.asp. Accessed December 11, 2008.
Box 35-7 summarizes the types of athletic mouth guards available. The following are mouth guard guidelines:
In addition to preventing tooth avulsion, a full palatal coverage mouth guard worn during sports participation helps to prevent or moderate a variety of head injuries. Concussion is the alteration of consciousness and/or disturbance in vision and equilibrium caused by a direct blow to the head, rapid acceleration and/or deceleration of the head, or direct blow to the base of the skull from a vertical impact to the mandible. Symptoms of concussion include headaches, earaches, facial pain, photophobia, vertigo, and impaired speech.
Single-Layer Mouth Guards
Vacuum-formed thermoplastic polymers are used to make mouth guards called single-layer mouth guards. They are fabricated from one sheet of polyurethane or soft ethylene vinyl acetate (EVA) acrylic, are custom fitted, allow for breathing and speech, and do not deform over time and use. They are the most commonly prescribed mouth guards in dental offices. These vacuum-formed mouth guards, custom fabricated by dental staff or laboratory technicians, are superior to the store-bought stock or boil-and-bite mouth guards. Strap attachments for helmets are easily adapted to the custom-made single-layer mouth guard, and the client can select the color and decorative pattern of the mouth guard (see Procedure 35-7).
Multiple-Layer Mouth Guards (Pressure Laminated)
Multiple-layer mouth guards made of EVA are recommended for full-contact sports. Dental technicians in a dental laboratory setting fabricate pressure-laminated mouth guards because they maintain their shape better than single-layer mouth guards. Two or three layers of EVA material are fused to achieve the necessary thickness. At a minimum, mouth guards should have a labial thickness of 3 mm, palatal thickness of 2 mm, and occlusal thickness of 3 mm. The mouth guard material should be biocompatible and last 1 to 2 years; however, mouth guard replacement is recommended after one season of play.
Several commercial laboratories fabricate pressure-laminated mouth guards in the United States and Canada. Playsafe Mouthguards from Glidewell Laboratories are pressure-laminated mouth guards made from EVA material. One of the following four types of pressure-laminated mouth guards is recommended based on the client's degree of risk:
Bruxism
Bruxism is a subconscious habit of grinding, clenching, rubbing, or gritting of the teeth that usually occurs during sleep. Occlusion discrepancy between centric occlusion and centric relation is thought to be a cause of nocturnal bruxism. Stress, a major contributing factor in bruxism, may increase the frequency and intensity of bruxism. Central nervous system disorders such as Parkinson's disease and Huntington's disease can contribute to nocturnal bruxism. Many individuals experience bruxism, but the degree of bruxism determines the sequelae. Box 35-8 lists the possible sequelae of bruxism.
Treatment of Bruxism
Treatment for bruxism is categorized as reversible or irreversible. Reversible treatment is conservative, is noninvasive, and causes no permanent changes in the structure or position of the jaw or teeth. Most therapy for bruxism starts with reversible interventions, but treatment may progress to irreversible procedures. Irreversible treatment is invasive and causes permanent changes in the structure or position of the jaw or teeth.
Reversible Procedures
Appliance therapy is the use of dental stents in a variety of situations. Dental splints such as nightguards or dayguards treat bruxism. Evidence suggests that wearing a nightguard during sleep to reduce bruxism will decrease damage to the teeth and relax strained muscles.4
Biofeedback is the use of electromyography (EMG) to record muscle activity to help the patient recognize when he or she is overusing the muscles of the head and neck. During treatment the client wears pairs of electrodes attached to the surface of the skin in contact with the muscles of mastication. The electrodes transmit muscle activity information to a computer monitor the client can see, to allow the client to consciously reduce muscle tension. Sleep biofeedback therapy involves EMG-activated alarms, which sound during sleep to awaken the client to stop the bruxism. Sleep biofeedback can also use electrical stimulation to produce pain during nocturnal bruxism to awaken the patient, thus stopping bruxism.
Drug therapy is the use of antianxiety, sedative, anti-inflammatory, and muscle relaxant drugs to control bruxism. Moreover, when the overuse of the muscles of mastication produces muscle fiber changes, methocarbamol (Robaxin) can be injected into muscle trigger points to provide pain relief. Over-the-counter medications such as ibuprofen and naproxen are recommended as nonsteroidal anti-inflammatory agents.
Exercise therapy using isokinetics and stretching of the muscles of mastication can be performed by the client. Reflex and relaxation exercises may also be useful.
Physical therapy procedures may be effective in restoring normal muscle function. Heat and cold therapy using moist heat or ethylene chloride spray may end the muscle spasm and pain cycle. Mandibular relearning therapy helps the client to work on the opening and closing of the mouth.
Psychotherapy from an appropriate mental health professional may be indicated to reduce stress via relaxation, medication, and guided imagery. The antidepressant amitriptyline can be prescribed by the mental health professional. Other stress reduction strategies also may be recommended for the client to perform before sleep.
Irreversible Procedures
Equilibration therapy is used to adjust the occlusion of the teeth by recontouring occlusal enamel with dental burrs. The objective is to create a centric occlusion coinciding with centric relation.
Orthognathic surgery can be employed to improve a skeletal malocclusion. Splint therapy must first be used to reconfirm the effectiveness of equilibration therapy in relieving the client's symptoms. Surgery is recommended only after preliminary orthodontics has eliminated the dental compensations of the malocclusion.
Nightguards and Dayguards
A nightguard or dayguard is a hard acrylic appliance that fits over the maxillary or mandibular teeth to protect the teeth from clenching and grinding. If this appliance is worn during sleep it is referred to as a nightguard. If the appliance is to be worn throughout the day, it is called a dayguard. The purpose of these appliances is to do the following:
There are several nightguard and dayguard designs.
Partial coverage nightguards or dayguards are maxillary appliances that cover the palate and the lingual surfaces of the maxillary anterior teeth. The disadvantage of such appliances is that they cover only some of the teeth, and the occlusal force may overstress those teeth covered by the acrylic. Subsequently, teeth that are not covered by the nightguard or dayguard may hypererupt or drift. Full occlusal coverage nightguards or dayguards, the appliances of choice, are fabricated in acrylic to cover the occlusal surfaces. A nightguard or dayguard that fully covers either the maxillary or mandibular teeth is the safest design because the dentist can adjust the occlusion on the appliance. The lifespan for full occlusal coverage nightguards and dayguards varies from 3 to 10 years. A single-layer athletic mouth guard may be used as an inexpensive nightguard or dayguard to temporarily change the neuromuscular behavior and produce muscle relaxation in mild clenching and bruxism. This appliance usually lasts less than 1 year. However, the occlusion cannot be adjusted, and the mouth guard can create increased parafunctional clenching and related temporomandibular disorders.The fabrication of nightguards and dayguards usually requires two dental appointments. At the first appointment, accurate alginate impressions are made. The alginate impressions are poured in Class I dental stone to create diagnostic casts. A centric relation bite registration is made to enable placement of the casts on an anatomic articulator that simulates tooth occlusion and TMJ positioning. The articulated models are sent to the dental laboratory for fabrication of the appliance by a dental technician.
Periodontal Splints
Periodontal splints are used for the stabilization of mobile teeth to prolong their presence in the mouth.
Sleepguards
Sleep disorders comprise a group of medical conditions. Snoring and obstructive sleep apnea (OSA) are two sleep disorders recognized by the dental hygienist for referral. Snoring and OSA are treated intraorally with a sleepguard oral splint, also called a snoreguard. Snoring is successfully managed by the wearing of a snoreguard appliance. Mild to moderate OSA patients have the choice of a snoreguard appliance as one of several treatment options. The snoreguard is constructed of hard acrylic resin and is designed to fit over the maxillary dentition to reposition the mandible. It repositions the mandible to prevent the tongue from obstructing the oropharynx, thereby making it a splint because it stabilizes the mandible.
Surgical Splints
Surgical splints are orthopedic devices used to cover the graft donor site for protection of the palate after the harvesting of soft tissue for periodontal soft-tissue graft surgery.
CLIENT EDUCATION tIPS
LEGAL, ETHICAL, AND SAFETY ISSUES
In some states, dental hygienists can legally make preliminary dental impressions. It is the legal responsibility of the dental hygienist to practice within the scope authorized by state law. Impression trays can be a source of cross-contamination. They are classified as semicritical instruments because they become contaminated by saliva and must be either discarded if disposable or sterilized for reuse. Impression trays trial-sized in the client's mouth but not used for the impression are either discarded if disposable or sterilized for reuse. Anything that comes into contact with contaminated impression trays must be sterilized (e.g., spatulas, bowls, and measuring devices used for mixing alginate). Countertops are disinfected using an Occupational Safety and Health Administration (OSHA)–approved surface disinfectant after the impression procedure has been completed and the client has been dismissed (see Chapter 7). Product manufacturers are required to provide written handling instructions called Material Safety Data Sheets (MSDSs) according to OSHA laws. MSDS warnings for alginate include eye irritation, congestion, and irritation of throat, nasal passages, and upper respiratory system. Unnecessary exposure to alginate powder should be avoided. Health conditions aggravated by exposure to alginate powder include the lung diseases bronchitis, emphysema, asthma, and silicosis. Long-term exposure to alginate may produce silicosis because of the crystalline silica element of the diatomaceous earth ingredient. Dustless alginate powder is now available. After an alginate impression is removed from the mouth, it is a biohazardous material. Because they are contaminated with the blood and saliva of the client, alginate impressions must be disinfected according to the manufacturer's recommendations and labeled as biohazardous material before being sent to a dental laboratory. The protocol for disinfection of a dental impression based on the manufacturer's recommendations needs to be followed.KEY CONCEPTS
A dental impression is used to create an accurate three-dimensional reproduction of the teeth and surrounding tissues called a diagnostic cast, study model, or study cast. There are three main types of dental impressions used in dentistry: a preliminary impression, a final impression, and a bite registration. Loading and inserting the tray should take no more than 1 minute. The objective is for the impression material to reach the gel state in the client's mouth. A maxillary impression tray is seated in a posterior to anterior direction to avoid triggering the gag reflex, prevent the excess material from going toward the back of the mouth, and move the impression material forward, ensuring complete coverage of the oral structures with alginate. Stone casts and plaster models are made of gypsum products; stone casts are stronger than plaster models. Mouth guards should be recommended to clients at risk for sports-related dentofacial injury. Tooth avulsion, facial bone fractures, temporomandibular joint (TMJ) injuries, and concussions can be reduced by using properly fitted professionally manufactured mouth guards. Signs and symptoms of bruxism include abfraction lesions, exostosis, gingival recession, headaches, impaired hearing, TMJ noise with movement, limited range of motion of jaw, linea alba, tenderness of muscles of mastication, pain, periodontal pockets, tinnitus, TMJ disorders, tooth fracture, tooth mobility, tooth sensitivity, and tooth wear facets (attrition). Bruxism is treated with reversible and irreversible therapies. Reversible therapies include biofeedback, drug therapy, appliance therapy, exercise therapy, physical therapy, heat and cold therapy, mandibular relearning therapy, and psychotherapy. Irreversible therapies include orthognathic surgery and occlusal equilibration. Sleep disorders are treated in the dental practice using a snoreguard. Snoring is reduced while a snoreguard is worn owing to the repositioning of the mandible and tongue. Mild to moderate obstructive sleep apnea can be treated with the use of a snoreguard, which repositions the mandible and tongue.CRITICAL THINKING EXERCISES
Refer to the Procedures Manual where rationales are provided for the steps outlined in the procedures presented in this chapter.
1. Anusavice K.J. Phillips' science of dental materials, ed 11. St Louis: Saunders, 2003.
2. American Dental Association (ADA): ADA website. Available at: www.ada.org. Accessed July 2007.
3. Academy for Sports Dentistry: Welcome to the Academy for Sports Dentistry. Available at: www.sportsdentistry-asd.org. Accessed January 2007.
Visit the  website at http://evolve.elsevier.com/Darby/Hygiene for competency forms, suggested readings, glossary, and related websites..