chapter 7 Film Processing
Upon completion of this chapter, the reader should be able to do the following:
Accelerators: Chemicals that increase the pH of the developer and subsequently increase the rate of developing.
Acidifiers: Compounds that accelerate the fixing process and neutralize the alkaline developer.
Buffers: Compounds in the fixer that maintain proper solution pH.
Clearing agents: Also called fixing agents; a portion of the fixer that dissolves and removes the unexposed silver halide crystals from the film emulsion.
Developer: A chemical solution that converts the latent image on a film to a visible image by converting the exposed silver halide crystals to black metallic silver.
Developing agents: Chemical solutions used to convert a latent image on x-ray film to a visible image.
Fixation: The process by which the unexposed silver halide crystals are removed from the film and the gelatin is hardened.
Fixer: The chemical solution used during fixation.
Hardeners: Chemicals added to the fixing solution or to developers in automatic processors to prevent excessive emulsion swelling.
Latent image: An invisible image on unprocessed x-ray film after it has been exposed to ionizing radiation or light.
Preservatives: Chemicals that prevent rapid decomposition of the developer or fixer.
Restrainers: Often potassium bromide and potassium iodide are used as restrainers or antifoggants. Restrainers limit the action of the developing agent to the exposed silver bromide crystals in the film.
Reticulation: A darkroom artifact produced by variable chemical temperatures that cause irregular expansion and contraction of the film emulsion, resulting in a mottled density appearance.
Rinse bath: A solution (usually water) used to remove excess developer solution before the film is placed in the fix tank.
Solvent: Water; dissolves the ingredients of the developer or fixer and diffuses the chemical into the emulsion of the film.
Stop bath: A solution of acetic acid and water used to “stop” the development of the x-ray film by rapidly neutralizing the alkaline developer solution.
INTRODUCTION
Proper film processing is vital to the production of a quality radiograph. Many believe that the use of appropriate exposure factors is the only component necessary to produce a “good” film. This is far from the truth. The production of a good-quality radiograph depends on many factors, one of which is film processing. When manual processing was the norm in human hospitals, it was said that 90% of all poor-quality radiographs were the result of poor processing. This is still relevant in veterinary radiography. One goal of the radiographer is to eliminate all possible pitfalls that may inhibit quality. A common area for pitfalls is the darkroom. Although quality does not begin in the darkroom, it could possibly end there.
The basic principles of radiographic processing have remained the same over the years, but technology has made remarkable advances toward automation. However, although an increasing number of veterinary practices use automatic film processing, the majority still process radiographs by hand with tanks to hold the processing chemicals. Both methods of processing are discussed in detail in this chapter.
THE DARKROOM
Three qualities constitute a good darkroom. A darkroom must be (1) clean, (2) organized, and (3) lightproof. Although individual darkrooms may vary in design, all should possess the same qualities. A darkroom should be separate from the radiographic suite and should be used for only one purpose: processing exposed radiographs. Ideally, the room dimensions should be no less than 6 × 8 feet (2.6 × 2 m), and the layout should reduce the possibility of film damage. Most of the work in the darkroom is performed with minimal illumination. Therefore it is important that the darkroom be organized so that all of the equipment can be located quickly and easily. And, of course, cleanliness is crucial. This is the only room where both the intensifying screens and the x-ray film are exposed to the air. If the countertops are dirty and soiled with chemicals, it is easy for both to be sucked into the cassette as it is opened, possibly causing damage to the intensifying screens.
Another factor that is often overlooked in the darkroom is climate control. Because the film emulsion is extremely sensitive to heat and humidity, good ventilation and temperature control are mandatory. A darkroom should be relatively cool and should have low humidity. The specific temperatures and humidity for proper film care are described in Chapter 6.
Organization
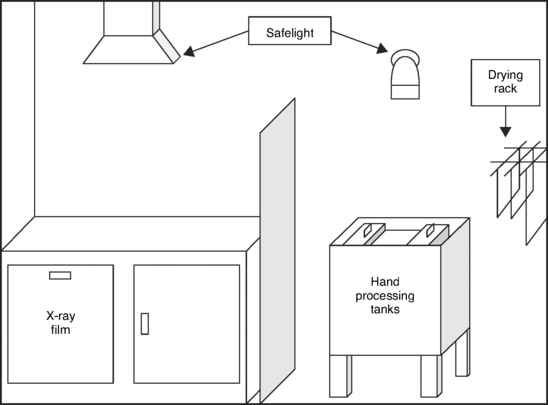
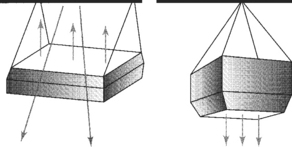
There should be essentially two sides to the darkroom: a dry side and a wet side (Fig. 7-1).
Dry side.
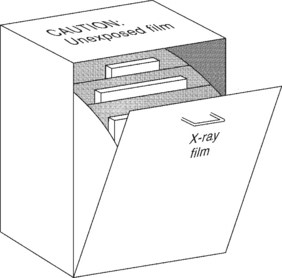
The dry side of the darkroom is where the cassettes are unloaded and reloaded. A countertop or tabletop large enough to accommodate the largest cassette in the open position should be available. The tabletop should be constructed of a material that allows frequent cleaning, which is necessary to reduce the source of darkroom artifacts that can potentially get on the film. It must be impossible for chemicals to splash into the dry side. At no time should anything “wet” be brought to the dry side. It is customary to store film under the dry table, either in a cupboard or in a film bin, to allow easy access for reloading cassettes (Fig. 7-2). Film hangers for each size of film should be hung above the table on the dry side on an appropriate bracket. Brackets can be purchased commerially or constructed inexpensively using large hooks found at any hardware store.
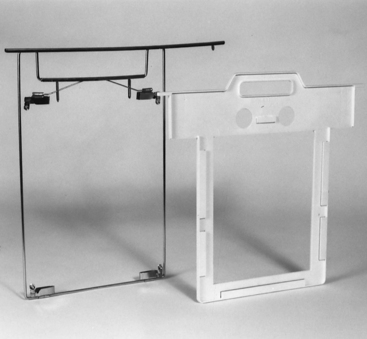
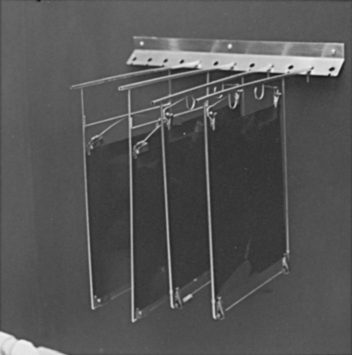
Film hangers are available in two designs: channel hangers and clip hangers (Fig. 7-3). Channel hangers tend to retain water and chemicals and need special cleaning and drying to prevent contamination of the dry side. Films must also be removed from the channel hangers to be dried. However, clip hangers are more fragile than the channel type. When the clips are used frequently over a period of time, they become weak and lose the ability to “stretch” the film. The clips also puncture the four corners of the film, which, when filed, can scratch other films in the same envelope. It is important to cut off the corners of films processed with clip hangers before filing to prevent this. When more than one film is processed at the same time in the tanks, the clips on the hangers can scratch neighboring films.
Wet side.
The wet side of the darkroom is where the actual chemical processing is performed. A darkroom that hand processes films usually consists of three tanks containing developer, water, and fix solutions. Various tank designs are available. The three tanks can be individually freestanding and warmed as required by an immersion heater (placed in the developer). Alternatively, the developer and fix tanks can be placed in one large tank filled with thermostatically controlled water. The latter system is preferred and can be purchased as a complete package constructed with 3- or 5-gallon (9- or 22-L) individual tanks. The water tank is usually four times the size of the smaller developer and fix tanks. The central water tank should have a circulating water system to provide a way to regulate temperature and rinse chemicals off the films during the processing procedure. A thermometer is an essential piece of equipment for the processing tanks because radiographic film is developed for a specified time on the basis of the temperature of the chemicals.
The wet side should also have a film-drying area consisting of either a drying rack or a drying cabinet. The drying rack should be placed in a dust-free area to prevent artifacts from sticking to the wet films. A drying cabinet is a heated forced-air unit that hastens the drying process. A viewing screen is also recommended on the wet side to evaluate radiographs. A “wet” film can be viewed, and, if a second radiograph is required, the radiographer can immediately evaluate the error. This is best achieved in the darkroom before too much time has elapsed.
Darkroom Lightproofing
As mentioned earlier, one criterion of a good darkroom is that it be lightproof. Light leaks in a darkroom can cause significant film fog; therefore taking appropriate measures to lightproof the darkroom is imperative. Lightproofing a room is more difficult than may be expected. The first step is locating the light leaks. Small light leaks may not be perceptible until the eyes have acclimated to the dark, and it may be necessary to spend 5 minutes waiting for the eyes to adapt. To achieve a truly lightproof room, a number of tasks may be necessary.
The entrance to the darkroom is a common site for light leaks. A double-door system or revolving door is preferred but not always practical in a veterinary practice (Fig. 7-4). The first step in lightproofing a standard door is to fit it tightly into its frame against strips of felt or rubber molding. Weather stripping is also useful around doors to prevent the entrance of light. Light entering from underneath the door can be prevented by a vapor seal designed specifically for the bottom of a door. A sliding bolt lock or doorknob lock prevents someone from accidentally entering the darkroom at an inopportune time. A suspended ceiling can be a radiographer’s nightmare. It may be necessary to place a large black sheet of plastic above the ceiling tiles to prevent light in adjacent rooms from entering through the seams.
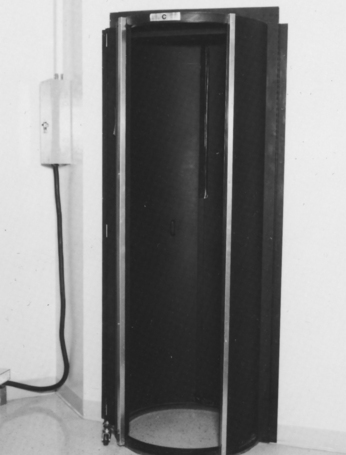
Figure 7-4 A revolving door for the darkroom. This door is an effective means of entering and exiting the darkroom without risking exposure of the film to light.
It is a common fallacy that the walls of a darkroom should be “dark.” The opposite is true. The walls of the darkroom should be painted white or cream with a good-quality, washable paint. By painting the walls a light color, more reflection of the safelight is produced, providing a more visible work environment. If the quality and intensity of the light are “safe,” the illumination reflected from any surface also is “safe,” regardless of the color of that surface.
Darkroom safelight.
Correct safe lighting in the darkroom is crucial. A “safe” light means that the light produced will not affect the film. Radiographic film is sensitive to ultraviolet light. Safelights use a small-wattage bulb and a special filter to eliminate the light from the blue and green spectrum. The light bulb should be 15 watts or less. The filter varies by manufacturer. The most common types are a brown filter (Wratten 6B, Kodak) for blue-light-sensitive film and a dark-red filter (Wratten 6BR or GS-1) for green-light-sensitive film. The dark-red filter is recommended because of its versatility: both green-light- and blue-light-sensitive film can be used in this lighting.
Safelights should be positioned so that darkroom work can be performed without fumbling. There are two types of safe lighting: direct and indirect (Fig. 7-5). Direct lighting is a diffused light that shines directly over a work area such as the dry or wet side of the darkroom. Indirect lighting is a filtered light directed toward the ceiling and reflected over the entire room. Indirect lighting is often combined with direct lighting. At no time should the safelight be closer than 4 feet from a work area. A safelight that is too close, has a too-high wattage bulb, or has incorrect filtration may cause film fog.
The efficiency of a safelight can be tested; this is discussed in Chapter 10. Remember, no light is “safe” if the film is exposed to it for a prolonged period. Therefore the film bin should be open only when removing or replacing film. Fogging will result even with a safelight if the bin is left open or if film is left on the counter.
FILM-PROCESSING SOLUTIONS
Film processing, whether it is manual or automatic, comprises five basic steps: (1) developing, (2) rinsing or stop bath, (3) fixing, (4) washing, and (5) drying. The first step in learning how to process a film is a basic understanding of the processing solutions. The chemical solutions can be purchased in a number of forms. Powders and liquid concentrates are those most commonly used in veterinary practice. Water is added to the concentrates according to the manufacturer’s instructions to produce the proper amount of solutions for the processing tanks. Preparing the chemicals correctly is important or the resulting solution may adversely affect the radiographic product.
Every effort should be made to keep the chemical solutions at a specified temperature—any variance may adversely affect the radiographic product. At temperatures below those recommended, some of the chemicals may become sluggish in action and may produce an underdeveloped or underfixed radiograph. At temperatures much above those recommended, the chemical activity is too high for manual control.
Keep in mind also that all of the chemical solutions should be the same temperature. If the chemicals vary greatly in temperature, film reticulation can result. Reticulation appears as a mottled density on a finished radiograph and is caused by irregular expansion and contraction of the film emulsion.
A quality assurance program should be established and maintained in the veterinary practice. This program allows reproducibility, and it gives the radiographer confidence in the exposures used on each radiograph (see Chapter 10).
The Developer
The developer is a chemical solution that converts the latent image on a film to a visible image. The primary function of the developer is to convert the exposed silver halide crystals to black metallic silver.
The developing time usually is specified by the chemical manufacturer. Keep in mind that the developer temperature affects the developing time. Time-temperature developing is preferred over visual inspection when using the manual processing technique. This manual inspection is called “sight developing,” which consists of increasing or decreasing the time according to visual inspection of film density while the film is still in the tank. This technique requires attention and skill and is often subject to error. Sight developing should be avoided if at all possible.
The developer consists of developing agents, accelerators, preservatives, restrainers, hardeners, and a solvent.
The Rinse Bath
After a film has been in the developer, it retains a substantial amount of developer in the gelatin (approximately 60 mL on a 14- × 17-inch film). If the film were transferred directly into the fixer, the alkaline developer would neutralize the acid of the fixer. The rinse bath serves to stop the developing process, rinse the developer from the film, and prevent carryover contamination to the fixer.
Normally, the rinse bath consists of circulating water in which the film is rinsed for 30 seconds. A chemical solution such as acetic acid and water can be used as another method of stopping the development procedure. This chemical solution is called a stop bath. In automatic processing, a rinse or stop bath is not necessary because the rollers tend to remove excess developer from the film before it reaches the fix tank.
The Fixer
After a film has been properly developed and the exposed silver halide crystals have been converted to metallic silver, one other step involving the silver crystals remains. The unexposed silver halide crystals remaining on the film are unaffected by the developer solution and must be removed. If these silver crystals were to remain on the film, they would discolor and darken with exposure to light.
The fixer serves two basic purposes: (1) it clears the unexposed silver halide crystals from the film, and (2) it hardens the gelatin coating so that it can be dried without damaging the film surface. This process is known as fixation. The general guideline is that the film should be fixed for twice the development time to ensure maximum hardening of the emulsion. (Note: A radiograph can be viewed briefly after it has been in the fix for 1 minute and then returned after evaluation.)
The fix solution consists of clearing or fixing agents, preservatives, hardeners, acidifiers, buffers, and a solvent.
The Wash Bath
The wash portion of the development procedure is vital to a quality radiograph. Unfortunately, the value of the wash procedure is often underestimated and inadequately performed. The purpose of the wash is to remove the processing chemicals from the film surface. If a film is not washed properly for a long enough period, the image will eventually discolor and fade.
Films should be washed in circulating water so that both surfaces of the film receive fresh water continuously. In manual processing, the average suggested wash time is 20 to 30 minutes with periodic agitation or water circulation. In automatic processing, the water system of the processor keeps a constant flow of temperate water through and around the wash rack and film.
Wetting Agent
A common problem of drip-drying films is the possibility of water spots or other drying streaks. The drying process can be hastened and some artifacts avoided by using a wetting agent bath known as a surface-tension reducing agent (a detergent). These agents are commercially available.
Solution Replenisher
In manual processing, chemical depletion is a natural result of chemical carryover into adjacent tanks. As much as 60 mL of developer can be “carried” on a 14 × 17-inch piece of film into the rinse bath. Both the developer and the fixer need frequent replenishment to keep chemicals at a proper level and cover the entire film.
Replenishment solutions are available in powder and liquid concentrate form. The liquids are easier to work with because they eliminate the problem of powder settling on the countertops of the darkroom. Generally, the replenisher has a higher concentration than the original solution to maintain chemical potency.
Solution Replacement
Exhausted processing chemicals (or, more likely, oxidation/deterioration of chemicals in limited-use situations) are a primary cause of poor-quality radiographs. The developer and fixer solutions are often the last elements checked when a film has poor quality, yet exhausted chemicals are the most common cause. Chemicals that have lost their potency will produce radiographs that have increased film fog and decreased contrast and density.
Determining the need for developer and fixer replacement is based on a couple of clues. In general the developer solution turns from brown to green when it needs to be changed. The developer usually requires less changing than the fixer. Because each film brought into the fix tank brings with it a certain amount of water from the rinse tank, the fix tends to become diluted. The activity of the fix solution, however, cannot be determined by a change in color. The fixer needs to be changed when the “clearing time” is greater than 2 to 3 minutes. Clearing time refers to the amount of time it takes the fixer to clear the unexposed silver halide crystals off the film. If all the silver complexes have not been removed, the film will fog or even turn black when exposed to light. In general chemicals in hand-processing tanks should be changed every 4 to 6 weeks.
Biologic Growth
A common problem encountered in hand-processing tanks is the growth of bacteria and fungi, particularly during the warm seasons of the year. Bacterial and fungal growth can produce slime deposits that can build up in the tanks. The bacteria, fungi, and occasional algae originate from the air, personnel, or incoming water supply. If not controlled, they can cause corrosion of the metal surfaces, as well as artifacts on the films. The growth rate of the organisms is increased in stagnant water.
Biologic growth can be inhibited by good housekeeping. When the chemicals are changed and the processing tanks are drained, they should be scrubbed and quite possibly soaked with 1% chlorine bleach and water. The wash tank of automatic processors should be drained at the end of the day to reduce biologic growth. A simple filtering system can prevent organisms from entering through the water line.
FILM-PROCESSING TECHNIQUES
As mentioned earlier, radiographic film can be processed in one of two ways: manually or with an automatic film processor. The manual process takes approximately 1 hour to produce a finished product. With an automatic processor, a film can be processed and dried in as little as 90 seconds. Both methods produce a quality radiograph, and it is a matter of preference as to which method best suits the clinical situation.
Manual-Processing Procedure
The manual-processing procedure (by hand) should be standardized as much as possible. By establishing a routine and following it, mistakes made in the darkroom are less likely. Normally, the developing tanks are positioned so that the processing procedure starts at the left and ends at the right. In other words, the developing tank is on the left, the wash tank in the center, and the fix tank on the right (Fig. 7-6).
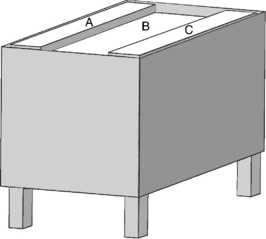
Figure 7-6 Bird’s-eye view of hand-processing tanks. The tank labeled A is the developer, B is the rinse and wash tank, and C is the fix tank.
Manual processing is not a difficult procedure, and the technique can be learned in a relatively short period.
Step 1—Preparation.
Before the film is processed manually, the chemicals should be at the proper temperature (normally 20° C [68° F]) and should be stirred. Because the chemicals are suspensions, they tend to settle to the bottom of the tanks (Fig. 7-7). The paddles used to stir should not be shared between tanks; the developer paddle should never go into the fix tank and vice versa. (Note: Even slight fixer contamination in the developer can render it useless.) At this point, the white lights should be turned off and the safelight turned on.

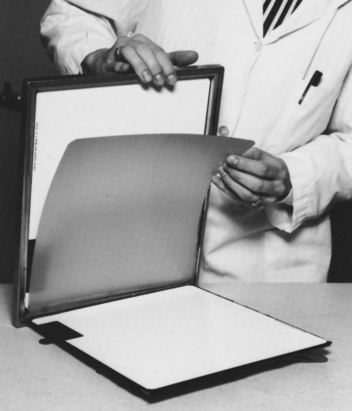
Step 2—Unloading the cassette.
Care should be taken when removing the film from the cassette. Fingernails should not be used as a tool to remove the film from the cassette corners. This technique can damage the sensitive intensifying screens. The proper method of removing the film is to open the backplate of the cassette and gently shake the top so that the film can be grasped by the corner between the thumb and the forefinger (Fig. 7-8). The x-ray film should be handled by the corners or edges only. The cassette should be closed while it is being labeled and loaded onto the film hanger. Film labeling is discussed at the end of this chapter.
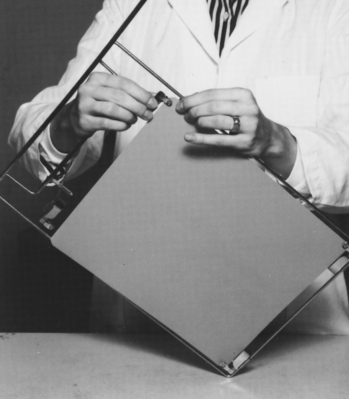
Step 3—Loading the film on a hanger.
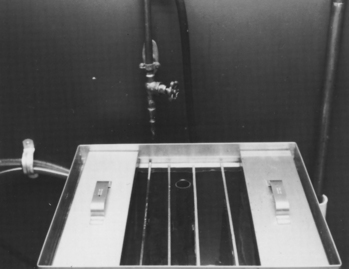
A tension clip hanger is loaded by inserting the film into the bottom, stationary clips first, then rotating the hanger right side up and inserting the film into the movable spring clips (Fig. 7-9). The film should be stretched so that it is taut enough to “bounce a coin on it.” Taut mounting will prevent the film from touching adjacent films or walls in the processing tank.
If a channel hanger is used, it should be held in one hand while sliding the film into the channels with the other. All sides and corners of the film should be checked for correct placement in a channel. Once the film is in position, the top hinge can be closed.
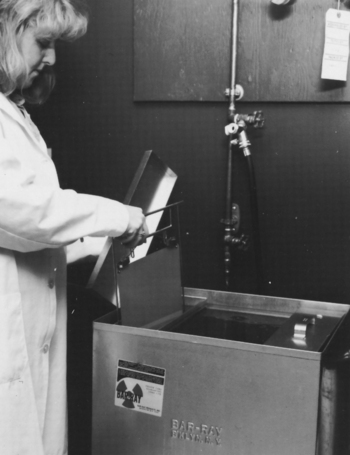
Step 4—Developing the film.
The film is immersed in the developing tank, and the hanger is agitated two or three times to remove any air bubbles from the film surface (Fig. 7-10). The lid on the developer tank is replaced, and the timer is set for the appropriate development time. At this juncture, the hands should be dried and the cassette reloaded with film. Care should be taken in the reloading process. The replacement film should meet all four corners of the cassette before closing so that no portion of the film is compressed in the cassette seams.
Step 5—Rinsing the film.
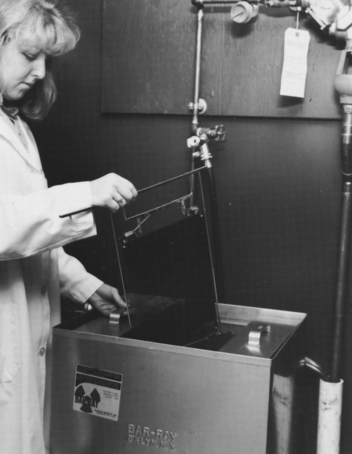
When the timer sounds, the film should be removed from the developer rapidly to avoid excessive dripping back into the developer tank (Fig. 7-11). For fast drainage, the hanger should be tilted so that the chemical carryover (spent developer) goes into the rinse or stop bath. Preventing the used developer from adding volume to the developer tank assists accurate tank replenishment. The film is immersed in the rinse bath and agitated for 30 seconds.
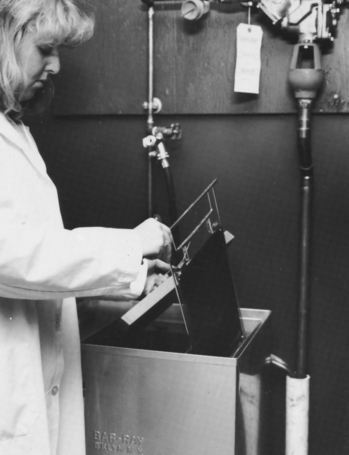
Step 6—Fixing the film.
After the film has been in the rinse tank for 30 seconds, it should be drained of excess water and immersed in the fix tank (Fig. 7-12). The film is agitated two to three times to remove any air bubbles on the film surface, and the timer is set for the appropriate duration. The duration of the fixation process is usually twice the clearing time and until after the film has lost its “milky” appearance. The milky appearance refers to the unexposed silver halide crystals that remain on the film. Once the silver is removed, the image will appear clear or transparent. After the film has been in the fix for 1 minute, it may be viewed briefly to evaluate the quality of exposure and positioning. Putting the film back into the fix tank after evaluation for a total of at least 10 minutes is important to allow maximum hardening of the film surface.
Step 7—Washing the film.
The film is removed from the fix quickly so that chemical carryover (spent fixer) enters the wash tank. As with the developer, preventing carryover from entering the fix tank allows for accurate fix replenishment. The film should wash for 20 to 30 minutes (Fig. 7-13). The wash time depends on the water flow and exchange rate of the bath. The flow should have approximately eight complete changes per hour.
Step 8—Optional final rinse.
If facilities permit, a wetting agent can speed the drying time and prevent water marks on the film surface. The film is briefly dipped in the wetting agent before drying (Fig. 7-14).
Step 9—Drying the film.
The film should be dried in a dust-free area to prevent artifacts from sticking to the wet film surface. If channel hangers are used, the films should be removed from the hangers and hung with clips on a tension wire (similar to a clothesline). Tension clip hangers can be hung on a drying rack (Fig. 7-15).
The films should be well separated and never allowed to touch each other while wet. When the films are dry, the sharp points on the corners of those processed with tension clip hangers must be trimmed before filing. Trimming the sharp points prevents scratching the emulsion of adjacent films. The films can now be inserted into the appropriately labeled envelope.
Automatic Processing
Automatic processing involves the same basic principles as manual processing: the film is developed, fixed, washed, and dried. However, automatic processing has two major advantages over the manual method: (1) It is a highly standardized procedure with consistent quality, and (2) it can produce a dry radiograph in a short time period. In a practice or clinic that has a high radiographic output, the amount of saved labor hours is remarkable. However, the cost of an automatic processor is a primary factor that precludes many veterinary practices from having this convenience. For a low-volume veterinary practice, the expense of an automatic processor may not be justified.
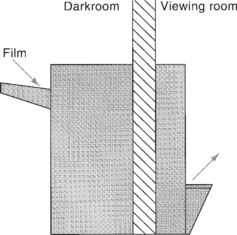
A darkroom is still necessary for automatic processing, except that a much smaller space is required. A counter is necessary on the dry side to unload and load the cassettes, but the wet side consists of the processor only. Because the processor has its own drying mechanism, which uses heated forced air or infrared methods, an exhaust system or extractor fan is necessary to prevent excessive heat and fume accumulation while in operation. Some automatic processors are designed to protrude through the darkroom wall so that a special exhaust system is unnecessary (Fig. 7-16). In this case the film is introduced into the processor in the darkroom, and a finished, dry film exits in the adjacent room.
HOW AUTOMATIC PROCESSORS WORK
Automatic processors involve roughly the same routine as manual processing, except they operate at much higher temperatures and have specially formulated chemicals to speed development. The film is transported through the processor by a series of rollers similar to a conveyer belt in a factory. The rollers are driven by a motor and move the film at a constant speed (Fig. 7-17). The film must be transported at a controlled speed to ensure that it is developed, fixed, and washed for the proper amount of time.
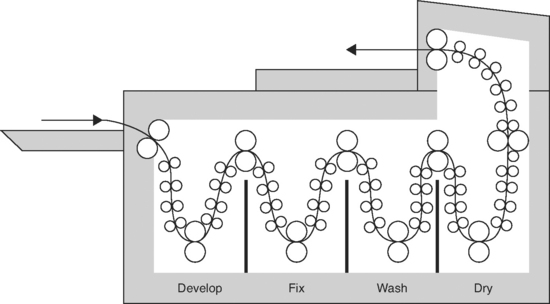
Figure 7-17 Cross section of an automatic processor showing its series of tanks and rollers. The rollers act as a conveyer belt, carrying the film from the developer, to the fix, to the wash, and finally to the drying racks.
The exposed film is fed onto the tray of the machine and is then transported through the chemical baths and dryer by the roller assembly. In order to speed development, the rinse between the developer and fix is eliminated. The carryover chemicals are removed by compression as the film passes through squeegee rollers placed between the developer and the fix baths.
PROCESSING CHEMICALS
The solutions are kept in peak condition because fresh chemicals are replenished at a predetermined rate on the basis of machine usage. Without replenishment, chemical activity of the processing solutions would decrease with use, as in manual processing. Accurate replenishment is essential to proper processing of film and to long life of the solutions. Generally, when the film is fed into the processor, pumps are activated to infuse replenisher from storage tanks to the baths inside the machine. The added replenisher is blended with the existing processing solutions by the recirculation pumps. Recirculation of the developer and fixer has two functions: to thoroughly mix the solutions and to help maintain the proper temperature and chemical activity. Excess processing solutions flow over the top of the tanks into the drain. Careful observation of the external replenishment tanks is necessary to maintain adequate chemical levels within the machine.
The temperature of the chemicals is constantly monitored and controlled within fine limits by a thermostatically operated water system. As in manual processing, the purpose of the water system is not limited to washing the films. Circulating water controls the temperature of the processing chemicals as well.
The method of water temperature control varies with the design of the processor. Hot and cold water may be blended to a proper temperature by a thermostatic mixing valve before the water enters the machine. Other processors are available with cold incoming water that is electrically heated to the desired temperature.
PROCESSOR MAINTENANCE
As with all mechanical devices, automatic processors can break down and need repair. In order to minimize the need for frequent repairs, proper maintenance is essential (Fig. 7-18). Recommendations for cleaning and maintenance procedures are furnished by the processor manufacturer and may include the following:
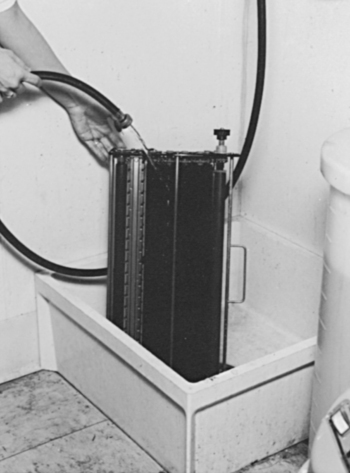
Figure 7-18 Processor maintenance is imperative to ensure proper film processing. The roller racks should be removed from the processor on a routine basis (at least monthly, depending on its use) and rinsed with warm water to remove any debris.
Although service engineers usually come as quickly as possible in the event of a processor breakdown, a backup processing system is recommended. It is worthwhile to have the necessary chemicals and containers available so that emergency hand processing can be performed if required.
SILVER RECOVERY
In the present age of environmental awareness, recycling has become a national standard. Silver is a valuable natural resource and should be recycled whenever possible. In fact, most states in the United States require silver recovery as part of pollution control. All heavy metals are considered pollutants and cannot be disposed of in a septic system. Silver recovery is not only environmentally wise but economically prudent.
During the processing procedure, the silver contained in the x-ray film emulsion either is transformed into black metallic silver in the developer solution or is removed by the fix solution. These two byproducts, the fix solution and old radiographs, contain silver that can be recovered.
Three methods of silver recovery from the fix solution exist: (1) metallic replacement, (2) electrolytic recovery, and (3) chemical precipitation.
Metallic Replacement
The metallic replacement method of recovery removes the silver from the exhausted fix by replacing the silver in the solution with another metal. The metal is normally iron in the form of steel wool. The steel wool dissolves in the acid fix solution and physically replaces the suspended silver, thus allowing the silver metal to precipitate to the bottom of the recovery unit.
A metallic replacer unit usually consists of a cartridge loaded with steel wool. The fix is poured into a top receptacle and allowed to “trickle” through the steel wool (Fig. 7-19). The fix containing no silver can then be discarded (according to local pollution control ordinances). Beware, the acid from the fix solution can harm pipes if water flow is low.
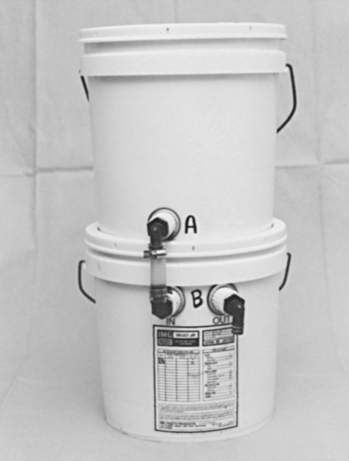
Figure 7-19 A Vault Junior trickle silver recovery system. The exhausted fix is poured into empty tank A and “trickled” through tank B. The fix containing no silver can then be discarded.
Up to 99% of the available silver can be recovered with the metallic replacement method, but the purity of recovered silver is low. This method is relatively inexpensive and is recommended for low-volume hand-processing systems.
Electrolytic Recovery
Electrolytic recovery involves two electrodes (an anode and a cathode) placed either directly into the fix tank or into a separate holding container for the exhausted fix solution. As an electric current passes between the two electrodes, the silver is attracted to the cathode and the silver is plated (collected) on the cathode. The advantage of electrolytic recovery is that the fix solution may be reused; however, this requires much chemical analysis. This method of reclamation recovers high-purity silver but is generally less efficient than metallic replacement.
Chemical Precipitation
The chemical precipitation technique of silver recovery involves addition of more chemical compounds to precipitate the silver from the fix solution. As the chemicals are added to the fix, the silver floats to the bottom of the receptacle and forms a sludge. The sludge is then filtered, dried, and packed to be sold to a refiner.
Gold and silver refiners and dealers often purchase exhausted fix solution and old radiographs to reclaim the silver that they contain. Companies that purchase fix solutions and discarded radiographs usually are listed in the telephone directory’s Yellow Pages.
Before radiographs can be sold for reclamation, however, the veterinary practice is legally required to keep them for a specific length of time. The legal requirement for retaining radiographs is 7 years, but it is advisable to keep them until the patient is deceased.
FILM IDENTIFICATION
Every radiograph should be properly labeled with essential information so that it can be identified at a later date. In many instances, additional radiographs must be taken to evaluate healing or advancement of disease. Without proper labeling, progressive evaluation would be difficult. There is also the legal aspect to consider. If a medicolegal problem were to arise, a radiograph without proper labeling is of little value in a court of law. The only legal labeling of a radiograph is what is in the film emulsion.
Several methods can be used to label a radiograph, and it is a matter of personal preference which method is adopted. All labeling systems should provide the same basic information: (1) name and address of the hospital practice or veterinarian; (2) date the radiograph was taken; and (3) patient identification including name of the owner and patient name, age, sex, and breed.
Lead Markers
One of the simplest methods of film labeling is with lead letters and numbers that are placed directly on the cassette before exposure. The lead digits can be placed in a holder or taped directly to the cassette (Fig. 7-20). The lead absorbs the primary radiation from the x-ray beam so that the film directly under the lead is left unexposed and appears transparent. It is possible to purchase prepared holders that include the name and address of the clinic spelled out permanently in lead letters. With a permanent prepared holder, only the date and identification of the patient must be changed.
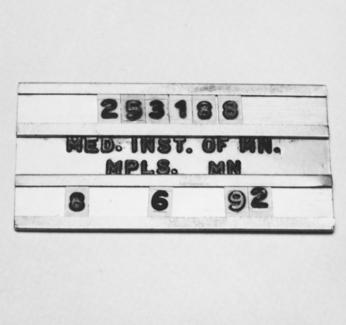
Figure 7-20 Lead letters placed in a holder designed to be placed on top of a cassette for film identification.
The disadvantages of this method of labeling are that it can be time consuming and that the small lead digits are easily lost. In addition, it limits tight collimation because the area outside the patient must be exposed to provide an image of the label.
Lead-Impregnated Tape
Another method of labeling a radiograph during exposure is with disposable lead-impregnated tape. Writing on the tape with a ballpoint pen or pencil displaces the soft lead, leaving indentations. These indentations create a difference in density that allows x-rays to penetrate to the film. The tape is then placed on a holder that has the name and address of the facility permanently attached (Fig. 7-21). The lead tape can be used to label left or right, time intervals for a series of radiographs, and markers to indicate the direction of the x-ray beam for oblique views.
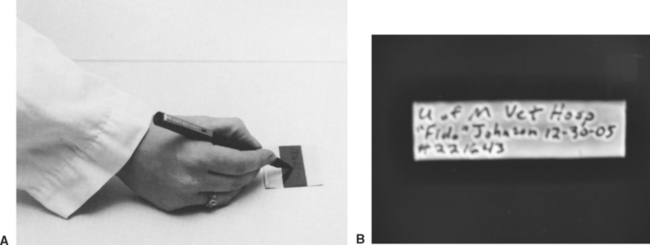
Figure 7-21 Lead-impregnated tape. A, The lead is displaced by means of a pointed writing instrument, leaving indentations. B, After the information is written, the tape is adhered to the cassette and exposed during the radiographic procedure.
The lead-impregnated tape is available in 50- or 100-foot rolls or in precut 3-inch strips. The manufacturer of the tape will usually supply the lead-tape holder with the specified facility information.
Photoimprinting Label System
One label system uses a lead blocker placed on the outside of the cassette, an identification card, and a photimprinter. The lead blocker prevents exposure to a 3 × 7 cm area, to which identification can be exposed in the darkroom. Following the removal of the film in the darkroom, but before processing, a typed or written card is placed between the unexposed portion of the film and a light source (photoimprinter). The light is “flashed,” and the written information on the card is recorded on the previously unexposed area (Fig. 7-22).
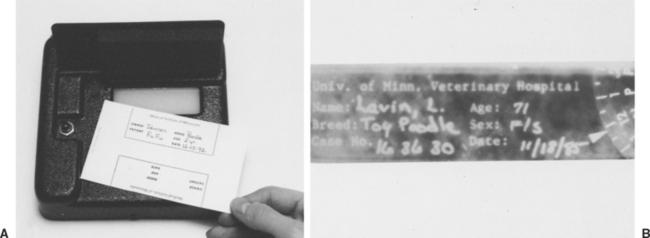
Figure 7-22 Film identification method known as photoimprinting. A, The identification card is placed on the photoimprinter with the film placed over the card. The imprinter is then closed, and a light is “flashed” under the card, which exposes the information onto the film. B, After the film is processed, the identification can be clearly seen in the corner of the film.
New cassettes can be purchased with the lead blocker already installed, or 3 × 7 cm pieces of lead can be purchased and installed on the cassette face. It is important that the lead blockers be placed in the same corner of all the cassettes. This consistency will prevent “flashing” the wrong corner in the darkroom. Caution should also be taken to ensure that no anatomic area of interest is positioned in the blocker area, where no exposure will be made.
Miscellaneous Markers
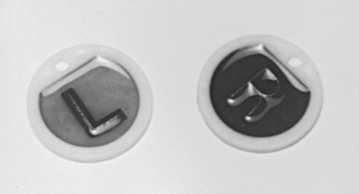
Right (R) and left (L) markers are essential to identify a right or left limb or to identify the right or left side of the thorax or abdomen (Fig. 7-23). Markers may also be necessary at times to identify a unique view, orientation, or beam direction. Labeling the front and rear limbs may be necessary, particularly in equine radiography, because the anatomic structures of the distal limbs of the horse are virtually identical. Time-sequence labels are also available for special procedures to indicate time elapsed after the administration of radiopaque contrast media.
Other Identification Methods
If identification was forgotten before exposure, it is possible to write on the film before development with a pencil or other pointed device. The pressure from the pointed device will distort the film emulsion and record the information, which will remain on the film throughout the processing procedure. Scratching the information into the emulsion while it is still wet is also possible. Other methods include a permanent marker or a piece of adhesive tape on the dry film.
All of these identification techniques are considered temporary and are undesirable for routine film identification. They are not considered adequate markings should legal proceedings arise regarding the patient.
FILM FILING
An organized filing system is mandatory in any veterinary practice. It would be pointless to spend time correctly exposing the x-ray film and properly identifying and processing it only to place it indiscriminately in a pile of other radiographs taken in the past. In order to use x-rays for future referral or follow-up examinations, they must be placed in a suitable holder that is labeled appropriately.
Before x-rays are filed, they must be completely dry. When x-ray film is hand processed with tension clip hangers, the corners often remain wet until the film is removed from the hanger and allowed to dry. Cutting the corners of the film where it was attached to the hanger clips may alleviate this problem.
The best method of filing radiographs is in a large, 14 × 17 inch (35 × 43 cm) file envelope, regardless of the film size. Smaller-sized x-ray film could be filed in smaller envelopes, which would be a bit less expensive, but the smaller envelopes tend to get lost among the larger when filed together. Film filing envelopes can be purchased from any radiographic sales service.
Filing the films in a logical manner is crucial. The envelopes should be labeled with a description of the patient, name of owner, date, and type of radiographic examination performed. The type of filing system will vary. Normally, a numeric system is used, employing either a patient case number or a file number. Some clinics have a color-code system for easy retrieval.
Eastman Kodak Company. Kodak: the fundamentals of radiography, ed 12. Rochester, NY: Kodak, 1980.
Gray JE, et al. Quality control in diagnostic imaging. Rockville, Md: Aspen, 1983.
Morgan JP, Silverman S. Techniques in veterinary radiography, ed 4. Ames, Iowa: Iowa State University Press, 1987.
Ticer JW. Radiographic techniques in small animal practice, ed 2. Philadelphia: WB Saunders, 1984.