Restraint and Handling of Animals
When you have completed this chapter, you will be able to:
1 Discuss the indications for restraint of animals and behaviors exhibited by aggressive animals.
2 Explain the physiologic principles that affect animal perceptions and methods of restraint in small and large animals.
3 Describe the methods for approaching, haltering, tying, and leading equine patients.
4 Define twitch and describe various types of twitches and their uses in equine restraint.
5 Explain the methods used for lifting a horse's foot, applying a tail tie, and applying hobbles.
6 Describe the indications and procedures for the use of stocks in equine patients.
7 Describe the indications and procedures for moving cattle and sheep into pens and chutes.
8 Describe the procedures for tail jacking and casting of cattle.
9 Explain the methods of capturing individual sheep, goats, and pigs.
10 Describe the proper procedures for carrying and lifting large dogs, small dogs, and cats.
11 List and describe the types of muzzles and mouth gags that are used on dogs and cats and explain the proper procedures for their use.
12 Describe restraint and handling techniques used with birds, reptiles, and amphibians.
13 Describe restraint and handling techniques used with ferrets, rabbits, and rodents.
14 Discuss the indications for use of chemical restraint in animal patients.
INDICATIONS FOR RESTRAINT
Competent restraint of animals is critical to a veterinary practice for the following reasons:
1. To control an animal so that it can receive medical care. Most animals resist physical examination and the administration of diagnostic and therapeutic procedures. Proper restraint of a sick animal may allow humans to save its life.
2. To prevent the animal from harming itself while it is receiving medical care. Animals must be restrained when panicked and trying to flee from, what they perceive as, a dangerous situation. Jumping off an examination table, attempting to crash through a fence or chewing the bars of a confinement are examples of fleeing behavior that can have disastrous results. Maintaining a safe environment, including well constructed stalls, cages and fencing is a critical part of protecting the animal from injury.
3. To protect personnel. The safety of veterinary personnel, clients and handlers is of the utmost importance. The injury and even death of individuals can devastate families, and veterinary practices. It can lead to the loss of wages, expensive litigation, anxiety, decreased morale, and loss of livelihood. Practice owners are responsible for any injuries incurred by veterinary personnel and clients during the performance of veterinary procedures. This liability begins when the client enters the practice or when the truck stops in the driveway. For this reason, many practitioners believe that a veterinary technician’s ability to perform excellent animal restraint is the most important skill for a technician to master.
ANIMAL PERCEPTION AND BEHAVIOR
Current studies in behavioral science and ethology provide us with information on animal-to-animal communication that aids in the understanding of how best to restrain various species. This data improves the ability of humans to assess animal responses and better understand how our interactions affect an animal’s behavior. Animals employ their senses, such as sight, smell and hearing, in ways that are different from humans. Therefore, animal gestures, touches, smells and actions that provide important information to other animals is often missed or misinterpreted by humans. A veterinary technician’s ability to correctly interpret these non-verbal, species-specific forms of communication is critical for implementation of effective and compassionate restraint.
SMELL
The sense of smell is well developed in all domestic mammals. The rabbit and cat have improved olfaction because of olfactory epithelium that is nearly 14 times more developed than in humans.
Horses will snort when faced with a smell with which they are unfamiliar. Bulls may react by pawing and blowing when they are faced with a different smell. We now are more aware of the chemical changes that occur in the human body which may cause changes in scent that communicate illness, stress and anxiety. Consider, for example, that we now train dogs to detect cancer in humans because the illness alters metabolic chemistry.
The language of smell undoubtedly has a more extensive vocabulary in animals than in humans. This is important to acknowledge when handling various species in a single hospital setting such as an exam room or treatment area. For example examinations of prey species such as rats, rabbits and mice should not be done in an area where a cat was recently examined. The finely tuned scent organs of the prey animals will detect the scent of a predator which may increase blood cortisol levels and alter heart and respiratory rates. Other odors to consider that may affect an animal’s behavior are anal sac excretions, vaginal discharge from intact female dogs or urine from a mare in estrus.
HEARING
Domestic animals are able to move the external ear, or pinnae, with muscles, which enables them to focus on the source of the sound. This is advantageous because an approach by a handler is often observed. Slight sounds will elicit movement of the ears and allow the animal to become aware of the presence of someone new. Low, smooth, confidant tones will allow the animal to become comfortable with your presence. The response of the ear is important to assess the animal’s attitude. The ears-back position in a horse or llama signals that the animal is upset or aggressive. A dog pricks its ears forward when alert or actively aggressive, whereas a submissive dog wrinkles and flattens its ears. Cats with their ears pinned back should be considered dangerous. Alterations in the shape and size of an animal’s ears may decrease the ability of the handler to use ear position as a sole indicator of the animal’s state of arousal.
VISION
The eyes of domestic animals focus by means of muscles controlling the shape of the lens through a process called accommodation. In small animals and pigs, accommodation is accomplished by increasing the dioptic power of the lens by changing the shape of the lens. Most animals accommodate the eye on near objects much less readily than do humans. It is known that the nearest point at which dogs can focus is about 30 cm, and this is most likely true for the pig. The dog’s ability to discriminate form and pattern is thought to be poor when compared with human abilities. This is particularly important when dealing with those dogs that are noted to be “fear biters.”
Cats have excellent night vision, which is consistent with their nocturnal habits. They are also acutely aware of a small movement, which facilitates the precision of their rush after stalking their prey. Unfortunately, this also enhances the ability of a fearful or painful feline patient to strike out against those humans who move too suddenly or come too close.
The pig has eyes that are directed more forward than the horse, but less than that of most dogs. The size of their binocular visual field could be as large as 30 degrees on either side of the midline. Ruminants have much less ability to accommodate with the lens of their eyes and will therefore have a much longer near-focus distance. Herbivorous animals have wide fields of vision enabling them to detect the encroachment of predators from various angles. This is particularly evident in the horse and rabbit, both of which enjoy nearly circumferential vision without moving the head. The horse has a particularly sluggish accommodation. What some handlers may perceive as fractious and spooky may in fact be nothing more than the horse attempting to visually accommodate. This is particularly noticeable when an already nervous human makes fast movements near a horse. The horse moves about in a rapid manner trying to ascertain what the human wants. Horses have acute vision at middle and far distances, which is not surprising for a prey species. Many of the behavioral displays of horses are visual in nature, and subtle movements by handlers at seemingly great distances will generate responses from horses. It is assumed that the binocular segment of the visual field for a ruminant is about 30 degrees on either side of the midline.
TOUCH
The sense of touch is becoming more important in the handling of animals. Numerous behaviorists and trainers are proponents of contact on different body parts to enhance communication between animals and among animals and humans. Contact behaviors that appear to result from or resolve conflict are the ones most described in handling. Dominant animals use biting, scratching, kicking, or striking to teach youngsters proper behavior. Horses kick or slam a shoulder into other horses to demonstrate dominance and make a point of their supremacy. Mares training youngsters in a herd will actually keep a particularly hardheaded yearling out of the herd by biting and kicking at it. This communication is species specific and it is best to avoid attempts to replicate these behaviors. It is important to remember that these behaviors occur in specific contexts and may relate to control of resources. Some people will use blows to correct unacceptable equine behavior. When using these techniques, the target must be carefully selected, and the individual must possess the physical strength to make the procedure effective. As a general rule, humans will end up hurting themselves much more than the horse they were trying to correct. It has also been shown that physical correction for behaviors can create fear, stress and anxiety for the animal in addition to damaging the human-animal bond.
The actual method of how to touch animals is a manner of skill. Tentative, light touches or repeated patting makes many species nervous and apprehensive. Steady, firm strokes are reassuring to most species. Watching animals in a natural setting provides the insight into how to most effectively touch them when they are nervous. You will never observe one animal slapping another to calm it down in a natural setting. Clever individuals learn to read the animals that they are asked to restrain and develop the touch necessary to keep them calm.
AGONISTIC BEHAVIORS
Agonistic behaviors are those associated with conflict. Many animals have to be maneuvered into a position in which restraint is possible, or they must be restrained from the outset as a safety measure. Such maneuvering is perceived by the animal as conflict (threat). To understand the principles of maneuvering each species, it is wise to become familiar with the prevalent forms of agonistic behavior in the different species. Agonistic behaviors cover the range of responses to conflict from passive avoidance to the extreme of aggression and fighting. In nature, overt aggressive attacks that lead to fights with other animals of the same or different species are not common outside of sexual or predatory behavior. Dominance and submissive behaviors represent the more common methods of resolving disagreement over resources such as food, territory, and reproduction. Chapter 11 gives additional information on animal behavior.
Fight or Flight
When a stranger approaches an animal, the same basic principles apply whether it is a domestic or wild animal. Each species in a given environment has its own degree of response, but the factors or cues giving rise to the response are common to all animals in varying degrees. Each animal has a fight-or-flight distance. When that space is invaded, the animal goes into a state of alert. The sympathetic nervous system releases epinephrine from the adrenal gland. This hormone causes increased heart rate and a subsequent increase in blood flow to the skeletal muscles, lungs, and brain. Further encroachment into the animal’s space will lead to action that may take the form of avoidance (the cow or horse crash through a fence, the dog runs off down the road) or aggression (the dog bites, the cow runs over the stranger). This action is aptly termed the fight-or-flight response. The response will vary from animal to animal of the same species and may vary from time to time for the same animal. When this happens, it is difficult to come up with a good restraint plan.
AGGRESSIVE BEHAVIOR
Aggressive behavior is the form of agonistic or conflict behavior that leads to and includes fighting. Aggression is not the result of a single cause. The different forms of aggression are classified according to the stimuli or circumstances giving rise to the ferocity.
Irritable or Pain-Induced Aggression
Inevitably, pain-induced aggression is a common problem in the veterinary hospital and in field situations. Herd animals that have become incapacitated and are incapable of keeping up with the herd must resort to aggression to stay alive. Injections and certain manipulations, such as the treatment of wounds, cause pain and discomfort to animals. Even the initial injection of a local anesthetic can be most uncomfortable, no matter how skilled the anesthetist. The state of mind of the patient has a lot to do with an aggressive outcome. If the animal is initially apprehensive and nervous, the probability for aggression is high. This is the reason that calming and familiarization of the patient are practiced whenever possible. Sedation may also be indicated for certain patients.
Maternal Aggression
All female domestic animals that are suckling their young are sensitized to interference with their offspring by strangers. The calmest, old broodmare in the herd may be extremely protective of her new foal. The bitch can be aggressive with strangers and even family members if she perceives a threat to her pups. A sow within earshot of her piglets when they are being restrained can become one of the most dangerous animals encountered. All parties working within a farrowing house must exercise caution because the vocalization of any young piglet as it is manipulated can make all the sows in the house become sensitized.
Predatory Aggression
Aggressive activity displayed by chasing and killing prey is observed in predatory domestic animals, such as the dog and cat, and is called predatory aggression. This form of aggression does not usually pose a threat to the animal handler, although large dogs may pull the handler down if they feel the urge to chase a cat while on a leash.
Territorial Aggression
All domestic mammals have a degree of territorial domain. They will protect the area over which they range from intruders, and they may exhibit territorial aggression. Separate groups of horses may share feeding sites and watering holes, but they remain apart from one another and retain control of their own separate home range. The domestic dog may regard the yard, porch, or house as its territory. Strangers are treated with suspicion, and this suspicion may lead to barking or attack. Unfortunately, territorialism in dogs can be difficult to distinguish from behavior that has been conditioned, is related to fear, lack of socialization or lack of mental stimulation. Dogs that harass the mail carrier or meter reader are behaving within the norm of canine behavior. The female rabbit is strongly territorial in the captive situation. If a buck is taken to her cage, she will attack him aggressively, often causing serious injury. Thus the doe is always taken to the buck’s cage for mating. This female territoriality may be associated with aggression that continues even when the nesting box is empty and can be directed at humans. Although the concept of an “attack rabbit” may seem humorous, it becomes less so when reaching into the cage of an old doe and being growled at, struck, and bitten.
Fear-Induced Aggression
When an animal is terrified of an environment and the people in it and is not given an option to avoid the circumstances, it will resort to aggression. Fear is a common cause of aggression in dogs placed under such circumstances. Fear biting is the most commonly encountered type of attack in veterinary hospitals. The dog is usually giving classic signs of being intimidated: avoiding direct eye contact with the head down, lips pulled back horizontally, ears flattened, and the tail between the legs, which have been ignored or misinterpreted by human handlers (Figure 7-1). When the personal space of such a dog is encroached, a sudden attack may ensue. This is fear biting. The attack is usually confined to the proffered hand or forearm, and the purpose is simply to repel the invader.
Intermale Aggression
Aggression occurring between males can be a problem, particularly when stud animals are kept. Boars can be extremely vicious when confronting each other, and great care should be taken when handling them. Stallions can become extremely agitated when mixed with another stallion. Bulls spend a great deal of time head butting and pushing one another around to establish the dominance order when they are turned out together.
Dominance Aggression
In the past it was presumed that certain dogs would establish their authority over a human family, other animals, and strangers because of their heritage as pack animals. Alternatively a dog may accede to dominance from one family member, but attempt to assert itself aggressively with other family members. Current scientific data refutes such arguments. Past assumptions were made by observation of wolves which were then applied to domestic dogs. Animal behaviorists, both in veterinary medicine and university settings no longer use the term dominance aggression due to the incorrect assumptions of the past.
Information collected by modern day animal behaviorists and ethologists shows that dogs while genetically related to wolves, differ in behavior. The effects of years of domestication and breed selection for specific characteristics have yielded results that favor the dog’s ability to live among humans. Additionally, original theories on dominance as a whole did not take into account how human interactions alter the behavior of domestic species. For example, old theories on dominance would say that when a dog jumped up on a human the dog was asserting its dominance. However, if the owner pets the dog when it jumps on them then the behavior is not dominant at all but has been conditioned of “trained” by the human. From the dog’s perspective it jumps on the human in order to receive contact and be petted.
In today’s world of veterinary behavior the term dominance aggression would most likely be related to a conflict between two animals regarding resources. Aggression would be the resulting behavior if neither animal was willing to give up the resource. An example of this would be two stallions competing for a band of mares.
TYPICAL BEHAVIOR OF DOMESTIC ANIMALS IN AGGRESSION AND AVOIDANCE
The primary concern when dealing with cattle is bulls, regardless of size. Dairy breed bulls, such as the Jersey and Holstein, should be considered the most dangerous animal of all the species that veterinary personnel are asked to restrain or handle. They are powerful and unpredictable. Aggressive behavior is characterized by pawing the ground with the forefeet while holding the head with the frontal area nearly vertical with the ground and snorting. These bulls after charging and knocking the person down will make continued attempts to toss the victim, which will lead to goring if the bull still has horns. Bulls may also attempt to kneel on the victim or continually smash the victim with their foreheads. Little can be done to dissuade or thwart a bull once this activity begins. Front-end loaders and pickup trucks have been used to try to push these animals away from their targets without success. Bulls, particularly the dairy breed types, should always be treated with the utmost respect and with the appropriate means of restraint and containment. The likelihood of a snorting bull, posturing in an aggressive stance, hurting a handler is actually less than one that has been hand raised. The hand-raised bull may appear to be quite gentle and yet when approached may react aggressively. Special handling considerations are made for those who work with semen donors at bull studs. These bulls are selected for the high-quality genetic potentials, and their semen is worth considerable amounts of money. Insensitive handling before and during collection may give rise to reproductive behavior problems leading to decreased collection volumes and significant economic loss.
Aggressiveness in the heifer and cow seems to be directly related to breed and socialization. Dairy cows are generally docile, probably because they are handled a great deal. Beef cows that have been handled frequently in a quiet, professional manner are manageable. However, beef cattle that are raised on range with little human interaction or those that are handled with lots of whipping and shouting tend to be apprehensive and may become quite aggressive. This aggressiveness is compounded when they are nursing calves.
The fight-or-flight distance for a herd of cattle will vary depending on the previous degree and type of contact with humans. The handling of dairy cattle and beef cattle differs greatly. The flight distance for dairy cows is extremely short, with the animal veering off only when directly confronted by the handler. Most dairy cattle are used to a number of different people around them during milking time, and the introduction of someone new into the herd does not create stress or fear. This makes handling dairy cows easier for veterinary personnel. Beef cattle have a much larger flight space, which is accentuated when they sense a new presence in a field or pen. It is common for ranchers to be able to walk or drive among their cattle at close range. When a new pickup or person enters the pasture, the cattle’s heads come up and they will gradually move further away. If the cattle are approached too quickly, they will break into a disorganized run, which makes them nearly impossible to maneuver. It is important to realize the impact that outsiders have on a herd of beef cattle before trying to handle and examine individuals. This is a common problem in “Penturbia,” where owners get two pregnant cows to decorate their acreage (usually of 3 to 5 acre lots) and then need veterinary attention. Routinely, they do not have adequate handling facilities on site. It is extremely important for veterinary personnel to understand this before initiating procedures to capture the animals in a run-in shed or a makeshift corral.
A part of the secret of maneuvering cattle is using a body extension. Canes, stock whips, or wiffle paddles used by a person on foot are viewed by the cattle as an extension of the body. If the cattle can be kept calm, the visual barrier created by these devices allows the handler to maneuver the cattle from pen to pen. If cattle are accustomed to observation from horseback, maneuvering a herd can be quite easy for one or two riders. Mixing riders and walkers in a pasture is not a good idea and should only be done as a last resort when trying to maneuver a herd of cattle. It should be made clear that maneuvering the herd (or all the animals that are housed together) is much easier than attempting to separate an individual.
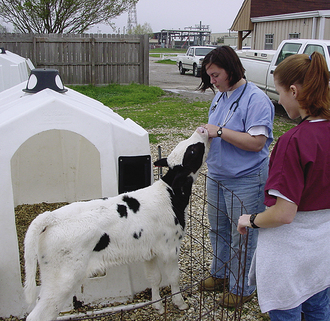
Calves
Calves are inquisitive and will become attentive to the presence of someone new. The calf stretching its head or neck toward the new handler is the usual posture (Figure 7-2). Darting movements will cause the calf to panic, veer, and run away. The approach toward a calf should be slow and deliberate with the hands slightly away from the sides of the body. No loud noises are necessary, and movement of the hands and arms should be kept to a minimum. Using a fence line or wall, the handler should move to cut off escape routes and negotiate the calf into a corner and grab it with one arm under the jaw, and the other hand should reach and grab the tail.
Cats
Aggressive behavior in cats should never be underestimated. They can be formidable patients in situations of conflict because they will use the claws of all four feet, they have razor-sharp teeth, and when stressed they seem to have a spinal cord that is made much like a Slinky, which allows them to go in many different directions at once. It should be remembered that the cat stalks its prey and runs only short distances to pounce. It is a stealthy aggressor. The true speed of the cat never becomes apparent until it is actively avoiding conflict. It is the wise staff that closes all doors and windows before attempting to handle cats in any environment to prevent escape.
Dogs
Overtly aggressive behavior, although not a common problem in dogs, is a significant social problem and one that will present difficulties for veterinary personnel. Dominance and submission are important in communication between two dogs in a conflict situation. Fixing the other animal in a direct stare is a direct threat of aggression. The ears are raised and angled forward. The front end of the body is held high, and the hackles on the back of the neck are raised. The head is held up, and the lips curl to reveal the incisor and canine teeth. The tail will be raised. The clinical stare of veterinary personnel as they examine a dog can be taken as a threat of aggression by a dog.
Lowering the front end of the body and avoiding direct eye contact demonstrate the submissive behavior. Usually the tail will be held between the legs, and the dog may squat and urinate or defecate. The ears will flatten on the back of the head, and the lips may become pulled back at the corners of the mouth into a “grin.” The spine may adopt an S shape, and the animal may lie down on its side or back, raising the legs and exposing the undefended belly. When dogs display this behavior it is similar to saying “take my keys and wallet, please don’t hurt me.” These behaviors are designed to appease an aggressor which would decrease or diffuse conflict between dogs. In the veterinary clinic this behavior is commonly demonstrated by fearful or anxious dogs.
When confronted by a person, the dog may demonstrate potential aggression by adopting the aggressive posture, or it may adopt a submissive stance. A dog in the active aggressive posture may attack if the threat is not removed from its fight-or-flight distance. A dog in this posture will bite if you attempt to encroach on its space. Dogs demonstrating submissive postures may also bite when handlers reach into their space or lean over them accidentally increasing the dog’s fear. Some dogs may show active aggression only when the owner is present. The protectiveness may be possessiveness as the dog defends its own favored object, owner conditioned behavior, or specifically trained behavior (protection/security dogs). Removing the owner may resolve the conflict. The opposite may occur when handling dogs that have developed a bond with their usual handlers. These dogs may be quite fearful without their human partner in the examination room. Retrievers, herding dogs, and guard dogs that tend to associate closely with only one individual may be quite difficult to handle without their owner present.
Certain dogs do not attempt to resolve conflict by aggression, preferring to avoid it if at all possible. Those that skillfully avoid conflict are described as having a passive defense reflex. Dogs that tend to face conflict are said to have an active defense reflex.
Horses
Blatant aggressiveness in the horse is not common. However, certain horses can be nasty with their aggression. This is most commonly seen in horses that are stalled most of the time. Racehorses and breeding stallions seem to be the worst offenders. Aggressive behavior may be observed on broodmare farms with mares protecting new foals and stallions protecting their band of mares. Lunging forward and biting, kicking with the hind legs, and striking with the front legs characterize the aggressive acts of the horse. Although the field of vision of the horse is nearly 360 degrees, the binocular field of vision is only 60 degrees to 70 degrees in front of the animal. Binocular vision is required for judging distance; therefore vision outside this range requires movement of the head and sometimes the entire body to allow the horse to further investigate what it perceives as the threat.
The approach to a horse should not be made from the blind spot directly behind the horse. The horse, as it detects new objects or people in its environment, will raise its head and observe. If no threat is perceived, the horse resumes its previous activity. If the threat is perceived as real, the head turns toward the object, the neck is raised, and the ears will turn toward the object. The nostrils will become dilated to further evaluate the threat. The tail will also become elevated, and the muscles of the torso and lower limbs will become more rigid, ready for fight or flight. Occasionally the horse will snort, further alerting other horses to the presence of a threat. Mares with foals will usually nicker, and the foal will move to the other side of the mare. Further encroachment results in rapid movement away from the intruder. If the horse is in a stall, it will circle rapidly away, always keeping its hind end toward the intruder.
Pigs
Aggressive behavior in the domestic pig has serious economic and physical consequences. Adult boars that are mixed together will circle and threaten each other with grunts and jaw snapping. Fighting commences in the side-to-side position with sideways pushing and slashing at one another with the tusks. Solid panels of plywood should be used to separate the combatants. Commercial pigs are reared in groups, which provide plenty of opportunity for fighting. When new pigs are introduced into a group, fighting will occur, especially if living space and trough space are limited. Introducing a sow into an established group may induce savage attacks and even deaths. Allowing more space and diversions for the group reduces aggression in pigs.
Large numbers of unfamiliar pigs adapt better than smaller numbers. There is less fighting, probably because dominance is more difficult to establish in the larger social groups. Avoidance behavior in young pigs in confined areas involves running into corners and huddling, shoving, and climbing over one another. This does not present a problem if small groups are huddled, but larger groups that pile up may produce traumatic lesions and in severe cases death from suffocation.
Remember that the lactating sow can be extremely dangerous because of maternal aggression. When handling suckling pigs, always remove the sow to a secure area out of earshot, if possible.
Sheep
Avoidance behavior in sheep is the basis of maneuvering the flock. When sheep are approached, they will flock together and move as a single unit. This herding behavior is well understood by dogs. By carefully controlling their posture, speed of movement, and distance from the flock, the dog uses the sheep’s avoidance behavior to maneuver the flock into an enclosure. This is one of the most fascinating and complex interspecies relationships in domestic animal management. Handling areas should be well lighted and free of objects that may project shadows into the sheep’s visual path and should have solid sides.
Aggression between rams may lead to injuries between the combatants. Handling these rams may also be difficult because of the willingness of the ram to challenge the handler. Rams are most dangerous when they attempt to head butt and as such should be treated with respect.
MANAGEMENT ETHOLOGY
Ethology is the study of animal behavior (see also Chapter 11)Capture, handling, and restraint might be called management ethology, which is the study of animal behavior as a means of determining how best to maneuver and control animals. The approach and handling techniques that are described for each species are in harmony with the typical behavior of the animals that we are asked to restrain, and the physical techniques described are compatible with their anatomy. Humans have great powers of observation, and it is important for students of the animal industries to enhance their powers of observation about animal behavior. Knowledge of body systems and anatomic structure is clearly important, but there is no substitute for alertness, observation, and perception of how the animal is reacting to its environment and to the presence of veterinary personnel. Mental preparation must begin well in advance of any potentially dangerous restraint situation. Confidence and knowledge will be gained over time that ensures the handler of a correct assessment of any situation.
CAPTURE AND RESTRAINT OF HORSES
A cardinal rule when approaching any animal, especially a horse, is not to startle it. The handler should always make his or her presence known by talking or calling to the horse. Many horses have learned that capture leads to work or some sort of unpleasantness, and these type of horses will practice avoidance. Horses also do not like to be closely confined or “squeezed.” Close quarters will make many horses anxious, and some will attempt to escape, which may result in injury to the horse and people involved. By calling to the horse, the handler begins to have an appreciation of how a particular animal is going to respond.
 TECHNICIAN NOTE
A cardinal rule when approaching any animal, especially a horse, is not to startle it.
The normal flight distance of most horses is between 3 and 10 m. Events that occur outside this radius are of little concern to the horse. Once within this area, sudden movements or sharp noises may easily startle it. Always be sure that the horse is observing you as you approach. A horse that is looking at you is less likely to be startled than one looking off at some other object. Be aware that if the horse decides to become nervous the first evasive maneuver that it will perform is to wheel away, leaving you facing the hindquarters of the animal.
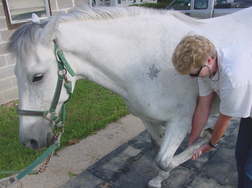
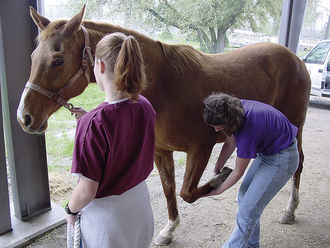
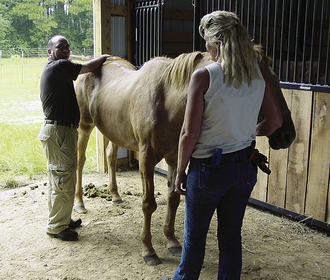
It should be obvious that approaching a horse from the rear should be avoided, if possible. Given the horse’s zone of vision and its blind spot, the horse is not likely to see a person directly behind them. A horse’s kicking zone extends 1.8 to 2.5 m behind it. The furthest extension of the heels is the most dangerous and is the area of potentially fatal kicks to the head or chest. Horses usually kick to the rear, rather than to the side, but many of them can “cow kick,” or kick to the side well. It is wise to grant at least 3 m behind and to the side of a horse when dealing with the rear quarters of the horse. The other alternative is to stay in direct contact with the horse as you maneuver about the hind end (Figure 7-3). Staying close to the hindquarters will not allow the full force of a kick and will keep the force of the blow low on the recipient’s anatomy. This does not mean that the blow will not be painful or damaging. However, a fractured tibia may be some consolation over a fractured skull. Grasping the tail may discourage some horses from kicking.
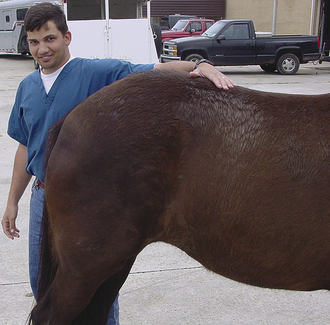
FIGURE 7-3 Note how the handler maintains contact with the horse as he begins to move from one side of the animal to the other. This is especially important since he is in the horse's blind spot.
The prospective handler should also never stand directly in front of the horse. A horse that becomes agitated may strike out with a front foot and leg at any instant. Agitated horses also may decide to become carnivores at any time and attempt to bite the handler.
The initial approach to the horse is best accomplished from the front and left side (Figure 7-4). The left side in equine terminology is known as the near side. This is the side that the horse is accustomed to being handled from because of tradition and the fact that most people lead their horses with their right hand. The first point of contact for the handler on the horse should be the withers. The handler should have a slightly outstretched arm that is no higher than the handler’s shoulder. The handler should make some low, confidence-building conversation as he or she moves toward the horse. This goes back to the natural behavior of the horse, from mares licking their foals to the social interaction between horses in which they will rub each other on the withers. If the horse moves away, the handler should stop and stay still until the horse has quieted again. Many times if the handler will turn slightly away from the horse and not look directly at it, the horse will turn back to the handler (Figure 7-5). This movement mimics the communication found in herds of horses when an outsider is finally “welcomed” into the herd. It is always wise to move in slow increments without raising your hands or voice. Presenting the hands in an open and empty manner may help the horse to gain confidence. Sometimes it is beneficial to squat down. This works reasonably well with young foals and some horses. The shorter stature probably makes the figure less threatening and increases the horse’s curiosity. Do not rush toward the horse at any time. Horses will assume you are giving chase and continue to move away, and some can become quite panicked. Once the would-be handler is behind the horse, the horse perceives even more of a threat since it cannot see the presumed intruder.
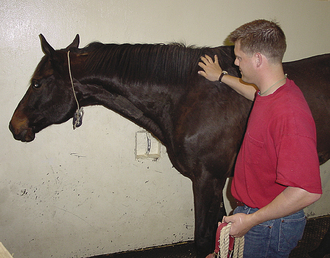
FIGURE 7-4 Initial approach to the horse should be from the left, or near, side. Note the right hand leads to touch the horse at the withers. The left hand holds the halter and lead rope low and to the handler's side.
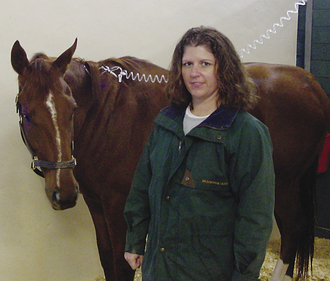
FIGURE 7-5 Note how the horse's ears and head are directed toward the would-be handler, almost as if the horse wants to know what is going to happen next.
The approach to halter the horse should also be unhurried and without sudden movements. Keeping the lead rope or halter hidden by your side may assist in the capture of the skittish horse. A small-diameter catch rope may aid in the capture of the horse’s neck (Figure 7-6). The rope may be carried up along the neck after gaining the horse’s confidence at the withers by a moment of petting. If the horse moves away, attempt to stay with it by moving along side and holding onto the mane. Most horses will have sense enough to know that you mean business if you stay with them at this time.
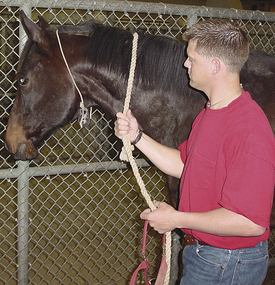
FIGURE 7-6 The use of a small rope looped over the horse's neck will aid in controlling the horse's head and allow the handler to place the halter over the nose.
When the horse is standing quietly, loop a rope around the neck by passing the rope over the horse’s neck with the right hand and reaching under the neck to grab the free end with the left hand. When placing the rope over the neck, start as low on the back as possible. Remember that slow and steady movements are the key to success. Once the rope is around the neck, the horse may be held in the loop, and the rope can be maneuvered to the throatlatch area. The halter can be placed by sliding the noseband over the nose and passing the crown strap to the right hand and then bringing the strap over the horse’s head for fastening.
The horse that does not respond to any of the above techniques becomes the biggest problem encountered in a field service practice. The arrival of veterinary personnel may trigger memories of previous contact that the horse does not want to have repeated. The usual reaction is for the horse to move off as far away from the handlers as possible. Of course, the simple solution is to have the horse caught before arrival of the veterinary team. However, this is not always possible. The usual solution to this problem is bribery with a handful or bucket of grain, which will entice the horse to approach or at least be approached. It is best to hold the bribe in the left hand and turn at right angles to the horse so that the neck is within easy reach for petting. As the horse gains confidence with some firm strokes along the shoulder, the right hand can then ease around the neck and allow capture. Many of these horses will attempt to wheel away when the arm is first placed over the neck, and this is where the small rope may be of assistance as a restraint aid. It is desirable to not allow horses to escape the first time because if they do it once they are likely to persist and become even harder to capture the second time. A horse that persists in whirling away becomes a candidate for trapping or, in extreme cases, roping.
Many horses that are impossible to catch in an open field will give up in an enclosed space. However, there are some that become exceptionally nervous in a small area and will kick or try to jump out when approached. The use of another haltered, calm horse within the stall to trap the nervous one will work in a majority of these cases. Similar to catching an unbroken foal, one handler will use the calm horse to trap the other in a corner. Then with slow and steady movements beginning at the withers, the second handler eases up the neck with a rope and makes the loop, which will allow temporary restraint of the nervous horse. A second technique that may be used is to have a solid panel that may be used to “squeeze” the horse into a corner. The panel needs to be sturdy enough to withstand the horse pushing against it and be movable enough to allow the handlers to back away in case the horse “blows up.” This should be used as a last resort in attempting to capture the nervous horse. Remember that exciting a horse like this is self-defeating. Excited horses lose whatever sense they have and in fear will go over, under, or through whatever is attempting to contain them.
TECHNICIAN NOTE
Attempting to lasso a horse with a rope is the last thing any sane individual wants to do.
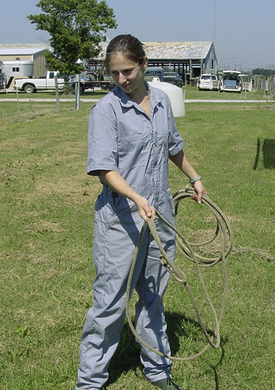
It is nearly impossible to rope a horse in a field, and holding on to the horse after it has been successfully roped is also difficult. Dallying the rope off to the bumper of a truck is not an easy maneuver to accomplish, and the roper must be able to stay out of the way of the rope as the horse swings back and forth on the other end. If you must rope a horse, it should only be attempted in a small, sturdy enclosure, such as a wooden round pen. Do not use a round pen made of pipes. This is an invitation to disaster. It is better to leave the horse uncaught than to have to destroy it because it became hung up in pipes and fractured a leg. There are a multitude of trainers that are experienced in this arena, and the owner should be informed of their availability for hire. It is important to keep the horse as quiet as possible and to hide the rope as well as possible. If you are forced into a situation where veterinary care is absolutely necessary in an immediate fashion and the horse must be caught, the following techniques should be remembered. Whirling the rope overhead is not good form because the sound and sight of the rope will frighten most horses. A low, backhand technique is preferable to the cowboy throw. The loop is made so that it brushes the ground when the loop and rope are held at waist level (Figure 7-7). A generous amount of excess rope is played out from the coils, which should be held loosely in the off hand. The loop is held with the dominant hand and carried across the body in preparation for the backhand throw. The position of the roper should be about 3 m from a fence such that when the horse is driven past between the roper and the fence the horse will run into the backhand loop. This technique, although admittedly a last resort, can be extremely successful if all parties involved stay calm.
It should be emphasized that gloves should be worn when attempting to rope any animal. After the loop is over the horse’s head, the coils will come off quickly. If the horse is charging through at such a rate that the rope cannot be held, release it before being jerked off balance and dragged in the dirt. The loose end of the rope can always be picked up from the ground after the horse has stopped running.
Horses that demonstrate signs of dangerous behavior or viciousness should not be given the opportunity to harm veterinary personnel by their physical proximity. There are alternative means of capture, such as tranquilization or anesthesia, that do not require closeness to the horse. Pole syringes, dart guns, and capture guns, although not common in equine practice, can save handlers from serious injury.
CAPTURE AND RESTRAINT OF FOALS
Newborn foals act from instinct in avoiding strange creatures and will hide behind the dam for safety. The capture of foals may be difficult and usually requires two people. Undoubtedly, these foals will not be halter broken, and if they are sick or injured, they do not need the increased stress that accompanies training to halter. The easiest way to capture a suckling foal is to first catch the mare and back her into a corner of a stout wall or solid fence, allowing her foal to come into the corner between the wall and the mare. The barrier should not have any holes that the foal may try to climb through. Flimsy barriers or barbed wire fences should never be used in an attempt to capture foals. The handler of the mare should realize that when the foal starts to struggle against the restraint, it may vocalize in fear and the mare might try to attack those who threaten her foal. The mare handler must be prepared to move the mare to a location away from the foal and handlers immediately following capture of the foal.
The mare should be positioned about the length of the foal away from the corner of the barrier, forming an open box in the corner of the barrier. One person then slowly goes behind the foal, and invariably the foal will cower to the hindquarters of the mare (Figure 7-8). The foal should be approached midway between the head and tail with the knowledge that once it senses hands or arms on it, it will try to escape by bolting, rearing, or kicking. Most commonly the foal will bolt forward into the mare’s hindquarters, and the person should grab under the foal’s neck and at the tail at this time. The tail should be held from underneath with the palm facing up. Grasping the tail is the most secure way to hold the hindquarters, even though the foal may be uncomfortable. It is possible for one person to restrain the foal after this by grabbing the tail and holding it straight up over the back and keeping the other arm under the foal’s neck (Figure 7-9). With bigger foals, two people are necessary for restraint, although the technique is similar. The first person advances toward the hindquarters of the foal as previously described and makes the initial contact with the hindquarters of the foal. The mare is then moved forward slightly, and the second person passes behind the mare and grabs under the foal’s neck (Figure 7-10). Handlers may have to push the foal against a fence until the foal stops struggling. There is a tendency to lift small foals off the ground when accomplishing this task, which is poor form. When the foal loses its footing, it may become more frightened and struggle more vigorously and batter the shins of the handler.
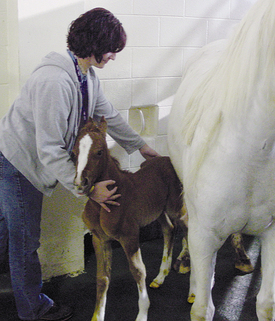
FIGURE 7-8 The mare is backed into a corner, and the foal is driven in beside her to safely capture the foal.
FIGURE 7-9 The handler must move in swiftly from the side of the foal and capture the tail first and sweep the arm under the neck of the foal. The mare handler must move her to a safe location at the same time.
FIGURE 7-10 Two people may be necessary to capture larger foals. The first enters from the rear, and the second comes around behind the mare and grabs the foal under the neck. The foal is then moved toward a solid wall for support.
Attempts to capture foals only by the neck result in a rapid reverse by the foal and subsequent escape. Once a foal escapes, just as with adults, it becomes much harder to capture. Veterinary personnel should not contribute to the negative experiences of a foal. Extra care and gentle techniques should be employed to get the foal to develop trust in people as much as possible.
Following successful capture of the foal, it is usually in the best interest of all to position the mare and foal so that they face each other. They should be as close as possible without the mare becoming a nuisance for the procedure that is performed. It is generally not recommended to separate the mare and foal because they both will fret until rejoined.
HALTER AND LEADS
The halter is the basic restraint tool for horses, and the lead shank should always be attached to the halter. Horses should never be led by the halter alone; a lead should always be attached (Figure 7-11). The halter and rope shank may be inadequate for some tasks. Halters that have rings at the side of the nosepiece may be made more effective if a chain lead is passed from one side to the other. The lead is snapped on the side of the halter that is away from the handler after passing through the loop near the handler, usually on the near side. This arrangement allows finer control of the direction of the horse’s nose and when snapped against the bridge of the nose, it reinforces the authority of the restraint because of the discomfort it causes. The chain lead should come in contact with the horse lightly, if at all, when leading the horse. Only when the horse misbehaves should the chain be used. Constant pressure is worrisome to the animal and does not leave the handler any reserve to use, if necessary.
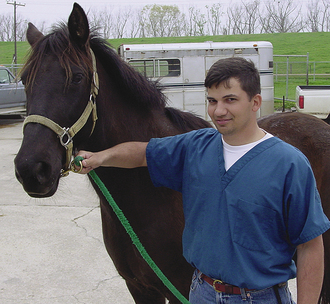
FIGURE 7-11 Halter and lead rope correctly placed on a horse. Note the position of the handler and the position of the arm. This allows the handler ample opportunity to sense impending movements.
There are three possible positions for the chain lead on the halter. The least authoritative is under the jaw, which causes a squeeze around the nose. Horses with tender chins or those that are not accustomed to a chain lead may throw their head or lunge backward when the lead is pulled. Horses that sense a squeezing of the nose as a signal to back up must be carefully restrained to respond correctly to this type of lead. It is often necessary to release pressure to allow the horse to stop its reverse. The chain over the nose is effective in controlling many horses (Figure 7-12). The top of a horse’s nose is sensitive, and a pull on the lead with the chain across the nose will make the horse drop the nose and stop forward progress. Most stallions should be led with this technique. A variation of this technique is to carry the chain across the nose and then to the cheek piece connection of the halter (Figure 7-13). This gives the handler more control of the horse’s head and nose. The most severe method of chain lead restraint is passing the chain over the upper lip and onto the gums of the upper jaw (Figure 7-14). This method works well with horses that have a bad attitude and need to be reminded about the “chain” of command. When using this technique, it is imperative that the chain is used only when the horse is misbehaving. When used correctly, this method of restraint replaces the use of a twitch and provides the handler with much more stopping power over the horse.
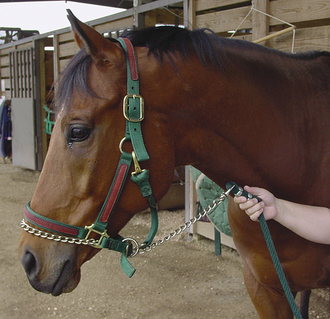
FIGURE 7-12 Lead shank with a chain positioned across the bridge of a stallion's nose to allow for more control.
TYING THE HORSE
A horse should never be tied with a chain over or under the nose. This too is an invitation for disaster. Seldom will it be desirable for a handler to tie a horse to perform a procedure. When a horse must be tied, the equipment must be strong and sound. The halter, rope, and whatever the rope is tied to must be in premier shape. Snaps on a rope are always suspect because all but the heaviest will break when a horse jerks back on them. If something breaks (the rope, halter, or post), the horse will be free and has now learned to pull back as a means of escape whenever tied. Another serious problem that can result from the horse pulling back occurs when it goes over backward and sustains head or neck trauma on landing. A horse should be tied to objects that are at the level of its shoulder or higher to prevent it from pawing and getting a foot over the rope. This also prevents the horse from trying to graze and becoming entangled in the tie rope. Horses should also be tied short; only 60 cm of rope should be present from the halter to the post to prevent the horse from having too much play in the rope and getting in trouble (Figure 7-15). Once a horse is tied, care should be taken to prevent hazardous objects from arriving into the area that might spook the horse, and the horse should never be left unattended. The shorter the horse is tied, the less likely it is to get into trouble.
FIGURE 7-15 Properly tied horse at a rail. Note the level of the tie and the short amount of rope between the post and the halter.
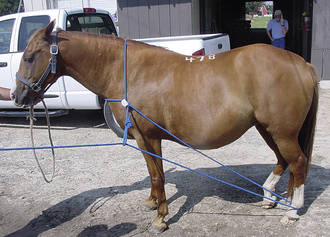
One technique that may be used to restrain (or train) a fitful horse is to place a cotton rope around the mid section of the horse just behind the rib cage and then pull it through between the front legs and through the bottom of the halter. This rope is tied slightly shorter than the halter rope. The basis of this technique is that the horse will hit the cotton rope first and feel the pull against its abdomen, causing it to move forward and release pressure on the rope (Figure 7-16).
FIGURE 7-16 The technique necessary to place a belly rope on a horse that will not stand tied. A, A soft cotton rope is placed around the horse's abdomen and run between the front legs. B, The rope is run down the halter and tied slightly shorter than the halter rope.
TECHNICIAN NOTE
In general, horses should always be held rather than tied for veterinary procedures.
For veterinary purposes, it is generally preferable to hold a horse rather than tie it. It is imperative that the holder stand on the same side of the horse as the veterinarian so that the head may be directed toward the practitioner rather than the body or hindquarters (Figure 7-17). If the handler is on the opposite side and the handler bails out, the head of the horse follows the handler, leaving the back end of the horse swinging directly into the veterinarian. When the head is controlled and the horse acts up, the worst that will happen is that the body of the horse will swing away from both handler and veterinarian. No matter what the circumstances, this technique should be upheld because in an emergency situation, self-preservation of the holder will overcome protection of the practitioner.
THE TWITCH
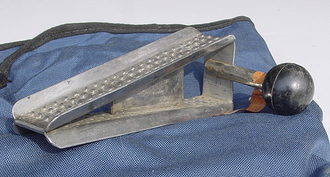
The twitch is a nerve-stimulating device that may immobilize horses and can be helpful in equine restraint. Most twitches are applied to the upper lip of the horse. The most innocuous is the humane twitch, which is a hinged pair of long handles that squeeze down over the sides of the lip and may be secured at the bottom by a thong and snapped back to the halter. The major advantage of this twitch is that once applied it need not be held in place (Figure 7-18). Therefore one person may restrain a horse that is acting up. The disadvantage is that the pressure is fairly mild, and most horses ignore it. More traditional twitches rely on a loop and a leverage device. The loop is either of chain or rope and is placed on the lip and tightened by twisting the leverage device. The leverage may be from a piece of wood or pipe and is about 50 cm long. The loop needs to be seated on the lip behind the heavy gristle pad at the tip and ahead of the nostrils. This area may be hard to find on thick-nosed horses. Horses that have been twitched become quite wise and will throw their heads into the air and tighten their lips when attempts are made to apply the twitch.

The application of the twitch should be done with the calmness and assuredness of the initial capture of the horse. It is best to have an assistant holding the horse by a lead rope when the twitch is applied. The loop should be placed over the thumb and three fingers, leaving the little finger out so that the twitch does not slide down the hand or arm (Figure 7-19). Grasp the end of the horse’s lip, raise the hand with the twitch on it, and slide it onto the horse’s nose. The end of the handle should be held in the opposite hand, in case the horse throws its head. Twist the end of the handle until the twitch is snug and begins to elongate and distort the shape of the horse’s upper lip. The twitch should be tightened until the horse responds by standing still. The average person cannot twist enough to damage the horse’s nose. Once the twitch has been applied, the person holding it should also be holding the lead rope from the halter. He or she should be positioned on the side of the horse next to the shoulder and should be at the end of the handle of the leverage device (Figure 7-20). A number of handlerless twitches are now available for use in minor noxious procedures. These are placed on the horse’s nose in the same fashion as previously described and secured to the halter as shown in Figure 7-21. In the absence of a twitch, it is possible for a person with a firm grip to hold the upper lip in their hand to accomplish a minor procedure. It should be remembered that horses are able to strike out with their front legs, and twitches may evoke this response. Never stand directly in front of the horse when applying or holding a twitch. As mentioned previously, the lip chain may be an alternative that will produce similar results without having to dodge the flying wooden handle of a twitch or the helicopter feet of a horse that has been stimulated to strike.
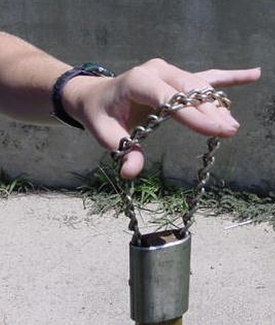
FIGURE 7-19 The proper placement of the fingers through the loop of chain before placing the twitch on a horse's nose.
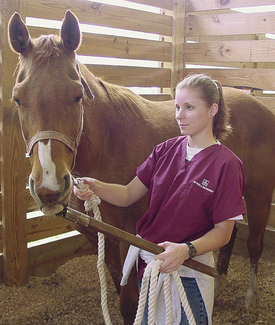
FIGURE 7-20 This handler demonstrates the proper positioning while holding the twitch and restraining the horse. Note that the horse is backed into a corner and there is still plenty of overhead space.
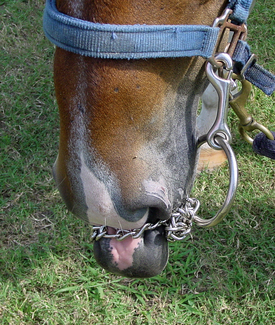
FIGURE 7-21 This is an example of a new “handlerless” twitch that may be attached to a horse's nose and secured to the horse's halter, allowing minor noxious procedures to be completed by one person.
A skin twitch may be a more acceptable form of restraint for many owners. This technique may also help for those horses that seem to be “light” on their front feet, attempting to strike when a regular twitch is applied to their nose. Grabbing the skin of the neck just in front of the shoulder and rolling it around the clenched fist will make many horses stand still (Figure 7-22).
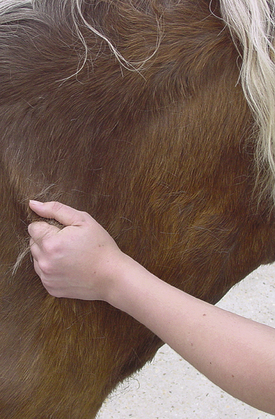
FIGURE 7-22 A skin twitch can be a powerful deterrent to an obnoxious horse. The skin just in front of the scapula is drawn into the clenched fist to accomplish this task.
The old cowboy notion of twisting the horse’s ear and biting down on it as a means of restraint is poor practice. The supporting structures of the ear may be damaged, and it is extremely common for the horse to become head shy following ear twisting. Owners are not keen on having this procedure done on their horses, and the handler risks a trip to the dentist after every attempt. Clearly, there are better forms of restraint available.
LIFTING THE FORELEG
Some horses will stand still if a foreleg is picked up and held. The theory is that with one leg in the air, the horse is less likely to leave the ground with the other three. To lift a horse’s foreleg, face the rear and stand next to the horse slightly in front of the leg that is to be lifted (Figure 7-23). Bend from the waist and push your hips slightly into the horse as the hand closest to the horse squeezes the suspensory ligament. The suspensory ligament is immediately palmar to the third metacarpal bone. Squeezing the suspensory ligament will cause the horse to flex its fetlock joint, and cradling the anterior aspect of the fetlock as it flexes will allow the handler to pick up the foot. When holding the foot as a means of restraint, the handler should rotate and face forward with both hands supporting the foreleg (Figure 7-24). To handle the horse’s hoof for procedures, the handler should face the rear of the horse. The foreleg should be placed between the handler’s legs from the rear and held between the thighs just above the knees, freeing both hands to work on the foot (Figure 7-25).

FIGURE 7-23 The proper foot positioning and bending at the waist to pick up a front foot of a horse. The inside hand is placed on the suspensory ligament of the horse's leg.


LIFTING THE HIND LEG
Lifting the hind leg will only be done as part of an examination procedure, not as a means of restraint. To lift the hind leg, the handler stands near the flank area of the horse and bends from the waist with a hand palpating down the horse’s rear limb. A slight lean into the horse will aid in elevating the limb off the ground, and the leg should be pulled upward toward the handler. Then the handler should walk under the limb, staying close to the horse’s body until the leg is outstretched behind the horse with the foot resting on the inside thigh of the handler. The horse’s hock should be at the level of the handler’s waist and the tibial region snugly against the side of the back (Figure 7-26). The leg should stay braced in this position without the use of hands. If the horse should resist, the handler’s arm should clamp down over the horse’s hock joint and attempt to quiet the horse.
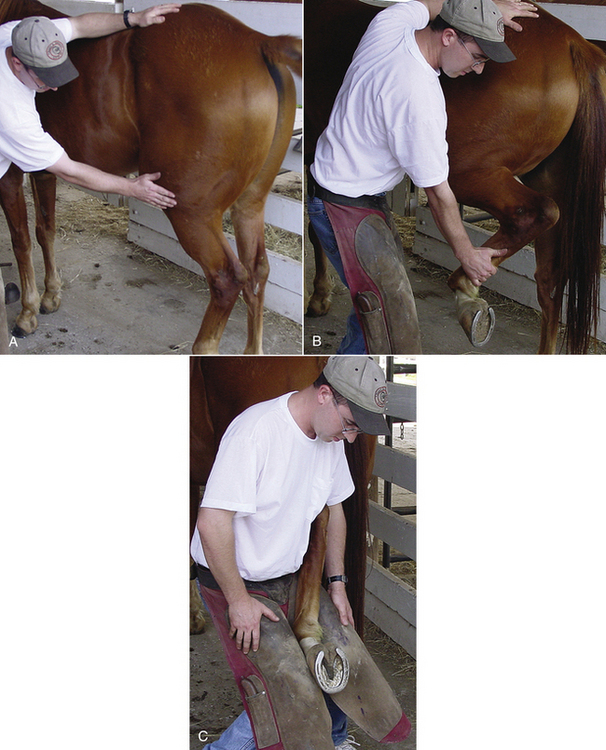
FIGURE 7-26 Lifting of the hind limb. A, The handler stands near the flank and palpates down the limb to give the horse knowledge of his presence. B, The leg is brought forward toward the handler before attempting to go out behind the horse. C, The handler walks in underneath the horse's leg, supporting the tibia on his hip and placing the hoof over the inside thigh to support the lower leg.
There are descriptions in the literature of how to tie the horse’s legs up to examine them, but they have many disadvantages to both horse and handler. A horse with a leg tied up may fall and seriously injure itself. There are too many chemical mediators available in equine practice today to recommend rope restraints for lifting limbs.
STOCKS
The use of stocks for fitful horses is clearly the safest way to manage these horses. The best stocks are made of heavy pipes or poles, anchored well to the ground surface, with the horizontal pieces set at the level of the horse’s shoulder (Figure 7-27). Stocks are used for many procedures, such as administration of fluids, dental work, nasogastric intubation, rectal palpations, and injections of jittery horses. Many horses will require some form of encouragement to get into the stocks. This can be done safely with voice commands, a slight raise of the arms by a second handler standing behind the horse, or a straw broom raised and lowered behind the horse. Every effort should be made to keep horses calm as they load into the stocks. Some horses have an innate fear of enclosure. These horses may do anything to get out of a set of stocks. Kicking, jumping, lunging, and striking are all ways in which the horse may try to escape. Therefore it is best to have a quick-release mechanism on the stocks, especially for the rear gate. The rear gate must be closed before tying the horse’s head after loading a horse into the stocks. Once a horse is in the stocks, the same principles apply with regard to positioning of the handler. Do not assume that the horse cannot come over the front of the stocks because many have done so in the middle of a tantrum. Horses should never be left unattended in the stock.
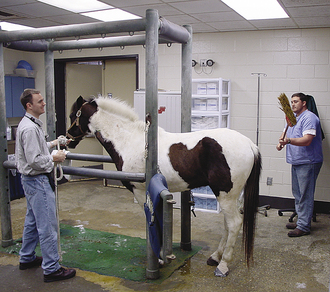
FIGURE 7-27 This horse is about to enter a set of pipe stocks. Note the height of the side pipes, about the level of the horse's shoulder and stifle joints. This stock is well anchored in cement to prevent unsteadiness once the horse is in the stock. The rear end of the horse must always be respected, and the back gate must be closed before securing the head of a horse in the stock. The judicious use of the broom helps get many horses to make the final step into the stock.
TECHNICIAN NOTE
The use of stocks for fitful horses is clearly the safest way to manage these horses. Always close the rear gate before tying the horse’s head.
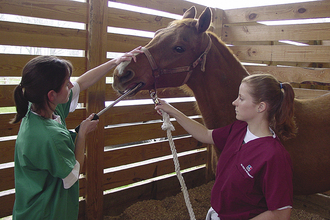
The lack of a set of stocks presents a problem with restraint for more noxious veterinary procedures, such as dental work, nasogastric intubation, and rectal palpations. For dental work and nasogastric intubation without stocks, the horse should be backed into the corner of a secure and sturdy area and quieted. Make sure that the ceiling is not so low that if the horse rears it will hit its head. The handler and the veterinarian should be located on the same side of the horse when performing the procedure (Figure 7-28). For palpation without stocks, the horse should be placed along a sturdy solid wall with the handler and veterinarian standing on the same side of the horse. The handler must “read” the horse, and everyone must have a clear idea of where the escape route is located when performing this procedure (Figure 7-29).
TAIL TIE
The horse’s tail may be tied during rectal palpations, vaginal examinations, and minor obstetric procedures. This is accomplished by using a small rope or a roll of gauze tied into the hair of the tail. The tail should never be tied to anything but the horse. Tying the free end around the neck of the horse is best. Should a horse get loose with the tail tied to a stationary object, serious injury could result. The tail tie is a simple quick-release knot using a rope or gauze placed across the tail just below the fleshy portion (Figure 7-30) with the long end tied in a quick-release knot around the neck.
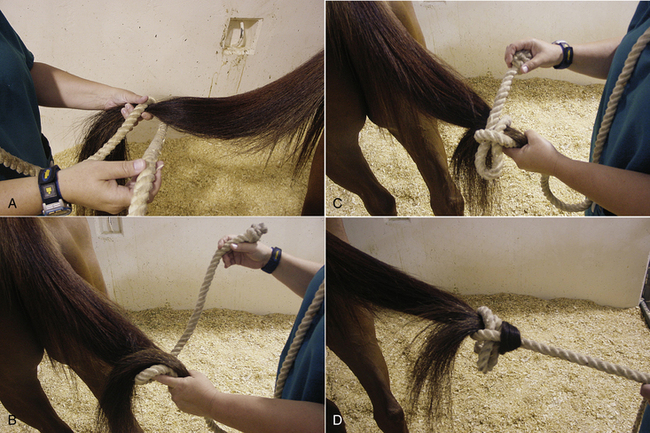
FIGURE 7-30 The steps in making a secure tail tie. A, The rope is placed around the tail. B, The tail is folded back on itself and on the rope. C, The short end of the rope passes over the folded tail, and a loop is pushed through the tail-encircling portion of the rope. D, Tension on the long end of the rope makes the knot snug. Pulling the short end of the rope will release the knot.
HOBBLES
Horses are seldom hobbled or cast (thrown to the ground with the aid of ropes) since the advent of chemical restraint that is both powerful and short acting. Breeding hobbles are still commonly used on farms that have natural breeding operations. These hobbles prevent a mare from kicking effectively. They are fitted around the hocks with web or leather straps that are tied to a neck strap or rope after passing between the forelegs (Figure 7-31).
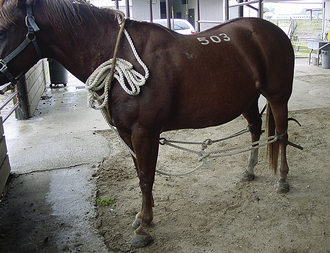
FIGURE 7-31 This is an example of breeding hobbles placed upon a mare before natural service to prevent her from kicking backward and potentially injuring the stallion.
The scotch hobble is a means of drawing up the hind leg (Figure 7-32). This technique can be used as a form of restraint for the examination of the opposite forelimb. It works by keeping the weight on the hind leg of the side that is examined. Most often the scotch hobble will be used for holding the hind leg that is “up” out of the way during a castration. A heavy cotton rope should be used to prevent rope burn. A loop is placed around the horse’s neck and tied with a bowline knot before the initiation of anesthesia. Once the horse is down in a surgical plane of anesthesia, the rope is passed through the loop behind the pastern area and then brought back to the loop. Pulling the end of the rope using the neck loop as a pulley draws the leg forward. Care must be taken to prevent a rope burn in the pastern area. Some people actually have a leather sheath with two loops on it that is used behind the pastern to allow the rope to slide around the leg without the potential of producing a rope burn.
RESTRAINT OF THE DOWN HORSE
Control of the head is the key to restraining a horse lying in lateral recumbency because to get up the head must be lifted. Kneeling on the neck near the head will keep most horses down. This should always be done from the back of the horse; any activities performed on a horse that is down must be done from the back. An approach from the belly side puts the handler in danger of thrashing legs and feet. To keep the horse from damaging the facial nerve and the down eye, the handler should cushion the lateral area of the face and orbital area. This may be done with a towel, inner tube, or foam mat placed under the head. If such a protection is not available and the horse is thrashing its head, pulling up on the nosepiece of the halter will elevate the nose and prevent the horse from moving the head and producing traumatic wounds to the eye and face.
OTHER HEAD AND MOUTH RESTRAINTS
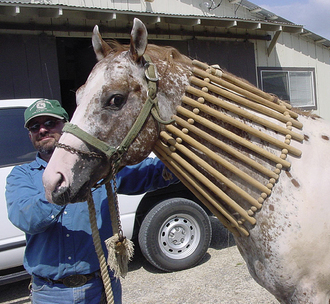
Horses will sometimes tear at bandages. Devices are available that may be used to prevent this by restricting the horse’s ability to move the head laterally. One such device is the cradle. It is made of wooden slats and leather straps with a buckle that goes over the horse’s neck to secure the cradle and brace the neck in a straight line (Figure 7-33). This device prevents the lateral movement of the neck while allowing the horse to eat and drink. Another method of preventing the horse from chewing at bandages is to tether the horse to an overhead cable in the stall. Running the cable diagonally across the stall is the usual method. With this technique, the horse is able to move about the stall freely, but cannot reach far enough laterally to gain access to the bandage.
Horses with severe pain, with neurologic disease, or undergoing anesthesia will frequently throw their heads, crashing into solid objects and mutilating themselves. To prevent this, there are foam rubber head protectors made to fit snugly over the head of the horse, much like a helmet (Figure 7-34). The use of these and padded stalls help to prevent self-inflicted trauma.

FIGURE 7-34 The handler is placing a protective foam and rubber helmet over the head of this anesthetized horse to protect the head during recovery from anesthesia.
Wire or plastic muzzles are used frequently on horses that are to be held off feed and to prevent them from eating bedding while still allowing them access to water (Figure 7-35).
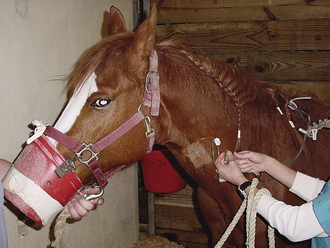
FIGURE 7-35 This horse is wearing a plastic muzzle to keep it from eating during the perioperative period. The muzzle does have holes to allow the horse access to water.
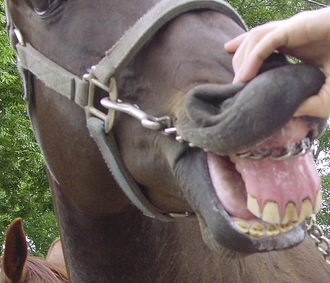
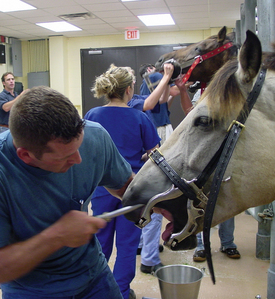
The examination of a horse’s mouth and dental arcades may be accomplished by standing to the side of the horse’s head and placing the hand of the arm more caudal to the mouth over the bridge of the horse’s nose. The hand nearest the horse’s nose is inserted into the interdental space (Figure 7-36). The hand must be kept in a vertical position. The fingers are placed on the lingual surface of the dental arcade, and the thumb palpates the buccal surface. Following a dental examination, the tongue may be pulled out the side of the mouth through the interdental space. Mouth gags are available to allow for a more complete visual examination of horses’ mouths. A simple wedge (Figure 7-37), which is pushed up between the upper and lower cheek teeth with the handle hanging out, is commonly used. A variation on this is a round gag, used in a similar fashion to the wedge. Caution must be observed with either of the previous gags because horses may fracture their molar teeth with these devices inserted onto their dental arcades. There are also a number of different large-hinged speculums that either fit over the upper and lower incisors or within the dental space and then are suspended from a halter (Figure 7-38). The mouth can then be cranked open, allowing examinations and procedures to be performed on the mouth. Although these devices are effective in getting the mouth open, it should be remembered that they are heavy and cumbersome for both the handler and the horse. The use of any of these speculums is usually coincidental with the sedation of the horse.
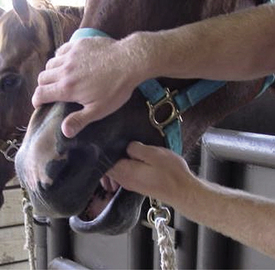
FIGURE 7-36 The handler is about to perform an oral and dental examination on this horse. It is critical that the examiner keep the hand in a vertical position while checking the teeth because the horse will bite down on a hand placed in a horizontal plane.
MANUAL AND CHEMICAL RESTRAINT
The manual casting of horses to the ground has been replaced by chemical restraint and anesthesia. Casting always had inherent danger for both horse and handler. Musculoskeletal damage was always possible when the forefeet of the horse were pulled from under it. Once the horse was cast, the thrashing about caused a variety of injuries.
Chemical restraint is now widely accepted and practiced. Many different agents and combinations of agents are used. These are discussed in Chapter 27. Whenever a horse has been sedated, tranquilized, or anesthetized, it is important for veterinary personnel to stay with that horse until it is steady on its feet. When horses are tranquilized, handlers must remember to maintain a safe distance from the horse. When they are under deep sedation, tranquilization, or proceeding through stage 2 of anesthesia, horses may crash into an unwitting handler and cause significant injury to the person. Once the horse is down, make sure of the stage of anesthesia before placing restraint ropes or beginning surgical preparations. A slap to the flank of a horse awaiting castration may save damage from the kick of a partially anesthetized colt.
CAPTURE AND RESTRAINT OF CATTLE
Cattle are less difficult to capture than horses. They are also less discriminating than horses about what or whom they step on or run over. Generally, they are not directly approachable for haltering and leading. However, they are easier to drive into pens, alleyways, and chutes. Herds of cattle will vary in the amount of avoidance present. Some herds will allow a person to approach closely before moving away. It is preferable to have the herd begin to move when the handlers come within about 12 m of the herd. Cattle are herd oriented, so they will crowd and bunch together as they are driven, even climbing over other cows if they are driven too hard or fast. This should be avoided because bruising and other injuries are likely to occur.
It must be stressed that herding cattle into weak barriers must be avoided. Most beef cattle will walk through a barbed or smooth wire fence completely unconcerned and unscathed. Sometimes they even leave the wire in place, although much looser than it was. Calves become adept at slipping through the lower strands of pasture fences.
Cattle are usually less spooky than horses about strange surroundings, but they may balk and then bolt suddenly. Generally the balking occurs just as the cattle reach the open gate of a holding corral after being driven off of a pasture. The clever cattle rancher avoids the placement of strange things at the entrance to a corral, such as dogs, new people, or strange trucks. Veterinary personnel should remain out of sight unless the owner requests assistance in driving cows. Nothing aggravates a rancher more than having all the cows ready to go into the pen and having them spook at the last instant because something or somebody steps into their sight.
Once cattle are in the corral, they are funneled from larger areas into smaller pens and eventually into an alleyway leading to a chute. Usually, there is a system of gates that will allow the handler to block the cattle into these progressively smaller areas. These gates may be used to “cut” calves from cows to facilitate handling. It is best to work larger stock separately from the nursing calves. The handler must be careful in closing gates on a large group of cattle. If they get turned back toward the opening and hit the gate before getting it latched, there is a significant chance of injury to the handler.
The alleys leading to the chute should be built just wide enough for one animal to prevent attempts to turn around (Figure 7-39). People on foot may follow cattle in an alleyway to drive them toward the chute, but they should always be cautious and ready to climb out of the way. Never enter an alleyway that cannot be easily evacuated. The alleyway is usually arranged so that posts or boards may be slipped behind the cattle to prevent them from moving backward. “Tailing” may be used to push a cow ahead in the alley. Tailing is simply grasping the tail in the middle and twisting it forward onto the cow’s back (Figure 7-40). This provides discomfort to the cow, and the usual and expected response is for the animal to move forward. Never underestimate the ability of a cow to get frightened or balk and begin moving backward. This may cause serious injury to the unwise handler. Cattle prods, wiffle paddles, and electric “hot shots” are available and may be used from outside the alley. Many alleyways will have an elevated walkway that allows handlers to move the length of the alley to assist in moving cattle forward to the chute (Figure 7-41). If an alleyway and chute are not available, the next best solution is to run an individual cow into a gated corner. The handler must move quickly to get behind the animal and tail it to keep it from backing up. It may be necessary to rope a cow if no other method of restraint is possible, but this is not a technique that is advantageous or desirable in modern veterinary practice.
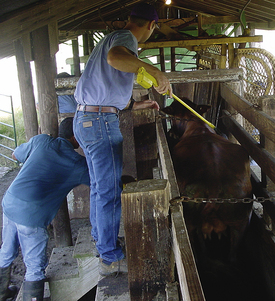
FIGURE 7-39 The alleyway that works best for moving cattle is only wide enough for one cow to pass through. Note that the alley is braced well with support posts and there are chains across the top of the alley to prevent it from spreading.
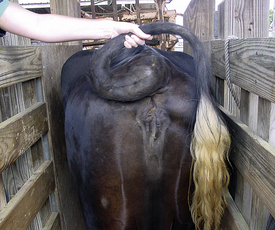
FIGURE 7-40 This is the tail twist method of pushing cattle into a space that they are reluctant to go. Care must be taken to not torque the tail so much as to cause a fracture of the coccygeal vertebrae.
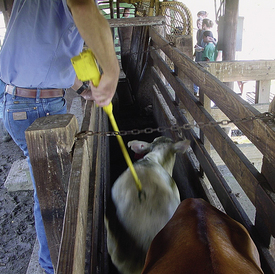
FIGURE 7-41 A “hot shot” with the proper positioning of the handler shown. These devices work well, but must be used judiciously to facilitate easy movement of cattle. The walkway that allows for human traffic above the cattle and outside the alleyway is evident just in front of the handler.
Once the animal has stopped moving, it is then possible to halter it and restrain it by the head. A single, calm cow restrained in a stall may be haltered without resorting to a chute. A bovine halter is all one piece and made from rope, as opposed to the equine halter. The halter is placed by loosening the nose loop first and then flipping the crown loop over the animal’s ears. Once the crown loop is in place, the nose loop may be positioned and the slack in the free end of the rope taken up as the rope comes under the jaw (Figure 7-42). Always keep the cow’s head at arm’s length and bend forward from the waist because an animal that becomes nervous will throw its head and may catch the handler in a compromised position. Animals with horns may be restrained by placing a loop of rope around the base of both horns and then dallying off to a solid post.
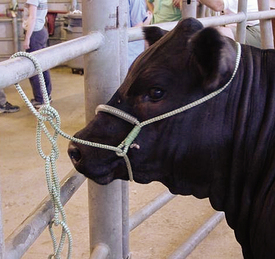
FIGURE 7-42 A rope halter placed correctly and tied to the pipe at an appropriate level to restrain this Angus heifer.
Calves are captured in much the same manner as foals. If the calf is small enough, it may be “flanked” and placed in lateral recumbency (Figure 7-43). The dam of the calf deserves respect and must be observed for aggression.
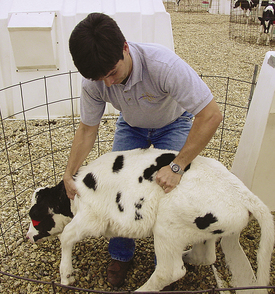
Bulls must always be respected for the aggression that they possess. Extreme caution should be used if driving bulls on foot. The use of feed to entice bulls into a capture area is often necessary. Once the animal is in the enclosed area, gates may be used to squeeze the animal into a position that will allow restraint. Capturing the nose ring using a wire with a hook on the end and then snapping a long lead provide the necessary restraint for most bulls (Figure 7-44).
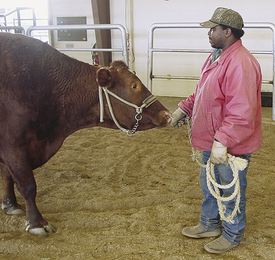
FIGURE 7-44 The handler has a long rope with a heavy snap in the nose ring of this bull and has also elected to hold the ring in his hand. The pipe arena that the bull is in provides additional safety for the handler.
HEAD-CATCH
The head-catch or squeeze chute is the final capture and restraining device for cattle (Figure 7-45). Cattle usually do not willingly put their heads through the head-catch. It takes precise timing to close the head-catch following the presentation of the head and ears and before the shoulders. Once a bovid gets its shoulders through the head-catch, it will escape. Spring-loaded head-catches are available, but their use is not as easy as the manufacturers would suggest. Most chutes also can squeeze the animal from side to side after the head is captured. This prevents the animal from moving about during an examination. Head-catches on manual or hydraulic chutes can be dangerous. Rapidly swinging handles or closing panels provide opportunity for the unfamiliar person to get hit. Take time to become familiar with the operation of any chute and head-catch before use.
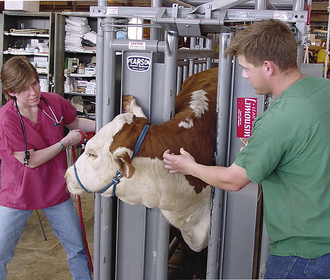
RESTRAINT OF THE HEAD
Many different techniques may be used as an adjunct to the head-catch to restrain the animal for more invasive procedures than observation. Halters may be applied to pull the head to the side for exposure to the jugular veins. A strong person can grasp over the muzzle and place his or her hands into the mouth to allow for an oral examination. The nasal septum may be pinched between the thumb and forefingers, or nose tongs may be placed in the nose to stabilize the head. The horn or ear should be used to provide leverage for the handler. Care must also be taken to perform these techniques at arm’s length to prevent a hit in the head as the animal throws its head up.
Grabbing the animal’s tongue and moving it to one side of the mouth allows oral examinations in cattle. The handler makes life easier by grasping the tongue with a towel. Large, metal, hinged speculums may also be used in bovine oral examinations. These are placed and maintained as in the horse. Remember that cattle are not used to being restrained in the first place, and the use of additional hardware on the head may make them dangerous to the handlers should they become panicked or aggravated.
Mouth gags or speculums are used in cattle for the passage of orogastric tubes. The most common type is the Frick speculum (Figure 7-46). This is a stainless steel tube that is placed in the oral cavity, passed over the lingual bulla, and held in place while the tube is pushed through it into the esophagus. Care must be taken to ensure that the tube does not damage the pharyngeal mucosa. Another method that can be used is a block of wood that extends across the animal’s mouth and has a hole in the center to allow for passage of the tube. The gag is placed in the interdental space and held by a strap placed behind the head.
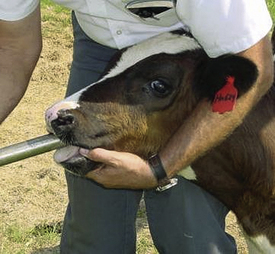
TAIL RESTRAINT
The tail of a cow can be tied just like that of a horse, with the same precautions necessary about tying the tail to anything other than the cow. The tail of a cow may also be used for driving it as mentioned previously. “Jacking” the tail of a cow will also provide a means of restraint for short procedures. This technique involves pushing straight up and forward on the tail carrying it vertically in a plane directly over the cow’s midline. The handler should remain balanced and have the tail about one third of the way down from the tail head (Figure 7-47). This technique works only when the tail is maintained vertically over the midline of the cow.
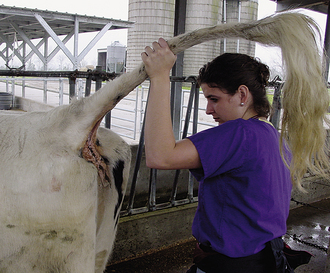
KICKING RESTRAINTS
Cattle usually kick to the side and forward with a hooking action rather than straight to the rear. Several commercial devices are available to prevent kicking and to restrain the hind legs. Milking hobbles are flat metal hooks with a chain in between that are placed over the tendons of the hind leg just above the hock. The open end of the hooks is to the inside of the leg, and the chain passes around the front of the limbs. Once the hooks are in place, the chain can be drawn up until the hocks are close together.
Pressure on the flank seems to discourage cows from kicking. A device shaped like giant ice tongs may be squeezed over the flank (Figure 7-48), or a rope may be tied snugly around the abdomen just anterior to the udder or prepuce (Figure 7-49).
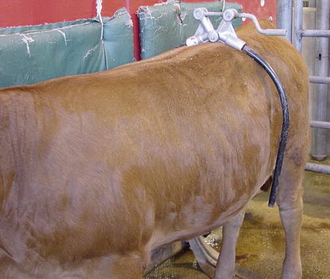
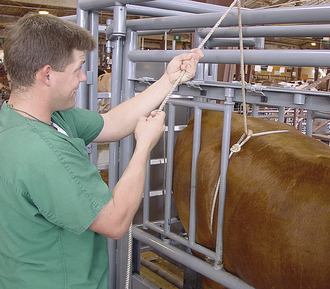
LIFTING FEET
Cattle are reluctant to lift up their feet, and to accomplish this in a standing animal without assistance requires great effort. The foreleg can be raised with a noose tied around the pastern and the free end of the rope passed over the back of the cow or around an overhead rail or pipe, which will then act as a pulley. The hind leg is more of a problem because there is no portion of the cow’s anatomy that will act as a pulley. The limb may be tied to an overhead beam or rail following placement of a clove hitch around the animal’s hock joint (Figure 7-50). Realize that most of the time this will be done in a chute or narrow area, and maneuvering space will be limited. However, the use of this procedure will allow for the visual and digital examination of the foot and interdigital space of all but the most recalcitrant cattle (Figure 7-51).


CASTING
The act of casting a bovid is quite simple. The animal must always be anchored to a sturdy post before placing one of the various rope harnesses on it. A sturdy halter is the first requirement for casting. The simplest harness technique consists of a noose around the neck, a half hitch around the girth, and a half hitch around the flank (Figure 7-52). Care should be taken to avoid incorporating the udder of a cow or the testicles of a bull into the flank rope. The free end of the rope comes off the animal’s back with all knots positioned dorsally. Once the harness is secure, a strong pull toward the rear of the animal will make it lie down. One average-sized person can easily cast an adult cow in this manner.
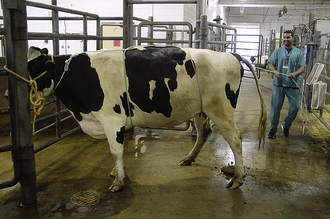
FIGURE 7-52 This is an example of the running W or double half-hitch technique of casting a cow. Care must be taken to ensure that the neck rope does not choke off the trachea; the thoracic portion is just behind the forelegs, and the abdominal portion of the rope is in front of the udder.
The cow may be rolled onto her back if there are appropriate wedges available to keep her in dorsal recumbency. Square bales of hay may be used to wedge against the animal to keep it in position. The legs should be stretched to the front and rear with stout cotton rope. Cattle in sternal or dorsal recumbency are less likely to bloat than those in lateral recumbency when they are cast. A bovid that must be placed in lateral recumbency should be restrained on its right side (Figure 7-53). This allows the veterinary personnel to observe the rumen for any signs of bloat that may occur. If the bloat becomes large, the procedure should be terminated. Kneeling on the animal’s neck may provide additional restraint for cattle in lateral recumbency. Standing cattle that are undergoing any procedure may go down at any time, for unspecified reasons. Restraint of the head should always be with a halter because a rope around the neck may tighten and strangle the cow and the use of nose tongs may lead to ripping out the nasal septum.
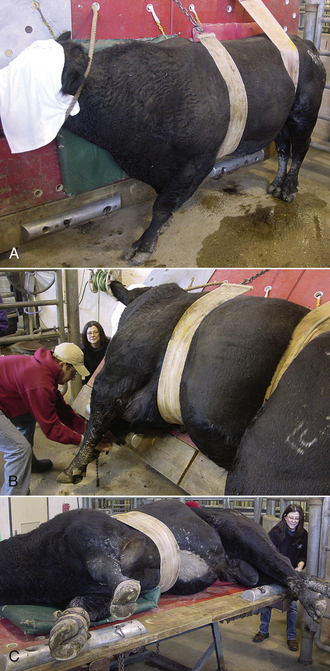
FIGURE 7-53 The techniques involved in tabling a ruminant. This bovine has been placed on a tilt table with the right side down so that constant observation of the left paralumbar fossa can be maintained. A, A towel is placed over the animal's eyes to minimize anxiety, and two bands are placed around the animal to initially restrain it to the table. B, The table is tilted slightly to raise the feet off of the ground, and the inside front leg is secured to the table with a wide band. C, The animal is then tilted into a horizontal position, and the rest of the legs will be restrained in a manner similar to the right foreleg.
TECHNICIAN NOTE
A bovid that must be placed in lateral recumbency should be restrained on its right side.
Some dairy breed bulls and some beef bulls will have a nose ring. They are easily led with the ring, but care must be taken because the ring may break or pull through the nasal cartilage. Likewise, a bull should not be tied fast by the nose ring. A combination of a halter and nose ring may provide the most efficient means of leading a bull.
Chemical restraint is used for cattle; however, it must be remembered that ruminants are exquisitely sensitive to α2-agonists, such as xylazine.
DRIVING SHEEP AND GOATS
Sheep and goats are more herd conscious than cattle and can be driven in bunches. Avoidance behavior in sheep is the basis of maneuvering the flock. When sheep are approached, they will flock together and move as a single unit. Taking advantage of their desire to escape is a fundamental part of successful handling. Dogs are an excellent adjunct in working sheep and some goat herds, although goats will occasionally challenge the dogs. Handling areas should be well lighted, have solid sides, and should be free of objects that may project shadows into the sheep’s visual path. Sheep can be worked in alleyways, and although they tend to climb on and over each other more than cattle, they do less damage because of their smaller size. Sheep are much more athletic than cattle, yet they do not seem to want to climb out of enclosures or go over fences like cattle do. However, if driven hard, sheep may run through flimsy, temporary fencing, hang themselves, or break legs.
In addition, kids and lambs within a flock may be quite acrobatic, jumping into fences and climbing over structures to avoid getting caught. These activities may result in traumatic injuries, and veterinary personnel should be alert to prevent dangerous situations.
Sheep can be caught in small enclosures in the same way as foals or calves are caught, with a hand under the neck and one under the rump. It is important to remember that a sheep or mohair goat must not be restrained by grabbing the wool. The fleece may be damaged, or in meat animals, a subcutaneous bruise may develop at the site, damaging at least the aesthetics of the product.
CATCHING INDIVIDUAL SHEEP
Sheep are often set up on their rumps for several different procedures. There are several different ways to end up with the sheep on its rump with its back leaning against the holder for support. The handler may have to retain a grip on the forelegs for better support and control of the sheep (Figure 7-54). The easiest method is for the person to begin on the sheep’s left side. Reach under the base of the neck with theleft hand and over the back to the right hind leg with the right hand. The sheep is gently lifted off of the ground toward the right and upturned, as the right hind leg is lifted to get the animal’s weight off of it. The right hand moves to the right foreleg as the left hand moves to the left foreleg, and the sheep is held on its rump facing away from the handler. One person can shear a sheep or perform other procedures unassisted with the sheep on its rump by steadying its upper torso between the arms and the lower torso between the legs as the person works.
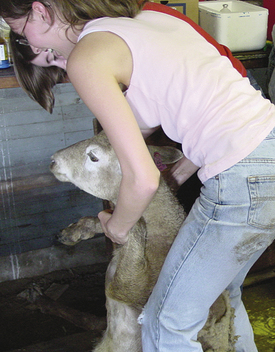
FIGURE 7-54 Holding the sheep set up on its rump. Note that the handler is supporting the sheep's head with one hand and the foreleg with the other. If the animal becomes more rambunctious, both forelegs can be grabbed and the sheep can be centered between the handler's legs for additional control.
The method of holding the legs of lambs for docking and castration is the same, whether they are held by the handler, laid on a bench, or placed over a fence. The holder grasps the parallel hind leg and foreleg, bringing the hind leg forward while holding between the hock and fetlock. The foreleg is held just below the elbow. One person can perform drenching of oral fluids or medicines to a sheep. The sheep is backed into a corner as the handler straddles the sheep above its shoulders, squeezing slightly with the knees. The handler lifts the head by the lower jaw while holding loosely around the muzzle. The dose syringe is inserted into the interdental space on the opposite side of the mouth with the other hand. Do not lift the jaw above a line parallel to the ground surface and take care to administer the fluid slowly enough so that the sheep can swallow it. The nozzle of the syringe should be inserted well back into the mouth so that the fluid does not dribble out. Caution must be used to keep the animal’s head under control so as not to traumatize the pharyngeal mucosa, as noted in the bovine section.
CATCHING INDIVIDUAL GOATS
When planning procedures that require physical restraint of goats, consideration of the layout and surrounding working facility, physical condition and temperament of the animals, and human and animal safety must be addressed. One person can easily restrain and carry out certain procedures on goats that have been handled frequently in a quiet, nonaggressive manner. However, when goats have had only occasional human contact, restraint and procedures should be performed with an assistant or many assistants (Figure 7-55). Patience and an easygoing manner of treatment often bring satisfactory results when handling goats.
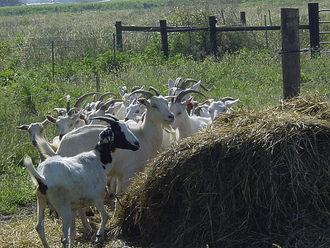
FIGURE 7-55 This photo represents a typical situation that veterinarians will be faced with when attempting to work a herd of goats. Note that the fences are thin, and there are obstacles in the pen. Care must be taken when approaching this herd to keep them all in the same location.
A useful technique for capturing goats is the use of a shepherd’s crook or cane. The goat can be hemmed in toward the fence, and the crook can be placed in the throatlatch area to catch the head (Figure 7-56). Care must be taken to prevent trauma to the trachea when using this technique.
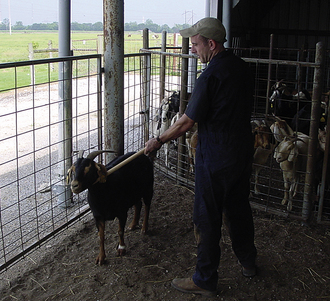
FIGURE 7-56 This photo demonstrates the use of a shepherd's crook or cane to capture a goat. Note the position of the handler in relation to the fence line.
Equipment such as stanchions, tilt tables, and squeeze chutes can be used to assist in restraint. Realistically, these are rarely available in pet-goat households. Most procedures are accomplished by steadying the goat against a wall or fence by firmly holding a leg against the flank or thorax of the goat. A handler can also gently flip, place, and hold a goat in lateral recumbency by holding the legs and placing a knee on the neck of the goat. Another useful strategy is for a handler to straddle the goat and back it into a corner and firmly press their knees into the shoulders of the goat (Figure 7-57).
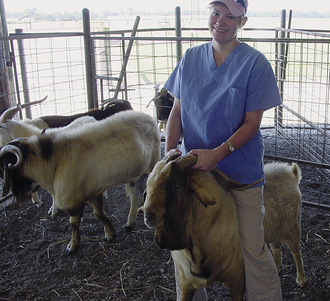
FIGURE 7-57 Restraint of an individual goat may be accomplished by straddling the goat and backing it into a corner while maintaining a grip on the horns and pressing the handler's knees into the thorax just behind the front legs.
To restrain the head, one hand can be placed on each cheek with the fingers wrapped under the mandible. Be advised to avoid excessive pressure upon the trachea. The beard can also be grasped along with wrapping the other hand around the goat’s neck. The horns may also be used to control the head, but this depends on the temperament of the goat and the strength and skill of the handler. Oral examinations are most efficiently accomplished using a speculum to ensure a clear view and protect the instruments and handler from being bitten by the goat.
When drenching, dispensing boluses, or passing an orogastric tube in a goat, the head should be held in a straight, natural position with the mandible parallel to the ground. The dose syringe should be inserted well back into the cheek pouch via the commissure of the lips. Give the goat time to swallow and dispense the fluid slowly because aspiration pneumonia can occur if fluids are exuberantly given or the head is tilted upward. A bolus can be administered by the use of a balling gun inserted over the base of the tongue, but not into the pharynx. Once the tablet or bolus is administered, the head position should be maintained with the mouth held closed until the goat swallows. This prevents the goat from spitting the bolus out.
CAPTURE AND RESTRAINT OF SWINE
Small piglets can be crowded into corners and grasped by a hind leg (Figure 7-58). The leg hold should be rapidly changed to holding the pig in both hands around the torso for the comfort of the pig (Figure 7-59). Obviously, this technique is not applicable to adult swine.
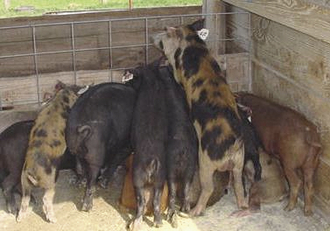
FIGURE 7-58 Piglets pile up in the corner when driven. It is easy to capture one by grabbing onto the hind legs that are presented.

FIGURE 7-59 Two handlers have grabbed a piglet and are maneuvering it for a procedure. Many times this is all the restraint necessary for a procedure, especially on small pigs. This is not a recommended procedure for miniature or potbellied pigs because luxations of the hind limbs may occur.
Veterinary personnel may be faced with the castration of large boars based on the owner’s perception of when the signs are right. One technique that can be used on market-weight boars is to herd them to a corner and have two handlers grab the nearest hind leg. Following capture, the hind end is then elevated so that the pig is standing on his head in the corner. This technique is not for the feint of heart; it requires the coordination and strength of the two handlers to accomplish the task.
Swine can be aggressive, particularly boars and nursing sows. A fence or panel may be used to “haze” them, and the barrier provides protection to the handler. When the panel is meant to be stationary, take care to push it all the way to the ground and plant it. Pigs will attempt to “root” underneath it. Always be aware of the escape route when entering a pen. Swine are intelligent and individualistic and may be difficult to direct in a large area. They tend to dart through small openings for escape. A cane is a valuable addition to a handler when attempting to drive and direct swine. Tapping them on the side of the neck and face with the cane while following on foot gives the handler some degree of “steering” capabilities.
Once pigs are inside a small enclosure, a snare may be used to catch them. A hog snare is an adjustable metal cable loop at the end of a rigid handle. The usual procedure in the capture of the pig is to push it into a corner and step in, tight to the flank area, and slip the snare loop over the upper jaw from behind. The loop is tightened after it is behind the incisors. The snare has a rigid handle that allows the handler to direct the snout after it is captured. Generally, swine will brace themselves by pulling backward when caught and are immobilized by its use (Figure 7-60). However, the discomfort of the snare usually results in nonstop squealing until it is removed. Handlers are encouraged to wear ear protection when performing any restraint on pigs.
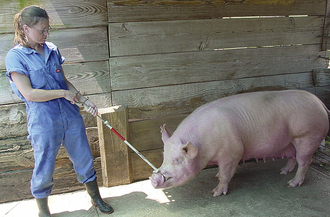
FIGURE 7-60 A handler with a hog snare has captured this pig by the upper jaw, just in front of the cheek teeth. It is obvious that the pig resents this and will resist by pulling back against the snare.
Pigs can be restrained on their backs in a trough, but find it unsettling and complain vocally (Figure 7-61). A sling of canvas with holes for the legs has been used with great success in laboratories and veterinary hospitals to cradle the pigs comfortably for certain procedures. The farrowing crate is the restraint device for sows, which keeps them from lying on their piglets.
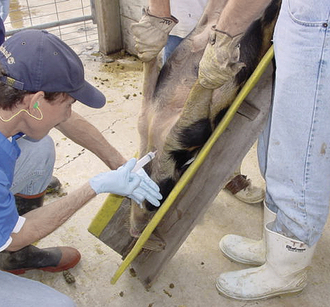
FIGURE 7-61 This pig is being restrained by both hind legs, and its back is supported by the V trough. Procedures such as ear notching and bleeding can be done with the pig in this position. The reader should note that the pig will squeal the entire time it is restrained in this fashion, and handlers should wear ear protection as is observed in the individual bleeding the pig.
Pigs can be restrained for castration or vaccination by holding them off the ground by the hind legs with their backs against the handler’s legs. Large pigs will struggle less if their forefeet rest on the ground. Piglets receive oral administration by holding them up by the forelegs and leaning their backs against the handler’s legs while they stand on their hind legs.
The pig is an intelligent animal that can be trained to tolerate minor discomforts; unfortunately, the time involved to train swine is often not profitable in agricultural animals. Miniature pigs, kept as pets, are most often seen these days in urban practices. Many of these are spoiled, willful creatures that dominate the household, and their owners are not impressed with rough handling. The support sling is the best method for restraint because it causes the animal no discomfort yet immobilizes well. Many pet pigs are fond of having people scratch their backs and may stand or lie quietly for an examination if this is done for them. Holding the pig cradled in the arms of a handler may seem a good idea until the pig struggles. Then the hind foot nearest the body will gouge the holder. Pigs also have powerful jaws and some will bite, especially if in pain. The examination of the mouth can be accomplished by the use of a U-shaped gag, which is placed into the mouth from the front to behind the canines; the gag is then rotated to spread the jaws. Never put fingers into the side of a pig’s mouth since the cheek teeth are sharp.
TECHNICIAN NOTE
Many pet pigs are fond of having people scratch their backs and may stand or lie quietly for an examination if their backs are scratched.
Although a miniature pig may live in and control a house, it is still a pig. Pigs vocalize when they are uncomfortable or in pain. Do not be surprised when the cute little pig emits an ear-piercing shriek as it is picked up. This will continue until it is set free. Chemical agents for restraint are highly recommended for use on these animals.
CAPTURE AND RESTRAINT OF DOGS
The only time veterinary personnel should have to catch a dog that is not in a cage or run is if the animal has escaped. In a hospital, dogs are often motivated by fear, so personnel should learn to deal with the two types of behavior this produces. Avoidance with submissiveness when cornered is one, and the other is avoidance until cornered and then aggression, otherwise known as fear biting. Unfortunately, it may be difficult to discriminate between the two until the moment when hands are approaching the dog. It is the rare dog that will not snap at a handler that grabs it as it runs past, yet it is difficult to resist the temptation of doing so as a dog streaks past on its way to freedom.
Dogs that feel they are being chased will run, and a person is not going to outrun any but the smallest or most debilitated. It is best to try to keep the dog in sight until there is an opportunity to corner it. Sometimes it helps to have a canine companion to entice the dog to approach. In this situation, it will never hurt to have a pocketful of bait to gain the dog’s favor. Most dogs respond favorably to voice reassurance, and a calm, friendly voice usually gets better results. With many dogs, squatting in front of them to appear less large and overbearing will help. Moving slowly and deliberately, offer the back of the hand at or below the level of the nose for the dog to sniff. The response to this action is the first indication of the tendency for the dog to try to bite. Never try to grab the dog’s collar or pick it up until some reassurance is given to the animal. Do not confuse a wagging tail with friendliness in a dog with an unknown personality. Watch the ears, eyes, and face. It is not unusual for an aggressive dog to hold the tail erect with a tense, narrow, oscillating motion before biting, or for a fearful dog to suddenly snap as a hand is withdrawn or a collar grabbed.
The back of the hand is offered to the dog for two reasons. The first is that it is probably less threatening than the open palm, which may appear to the dog as an attempt to slap. Second, the fingers are out of the way, and the dog will be less likely to get the entire hand if it does bite. Caution should be exercised by all handlers in these situations because dogs bite with lightning speed, and the position of the hand may have little to do with the ability to withdraw from danger.
Some dogs are naturally gregarious and trusting and require little in the way of preliminary introduction. The trusting dog will sniff the hand, begin wagging the tail, and approach for more petting. It is a good idea for the handler to run the hands over the entire dog in a friendly fashion before taking liberties with the body. Evaluating dogs requires knowledge of the relationship of the dog with the owner. Some dogs have trained their owners rather than the opposite, and the handler must forge his or her own relationship with the dog.
Sometimes dogs act reasonably in an initial examination with the client present and then threaten to bite when approached after the client has gone. When faced with a dog that will bite if given the chance, the sensible approach is to keep your hands and body out of the way. Always remember to keep all outside gates and doors closed when working with difficult animals. The cage door should be held closed as much as possible when trying to catch these animals. They are trouble enough without trying to capture them after they have escaped. Small dogs may be managed by handling with heavy leather gloves. The dog will bite at the fingers of the glove of one hand while the handler picks up the animal under the chest with the other. A small fractious dog can also be picked up using a thick towel. Large dogs that want to bite are more concerning. The first step is to catch them by the neck. A lead rope with a slipknot can be tossed over a dog’s head, but sometimes a rope or cable snare similar to a hog snare is required (Figure 7-62). Most dogs will relax or decrease aggressive behavior when caught by the neck. The truly vicious or confirmed fear biters will continue to attempt to bite and even attack. These animals will require a muzzle or rope with a pole to keep the teeth away from veterinary personnel. Often, chemical restraint is necessary for the safety of the patient and personnel.
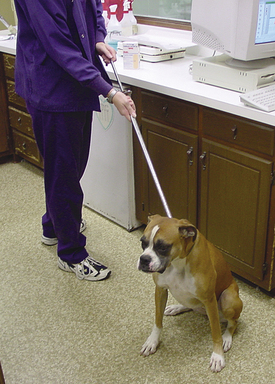
FIGURE 7-62 This dog has been captured with a cable snare. The steel handle allows the handler to keep the dog at a safe distance when maneuvering the animal.
TECHNICIAN NOTE
Often dogs act reasonably in an initial examination with the client present and then threaten to bite when approached after the client has gone.
A truly vicious large dog is a major challenge. These dogs must always be handled with at least one snare, possibly two if the dog is strong. Once captured, the dog is stretched between the snares for leading. Many of these dogs are used as guard animals, and only one person can handle them. The owner may be able to place the muzzle on the dog before bringing it into the practice. These dogs must always be treated with respect for their ability to harm the handler.
A dog at large that will not allow approach may require the use of a capture gun or pole syringe. Animal control officers are experienced with the use of these devices and may be able to provide assistance.
LIFTING DOGS
Lifting a dog onto the examination table is usually the first step in any examination or procedure. Grasping on either side of the thorax behind the elbows allows the handler to lift small dogs. Putting the arms around the front of the chest and behind the rump will allow a handler to easily lift a medium-sized dog. This technique places the handler in close proximity to the animal’s teeth, so care must be taken to prevent being bitten by the frightened dog. Large dogs are harder to lift. Their weight may be prohibitive, their bulk makes them awkward, and they are not accustomed to being lifted. One person can lift a large dog by using a forklift technique, placing the arms behind the elbow and in front of the hind legs. If the animal struggles, there is danger that it will fall forward or backward. Two people can lift a dog together if one lifts the forequarters and the other person lifts the hindquarters. Both individuals should be on the same side, away from the table, to accomplish this technique. Some dogs object to being lifted from under the flank area, especially males. If this is the case, they definitely need two people to lift them, and the person in back should make sure the placement of the hand or arm is well forward on the abdomen. Many practices now have lift tables that allow dogs to be walked onto the table at floor level and elevated to a comfortable height for an examination (Figure 7-63). Keeping two hands on the dog while lift tables rise and lower is very important. Dogs may become nervous or frightened with the sounds associated with lift tables and decide to quickly leave. Handlers are cautioned that lifting dogs may result in a back injury. Lifting with the legs and keeping the back straight will help prevent muscle strains. Large dogs that are nervous about being lifted or react adversely to being on top of a table should be dealt with on the floor.
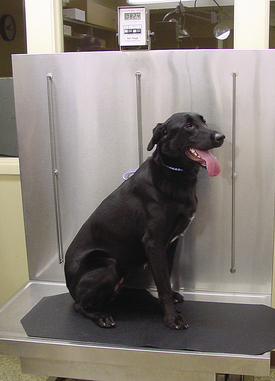
FIGURE 7-63 A stainless steel lift table that also has a self-contained scale. This allows large dogs or those that do not like to be picked up to step onto the table at floor level and be raised to a comfortable height for examination.
Never let a dog jump down from a table. Tables and floors have slick surfaces that invite slips and possibly fractures. Using commercially available bath mats, towels, or other nonskid surfaces can increase a dogs level of comfort with being on a table. Lift the dog off the table in the same manner as it was placed.
Injured or sick animals pose different problems in lifting. More support is required for patients with fractures or painful abdomens. A stretcher may be required for lifting a badly injured dog. Rational judgment should be used in all instances when lifting is required.
TABLE RESTRAINT
The degree of restraint required for a dog on the table depends on the procedure. The forequarters and hindquarters must be controlled at all times to prevent the dog from jumping or falling off the table. The form of restraint most commonly used is to have the arms either behind the rump or under the flank and in front of the chest pulling the dog inward in much the same manner as lifting. The head may be pulled toward the handler’s chest and anterior shoulder (Figure 7-64). This is adequate restraint on most dogs for an examination and intramuscular or subcutaneous injections.
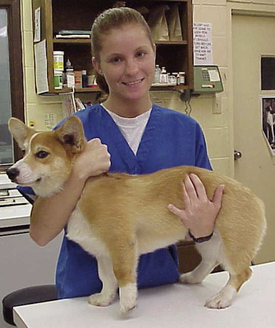
FIGURE 7-64 The handler is providing support for the dog and restraint for an examination at the same time. Note the placement of the arms in a forklift position under the neck and in front of the flank. The handler is positioned to draw the animal closer if serious anxiety develops.
A rectal examination requires only slight adjustments for restraint. The holder’s arm should not be behind the dog; it can be placed over the dog’s back to stabilize lateral movement by drawing the body toward the handler. Often it is preferred to place the arm under the ventral abdomen to prevent the dog from sitting down. The size of the animal plays a role in which method is more effective.
Whenever procedures are done on puppies, it is wise to put the bitch into a crate or better, remove her to a kennel outside the room. Care must be taken when removing newborn pups from the bitch for the same reasons discussed previously.
RESTRAINT FOR VENIPUNCTURE
The dog must not be allowed to move during venipuncture because movement results in the perivascular placement of the needle. The primary reason for struggling and movement during venipuncture is anxiety. Calm, affectionate handling with petting and soothing words will help alleviate anxiety. The most painful portion of the venipuncture is the piercing of the skin and vessel, which is when the restraint must be most secure. Positioning is the most critical part of a venipuncture to allow for accurate location of the vessel. Diagnostic sampling is discussed in Chapter 20.
The holder must restrain the dog’s body, present the forelimb, and occlude the vein to allow it to fill and be recognized under the skin for cephalic venipuncture. This can be performed with the dog in a sitting or standing position. Though many dogs feel comfortable on a table, large and giant breeds may be more comfortable on the floor. A muzzle to prevent biting should be used when necessary. The handler stands (or kneels) beside the dog facing the venipuncturist and places one arm under the dog’s neck, using the hand of that arm to hold the dog’s head against the anterior shoulder. At the same time, the handler wraps the other arm over the back of the dog and uses the hand of that arm to encircle the dog’s forearm just below the elbow. The thumb is used to cover the cephalic vein on the medial side. The hand is then rotated to the lateral side pulling the skin and vessel as far to the outside as possible. Concurrently, the dog’s elbow pushed forward to extend and stabilize the leg (Figure 7-65).
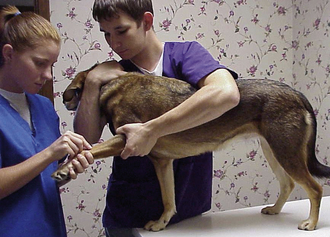
FIGURE 7-65 The correct positioning for obtaining blood samples from the cephalic vein. The handler has the dog well restrained, even though the dog remains standing, and has rolled the vein slightly outward to tighten the skin and provide easy access for the sample. If the dog becomes anxious, the handler will force the dog into sternal recumbency while maintaining the hold.
The handler must release the thumb when the person is ready to perform the injection. Failure to release the vessel will prevent the substance injected from reaching the general circulation and may result in the rupture of the vessel.
Kneeling or squatting behind a large dog that is sitting on the floor allows cephalic venipuncture to be performed in the same manner. Most dogs submit to cephalic venipuncture quite readily. Dogs that are gentle may allow cephalic venipuncture while sitting up.
Jugular venipuncture is sometimes needed. The handler stands (or kneels) alongside or behind the dog. One arm is placed around the neck of the dog and the hand is used to raise the chin so that the neck is extended and the dog’s face is directed toward the ceiling. The fingers must not be placed too far caudally on the jaw, which may occlude the jugular vein and make it difficult to locate. The handler uses the other arm to encircle the dog’s back and chest and hold the animal snuggly against the torso of the handler (Figure 7-66). The main advantage of this position is to provide a nearly straight plane from the angle of the jaw to the forefeet for easy access to the jugular vein. The correct position of the head should be no more than slightly above 90 degrees from the neck.
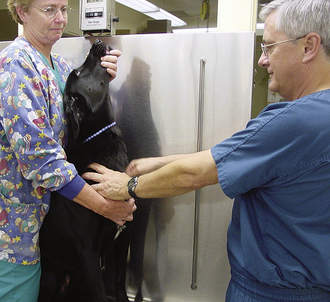
FIGURE 7-66 Method of holding the dog for jugular venipuncture. Note the straight line from the ramus of the mandible to the feet.
TECHNICIAN NOTE
The saphenous vein, located on the lateral aspect of the hind leg, is an alternate venipuncture site for which the dog must be restrained in lateral recumbency.
The saphenous vein, located on the lateral aspect of the hind leg, is an alternate venipuncture site; for this procedure, the dog can be restrained in lateral recumbency or may be done from a standing position. To position a dog in lateral recumbency, the holder stands behind the dog with one forearm pressed across the animal’s neck while that hand holds the forelegs with a finger between the legs. The other forearm presses across the dog’s flank, and the hind legs are held in a similar manner. When venipuncture is performed, only the down leg is held; the person making the puncture stabilizes the other.
MUZZLES AND MOUTH GAGS
A dog’s mouth can be restrained manually by bringing the hands forward from the rear on both sides of the face. The thumbs are placed on the forehead, and the fingers are looped under the mandibles. The palms of the hands should be below the ears. Concern for the owner’s perception of this type of restraint and varying human hand sizes makes this method impractical and often unsafe.
Commercial muzzles are made of a variety of materials and come in various sizes. Several sizes should be available. Gauze or rope muzzles can be made, if necessary. Nylon rope slip leads are sometimes handy as muzzling devices for snapping dogs. Following capture of the dog, a loop of rope made with a single overhand knot is positioned from above the dog’s nose until it is in place over the muzzle. This loop should be tightened quickly after it is positioned with the knot on top of the nose. Most dogs will try to push the rope loop off with their forepaw. The first knot must be held snugly while a second knot is made with the ends under the nose. The second knot may be a single overhand, or a square knot may be thrown. The two free ends are passed behind the dog’s head and tied again. This knot is extremely important because it holds the muzzle in place, so it must be secure, yet it must be tied in such a manner to allow for quick release should the animal have difficulty breathing.
A gauze roll bandage (7.5 to 15 cm) may be used as a muzzle in the same fashion as the rope (Figure 7-67). Gauze is preferable to rope because it is less slick. However, it also makes a less rigid loop to apply to a recalcitrant dog. The piece of gauze should be cut at least 90 cm long for most dogs. It is important to have a sufficient length to begin with because there may be only one opportunity to muzzle the dog without a significant battle.
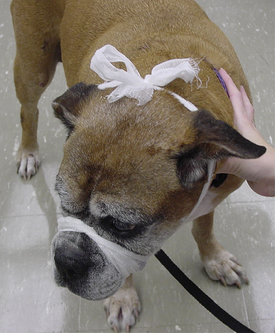
Brachiocephalic breeds are difficult to muzzle and can be determined biters. To muzzle them, the gauze bandage is first tied around the nose with the first knot tied underneath the jaw. The ends are then passed behind the head and tied with a square knot. Finally, one end is passed over the forehead and under the loop on top of the nose and then tied back to the other side. This keeps the loop from slipping off the top of the short nose. Commercial muzzles are now available for brachicephalic breeds.
The mouth of a dog can be examined in a variety of ways. The easiest, if the dog is a willing participant, is to open the mouth with the hands for a visual examination. Placing one hand on the upper jaw and the other on the lower and forcing the lips over the teeth will allow the handler to separate the jaws of the mouth (Figure 7-68). A variety of mouth gags can also be used on dogs. A simple wooden dowel may be pressed toward the back of the mouth to rest between the carnassial teeth. The dowel can be tied in place behind the ears, or it can be held by hand. Stomach tubes may be inserted with the dowel in place. The commercial spring mouth gag has a hole on either end for the canine teeth, and it is inserted on one side of the mouth for a variety of procedures. The disadvantage to this type of gag is that it hangs outside of the mouth, is heavy, and can fracture teeth to which it is attached. Concern for over-extension of the temporal mandibular joint should also be taken into account, especially when dealing with spring loaded mouth gags. A syringe case of appropriate size placed over the opposing canine teeth makes a lighter and safer gag, especially for use in dental work.
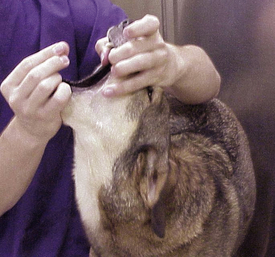
MOBILITY-LIMITING DEVICES
Self-mutilation and tearing of bandages can be prevented with several devices. The most common is the Elizabethan collar. The concept is to place some type of stiff material extending from the collar area to the dog’s nose so that it cannot chew or lick its body. Commercial plastic collars are available, or collars may be fabricated from buckets, large bottles, or heavy plastic sheets. It is most important to ensure that no sharp edges are present and that the collar is secured to the neck by gauze or the dog’s collar. (It is not good for a veterinary practice if the dog traumatizes itself with the collar in a manner greater than the original lesion.) Attention must be given to the ability of the dog to eat and drink following the placement of these devices.
Fastening a pole along the body to a snug collar high on the neck makes another type of device that will limit movement of the head. This would mimic the cradle described for restraint of horses earlier in the chapter. Tape is usually used to keep the device from shifting. Commercial “neck braces” or cervical collars are also available that work in a similar manner by decreasing the ability to flex or turn the neck.
CHEMICAL RESTRAINT
Many drugs are available for chemical restraint and sedation for dogs. The main reason for tranquilization is to remove anxiety, which is one of the major reasons that dogs bite. However, the handler is cautioned that tranquilizing effects vary between dogs and that dogs are still capable of biting even when heavily tranquilized. Chapter 28 gives more information on the chemical agents of anesthesia.
CAPTURE AND RESTRAINT OF CATS
Cats are more apprehensive than dogs with strange people and surroundings. A cat that escapes will search out a hiding place, whereas a dog that escapes will look for room to run away. This may be due to the lower endurance that a cat has for running and the security that cats feel in an enclosed space. A cat that is trapped may respond with flattened ears, hissing, scratching, and biting at hands and extended fingers (Figure 7-69). Heavy leather gloves may be used to subdue these cats in the same manner as described for small dogs. Grasp the scruff of the neck to lift the cat (Figure 7-70). This may be followed by a rapid “stretch” restraint by also grasping the hind legs. One of the easiest ways to catch a cat is to force it into a box pushed into the cage. There are boxes available that will allow for anesthesia induction after the cat is captured without having to handle the cat at all. All escapes from the box are blocked once the cage is placed in the kennel until the cat is safely inside and the top is closed.
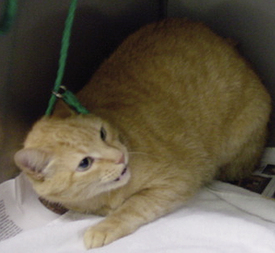
FIGURE 7-69 Trapped cats will display flattened ears and may hiss and growl before unleashing their claws.
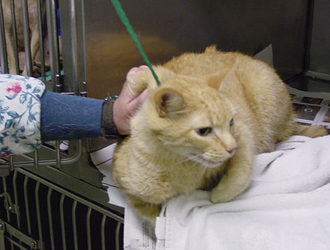
FIGURE 7-70 Capture of the head followed by grasping the scruff of the neck will restrain most cats.
Squeeze cages are very helpful when working with cat that is extremely uncooperative. These can be constructed by cutting a board or thick Plexiglas the same size as the cage door and applying handles. The handles should be accessible through the front of the cage when the board is pressed against the back wall of the cage. A cat can then be safely brought to the front of the cage by pulling the handles forward placing the cat between the front of the cage and the squeeze board. Next, chemicals may be used to subdue the cat, either by oral spray or injection. The hindquarters will be accessible for intramuscular injections. This provides the greatest amount of safety for the handlers. Groups performing trap-neuter-release (TNR) will often have capture cages that contain squeeze devices built in to limit the possibility of a cat escaping during transport from capture cage to hospital kennel.
CARRYING CATS
Cats generally feel most secure in close quarters and seldom resist being put into a bag or rolled in a towel. They are best carried from place to place in a cat carrier or small cardboard box with a lid. They can also be carried with one arm if they are not particularly nervous. To carry a cat, its hindquarters are placed under the elbow area and pressed securely to the holder’s body with the forearm (Figure 7-71). The cat lies in a sternal position along the forearm while the hand that has one finger between the legs holds the forelegs. The cat may still use the hind claws to gouge the abdomen of the holder, who must be ready to grab the scruff of the neck and hold the cat at arm’s length if it panics. Quickly grasping the hind legs and pulling away from the scruff of the neck will effectively immobilize almost any cat. This is not a position of comfort for the cat, and the cat will object, but it is clearly safer for the holder.
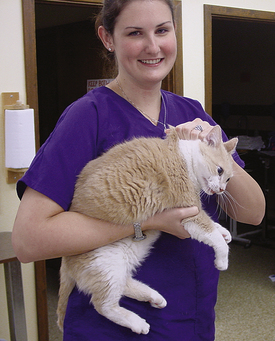
RESTRAINT FOR EXAMINATION
Table restraint of cats is similar to that of dogs, except that cats tend to use their claws as their first line of defense (if they have them) rather than their teeth. Cats should be allowed supervised movement when it is not necessary for them to be still. Some cats are so terrified that they are best held or cuddled with the head buried under the holder’s arm. Cats are not necessarily malicious when they climb onto a person’s chest or clamp nails into a forearm, but their actions will hurt if the holder is not prepared. It is a good idea to wear protective gowns or laboratory coats with long sleeves when dealing with cats (Figure 7-72). Cat scratches are potentially dangerous to veterinary personnel, and care should be taken to avoid movements and behavior that will agitate the cat.

RESTRAINT FOR VENIPUNCTURE
Cephalic venipuncture restraint can be applied to cats much like it is applied to dogs (Figure 7-73). However, cats will tend to engage their claws and teeth in an effort to get away from the holder. When a cat becomes agitated, it seems to lose its spine and develops legs that swirl about like a Weedeater. Once cats develop this attitude, they are impossible to hold like dogs, and other restraint techniques must be employed. Jugular venipuncture may be more appropriate for some cats because the hold restrains the head and forefeet more securely than the cephalic technique (Figure 7-74). Wrapping the hind feet with a towel disarms all but the most persistent cat. The head is held with the hand over the top of the head, and the jaw or zygomatic arch is grasped with the thumb on one side and two or three fingers on the other side. The other hand restrains both forelimbs as in the dog.

FIGURE 7-73 Proper restraint for cephalic venipuncture in the cat. The head, forearm, and back of the cat are all supported and well restrained by the handler.
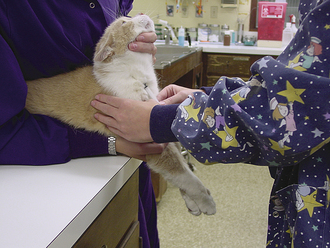
FIGURE 7-74 Restraint for jugular venipuncture in the cat. Note how the hind legs are tucked under the elbow of the handler and the forefeet are extended and held in one hand.
There are other ways to hold a cat for jugular venipuncture. They involve the cat being placed on its back with the holder occluding the jugular vein and the person using the syringe pushing the chin down toward the table to make the head move backward to get a straight shot at the jugular. The holder can hold two legs in each hand with a finger between the legs while pushing the cat down on the table and using the little finger to press on the thoracic inlet to occlude the jugular vein. A cat can also be rolled in a towel or bag to engage the feet and legs. The holder need only steady the cat on its back and occlude the vessel. Cat bags are made with zippers so that a single limb may be withdrawn and used for cephalic venipuncture, and in a similar fashion, there are now restraint boxes made for cats that have different openings to allow for withdrawal of a limb (Figure 7-75).
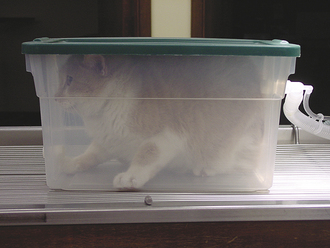
FIGURE 7-75 This cat is being restrained in a capture box that has inlet ports for inhalation anesthesia.
Stretching a cat in lateral recumbency will provide access to the saphenous vein (Figure 7-76). Most cats do not seem to realize that they can use their forefeet to scratch the hand on the scruff of their neck when they are appropriately stretched. The medial saphenous vein can then be used for venipuncture by holding the hind leg that is up in a flexed position. The little finger can be used to hold off the vein on the down leg for the venipuncture. The person who is performing the venipuncture must restrain the down leg with one hand while handling the syringe with the other.
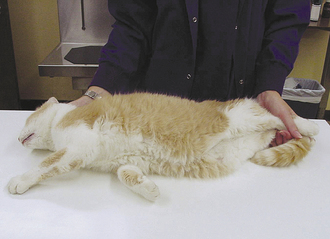
BATHING
Bathing a cat may be a trying experience for both the cat and the person. Most cats will try to climb up the person’s arms to escape standing water or spray. Cats should be bathed on top of a screen suspended over a tub (a metal window screen will suffice) and washed with a light spray of warm water. Almost all cats will clamp their claws into the screen and stand still for the entire bath when using this technique.
CHEMICAL RESTRAINT
The use of chemicals and anesthesia to restrain cats is common. The eyes should be treated with ophthalmic ointments to prevent corneal drying from the lack of blinking when these agents are used. See Chapter 27 for more information on anesthesia.
RESTRAINT OF EXOTIC ANIMALS
Minimal handling of all exotic animals is recommended and must be done efficiently, quietly, and confidently. The best method of learning restraint is by watching an experienced handler. Many clients judge the competency of veterinary professionals by how well they catch and handle the patient. Smooth handling and restraint of their animals reassure clients that the technician is well trained. It is often difficult to quantify the stress factor. The importance of fast, competent handling cannot be overemphasized. The sights, sounds, smells, and temperature of the strange environment will stress the exotic animal in a veterinary hospital. As a general rule, the more tame the animal, the better it will tolerate handling. However, do not underestimate the added stress of disease and trauma. Always discuss the risk of stressing an ill or traumatized nondomestic pet with the owner before handling begins. All treatment and testing material (culturettes, syringes) must be in place before the animal is restrained to minimize the stress. The patient work-up may have to be done incrementally because of the patient’s poor physical condition or response to handling.
RESTRAINT OF BIRDS
When holding and examining a psittacine patient, the medical team should avoid the strong beak, jaws, wings, and feet. The feet usually have sharp, pointed claws, but the beak can cause the most harm to the handler. The equipment needed to capture and handle these patients will include towels or drapes, perches, and nets. Gloves should never be used with psittacine birds in the clinical setting. Gloves are not supple enough for handlers to feel the patient within their grasp and will not protect a finger or hand from the extreme pressure associated with a bite from these patients. Do not use gloves during stressful events with a pet bird because that bird will soon correlate the shape of the human hand with the negative experience of capture and restraint. The handler should first remove water bowls and perches from the cage or carrier. Room lights may be dimmed to take advantage of the bird’s inability to rapidly accommodate to changes in lighting. The psittacine bird’s primary weapon is the beak; therefore the head should be promptly secured. Placing a towel or drape over the bird’s head and holding it with your hand is the best way to quickly secure the head. To prevent the bird from becoming afraid of the towel, you should come toward the bird with the towel covering the grasping hand in a manner in which the bird can see (Figure 7-77, A and B). By approaching the bird in a nonthreatening manner, you can often capture it with minimal stress. A wooden perch may be used to give the bird something to bite on other than fingers. The bird cannot bite the person attempting to catch it if it is chewing or biting the cage or carrier. If the bird is biting on the cage or carrier, this is an opportune time in which to quickly grab the head of a recalcitrant patient. Once the head is secured, the body is wrapped in the towel, the feet are held, and the bird is placed against the holder’s body to control the wings. The towel or drape may be slowly removed from the patient’s head for an examination, keeping the towel around the wings to secure them from flapping. Commercially available avian restraint boards allow for secure restraint with minimal risk to the patient or veterinary personnel (Figure 7-78, A-C). Care must be maintained to prevent restriction of the chest to allow the bird to properly breathe.
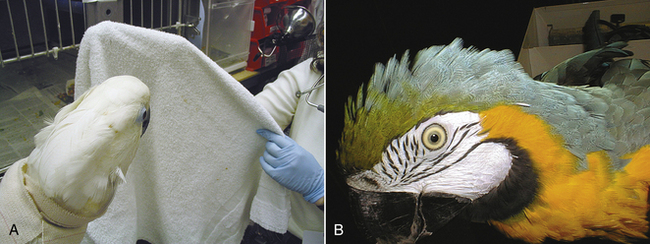
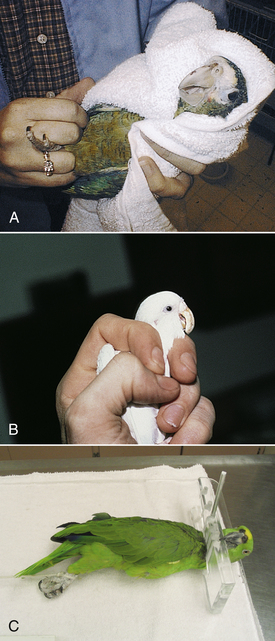
Passerine Species
Canaries and finches are the most common passerine species examined in veterinary offices. These birds are easily stressed under normal conditions and are even more sensitive when they are ill. Catching the patient for an examination must be done in a quick and efficient manner. For an attempt to catch a passerine patient, all lights should be turned off after the cage door is slowly lifted and the hand has been inserted into the cage door opening. Grab the patient with one hand and turn on the lights. To hold the bird for an examination, let the bird’s head rest between the middle and index fingers while lying on its back. The fingers should not completely encircle the body but should stay on the sides of the bird. As with other avian species, do not put pressure on the breast, or the patient may suffocate (Figure 7-79). Care should be taken to hold the head straight so the thumb does not slip to the anterior part of the neck and occlude the trachea.
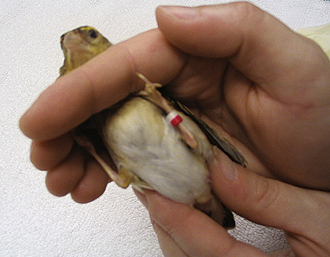
Raptorial Species
Birds of prey use their anatomic weapons in a different way than psittacine species. With raptors, it is of utmost importance for the handler to secure the talons. Although many raptors will bite, their jaws are not tremendously strong, and they do little damage with their beaks. The mouth is soft except the area close to the point of the beak, which the birds use for tearing flesh. The wings should also be considered a weapon and should be properly secured in a manner similar to that described for other avian species. The equipment necessary for restraining raptors includes towels or drapes, gloves of appropriate size and thickness, and hoods.
To approach a bird of prey using gloves, the handler should bend down low and quietly approach the patient. Dimming the lights may be a disadvantage for examining a species that hunts at night. The handler should present as little threat as possible to the raptor. As the handler places one hand in front of the raptor’s face, the second hand should be brought in low toward the bird’s feet. The upper hand should be held between the handler’s face and the bird and may be used to distract the bird. The lower hand should quickly grasp the feet in an attempt to place the index finger between the bird’s feet (Figure 7-80). The bird is smoothly and quickly pulled up out of the cage or off of the floor so it does not beat its wings on any surfaces. It is important to hold the bird away from objects, such as the examining table or cage. The bird can be brought into a cradle position, with the wings secured between the handler’s arm and body and the hood placed over the bird’s head.
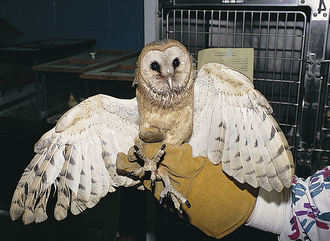
If hoods are not available, a towel may be draped over the bird’s head, which will reduce visual and auditory stimuli and help to significantly calm the bird. An alternative approach to secure a bird of prey may be done with a towel or drape. The handler approaches the bird in the same manner, quietly and low, with the towel or drape spread in front with both hands. The handler moves in slowly until he or she is close enough to use the towel as a large glove completely covering the bird. The handler’s hands should contact the bird at the level of the bird’s shoulders. It is important to avoid simply throwing the towel because the bird will be able to dodge it or move from under it. The bird is pressed through the towel with enough pressure to make the bird push up, using its legs on the ground. The handler’s hands are worked downward, alongside the wings, toward the legs, and the legs are grasped at the tarsometatarsus (below the hock). Once the bird is covered by the towel and its feet are secured, the handler lifts the bird up with the bird’s back toward the handler’s abdomen. A hood may replace the towel over the head. It is important never to release the feet of a bird of prey until someone else has secured them. A 10- to 15-cm long piece of 2.5-cm (1-inch) wide white cloth tape should be used to secure the talons to prevent accidents (Figure 7-81). If the bird’s talons enter the flesh of a handler, the person restraining the bird must not try to pull away, but relax. The talons will grip a moving object tight, but relax when the object (e.g., arm, prey) is stationary. The taloned handler will have to have another person pry the talons away from their skin. Birds of prey under the control of a falconer are considered a different situation when examined because the falconer is often adept at restraining the bird for a physical examination.
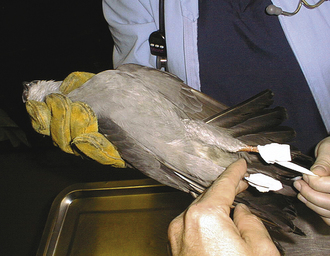
RESTRAINT OF REPTILES
The veterinary technician should become as familiar as possible with the anatomic and physiologic adaptations of reptiles to handle them. Several sources of information are found in the recommended reading list at the end of this chapter. Restraint of turtles or tortoises should be done with caution. Some species of turtles have long necks and sharp powerful beaks (rhamphotheca) that can inflict a serious bite on the unwary handler. Some turtles may be able to extend their heads and necks nearly to the level of the hind limbs, two thirds of their body length. Many are quick and should be approached from the rear with the tail and legs securely held. Simply covering the head, neck, and forelimbs with a cloth towel is usually adequate to prevent injury to the turtle and handler. To prevent an animal from walking during an examination, the handler may place it on a broad-based object that will keep the chelonian limbs from touching the examination table surface (Figure 7-82). The legs may be kept in place by wrapping the shell, with the legs inside, with an elastic bandage. Straight ovoid delivery forceps or digital pressure may be used to remove a turtle’s head from the shell for an examination (Figure 7-83). Care must be taken; and steady, gentle traction must be used without allowing the forceps to touch the eyes. The main force of the forceps’ jaws should be applied away from the shell and not onto the head. Digital pressure is recommended to extend a turtle’s or tortoise’s head away from the shell over the use of delivery forceps.
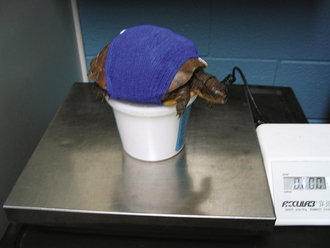
FIGURE 7-82 Placing a turtle or tortoise on a broad-based object will allow for easy handling and short-term restraint.
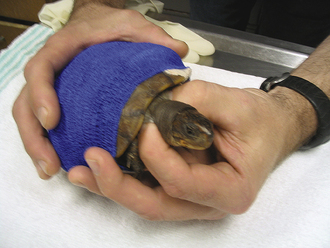
Snakes
Snakes are usually more difficult to capture and restrain for the inexperienced technician. The equipment necessary may include Plexiglas shields, Plexiglas tubes, tongs, canvas bags or drapes, snake hooks, a gas anesthetic machine, and plastic bags.
The general approach to restraint of any snake is to immobilize the head and grasp it firmly with the hands at the base of the skull. Several methods may be used to immobilize the animal’s head initially; a drape, piece of paper, or Plexiglas shield may be used to block the snake’s vision while the hands grasp the animal behind the head (Figure 7-84, A). The Plexiglas shield can be held in one hand, pressing the head of the snake to the floor, while the other hand grasps the snake at the base of the skull as the shield is slowly moved rostrally off the body. A snake hook may be used to pin the head to the floor.
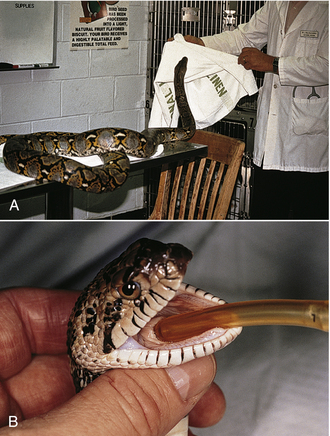
FIGURE 7-84 A, A towel may be used to block a snake's vision before grasping it from behind the head. B, Proper technique of holding a snake's head as an endotracheal tube is placed. These handlers are demonstrating restraint and passage of a stomach tube on a common boa constrictor.
When a snake hook is used, a suitable soft and resilient padded surface is useful to prevent trauma to the snake. A hand then replaces the hook. It is possible to injure a reptile by applying too much pressure with the hook; only experienced technicians should use a snake hook on a client’s animals. Most snakes can be easily maintained through hand control at the base of the skull. A few snake species can autotomize their tails as a defense mechanism. Snakes should not be picked up by their tails to prevent skin loss (degloving injury) and autotomization. Plexiglas tubes may be used in conjunction with a hook or pole. The hook is used to guide the snake into the Plexiglas tube, and the tube should be of a sufficiently small diameter to prevent the snake from turning around and coming back out. The aim is to get the snake to crawl up the tube; when it reaches the halfway point, the technician grasps the junction of the snake and the tube, trapping the snake’s head within the tube. The caudal half of the snake is accessible with this technique. A gas anesthetic unit may be attached to the open end of the tube for further restraint. Plastic tubes are not generally recommended for many elapine snake species (e.g., coral snakes, cobras) because of their ability to turn around and injure the handler.
Placing snakes in a plastic bag or box and filling it with anesthetic gases may also induce anesthesia. After the induction of anesthesia, snakes are intubated and monitored on a gas anesthetic machine with intermittent ventilation (Figure 7-84, B). Snakes can be easily transported in canvas bags. When a snake is handled, its body should always be supported, and large species should always be handled by more than one person.
Lizards and Crocodilians
Lizards and crocodilians may be restrained by using a combination of experience, snare poles, towels, drapes, nooses, or Plexiglas shields. All lizards will bite, and some have strong jaws and sharp teeth. Most lizards will also use their claws and tails as weapons. The approach for small-to-medium lizards is to attempt to block their vision with a towel or sheet of paper, make a quick grab around the shoulder girdle at the base of the skull with one hand, and restrain the pelvic girdle with the other hand. The tail may be tucked in against the body, under the arm (Figure 7-85).
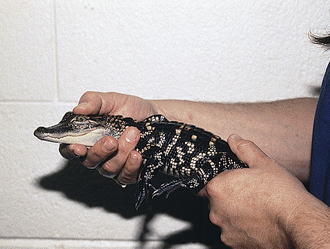
FIGURE 7-85 The proper restraint technique for a large lizard (tegu). One hand is placed firmly about the pelvis, and the other is about the shoulders and neck. The tail may be tucked beneath the elbow.
A noose made of fine fish line at the end of a pole may be used for small lizards. The noose is lowered over the animal’s neck, the pole is quickly lifted with the noose tightened, and the animal is lifted by the neck. The animal should be restrained and removed from the noose as quickly as possible. For a large lizard or crocodilian, it is important to block the animal’s vision and quickly and safely immobilize the head and body simultaneously. This is best accomplished by grasping the animal at the base of the skull or neck with one or both hands, then sitting on it. Two or more people are needed to accomplish this task, and the animal’s mouth should be taped shut as soon as it is restrained. A noose or rabies pole may be used to help control the mouth before attempts to restrain the head, legs, and tail are made. Crocodilians, most large lizards, and some chelonians can be immobilized for short periods (up to 30 seconds) by the application of gentle, inward pressure on their closed eyes for a few moments. The handler is cautioned that many lizards, particularly gecko species, have tails that autotomize when they are stressed or traumatized (Figure 7-86). Extreme caution should be used when lizard tails are handled.
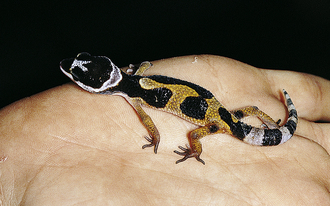
FIGURE 7-86 Great care must be used when restraining and treating patients that easily autotomize their tails, such as this gecko.
TECHNICIAN NOTE
The handler is cautioned that many lizards, particularly gecko species, have tails that autotomize when they are stressed or traumatized (see Figure 7-86).
RESTRAINT OF FERRETS
Ferrets that are not cooperative are a restraint challenge. Ferrets belong to the family group that includes weasels, and as such, they are quick, agile animals possessing sharp teeth. The ferret’s primary weapons are its teeth, and when threatened, it will not hesitate to bite. Ferrets that are hand raised, which includes most pets, can make docile companion animals in the right circumstances. Proper precautions should be taken when restraining ferrets.
Primary restraint for a ferret is to secure the head and forelegs by gripping the animal by the skin in the dorsal cervical area (the scruff of the neck) (Figure 7-87). The other hand is used to support the bottom of the animal. For the highly aggressive ferret, a towel or drape may be placed over the animal to block its vision. The animal’s head, neck, and shoulders can be grasped through the drape or towel. The handler may want to use gloves. Remember, it is not good for any pet animal to associate negative experiences with gloved hands. Once the animal is restrained with this method, the handler may alter the grip on the head to perform a thorough physical examination and other necessary diagnostic procedures. Ferrets may be “stretched” in a manner similar to that used for cats, or they may be grasped with both hands around the forequarters with one hand on the scruff of the neck and the other holding down the forelegs.
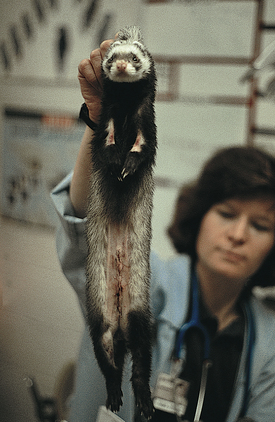
FIGURE 7-87 The proper technique to restrain a ferret. The scruff of the neck is held by one hand, and the other supports the body. Often this technique will elicit a “yawn,” at which time the oral cavity may be examined.
Ferrets are subject to hypnosis, although it is less likely to be effective when an animal is apprehensive in strange hands. For an attempt at hypnosis, a ferret is hung by the scruff with one hand and stroked around the entire length of its torso with the other hand. The susceptible ferret will begin to yawn, and its eyelids will droop or close after repeated stroking. The effect is not long lasting, and many ferrets will be easily startled out of the trance.
RESTRAINT OF RABBITS
Proper rabbit restraint is important in reducing stress and injury to the patient (Figure 7-88, A). Rabbits have some peculiarities for restraint. Their muscle-to-skeleton ratio is high, and their bones are small and light for animals of their size. Rabbits also have extremely powerful hind legs. Restraint of rabbits without controlling their hind legs may precipitate a kicking episode that could result in a “broken back.” This terminology is not precise because the bones of the back may not be fractured, but there is a definite loss of neural function in the hindquarters that results from trauma to the spinal cord. The hind legs become paralyzed, and bladder and anal tone are lost. The prognosis for recovery is poor in cases of total paralysis. Paralysis may be immediate or delayed, depending on the amount of hemorrhage and edema that surrounds the spinal cord.
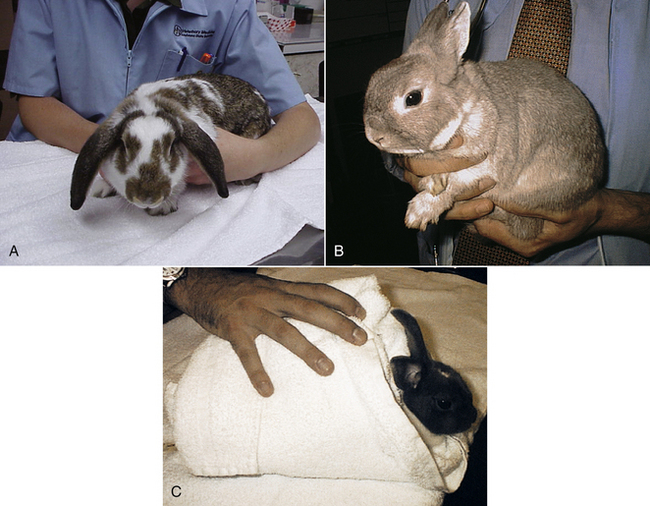
FIGURE 7-88 A, Proper holding technique for a rabbit undergoing a physical examination. B, The proper method of restraint for carrying a rabbit short distances. C, Wrapping a rabbit in a towel or “bunny burrito” is an effective way to restrain a fractious patient.
TECHNICIAN NOTE
Restraint of rabbits without controlling their hind legs may precipitate a kicking episode that could result in a “broken back.”
To prevent this situation, never pick up, carry, or restrain a rabbit by its ears. To carry a rabbit short distances, grasp the nape of the neck skin with one hand while supporting the rear legs with the other (see Figure 7-88, B). The best way to re-place a rabbit in a cage is by holding its skin fore and aft, placing it well inside the cage facing outward, and pressing its body down to the floor for a few moments before releasing it. Use of this technique forces the rabbit to turn in its cage before leaping to the safety of the rear of the cage. The ears should never be used to lift a rabbit of any age. Small plastic pet carriers should be used when rabbits are carried for long distances. A towel can be placed around the rabbit to help with restraint when the animal is carried or examined (see Figure 7-88, C).
Rabbits do not like slick surfaces, and losing their footing agitates them. It is best to set them down on something on which they will have good traction, such as a rubber mat, during an examination or treatment. Pressing the rabbit to the table and pulling the hind feet to the rear allow for trimming of nails. The nails of the forefeet may be trimmed by lifting one foot at a time off the table while the rabbit is held to the surface. When on the examination table, rabbits must be secured at all times to prevent the patient from jumping off and being injured from the fall to the floor.
Rabbits have sensitive whiskers and will flinch whenever these hairs are touched or the mouth is approached. For an examination of the mouth, the head must be firmly held. To steady the head for an examination, the holder should place the rabbit facing away from his or her body with the forearms pressing down the entire length of the rabbit. The thumbs of the handler are placed behind the ears of the rabbit, and the fingers are used to lift the head from below the mandible. The incisor teeth may be trimmed, aural examinations may be conducted, and ear venipuncture may be performed with the rabbit in this position.
Rabbits will bite; therefore a conscious effort should be made to keep fingers away from the rabbit’s mouth. Normally the fight goes out of even the most aggressive rabbit once its forequarters are pressed to the floor and the body is restrained from free movement.
RESTRAINT OF RODENTS AND SMALL MAMMALS
Rodents and small mammals can be problematic to examine and treat because restraint without injuring such animals is difficult. These animals are generally small and may bite when placed in a stressful situation. Commercial restraint devices are available for small rodents, but it is difficult to perform a good external examination because of their design. To catch these small animals, a technician can use bare hands or leather gloves. However, the teeth of rodents will penetrate leather gloves, so protection is minimal and may be more psychologic than physical for the handler.
Cornering or encircling the animal with both hands will allow the handler to capture a large rodent. Both hands should be used to pick the animal up with the fingers underneath and the thumbs on top of the body. One hand should be behind the other to support the entire abdomen. Grasping the scruff of the neck and supporting the back legs provide restraint for larger rodents (e.g., guinea pigs, chinchillas, prairie dogs) (Figure 7-89). A large rodent that is standing on the examination table can also be restrained by wrapping a towel around its torso. Guinea pigs are different than most small mammals when restrained in that they can be quite vocal. Pregnant guinea pigs have pendulant bellies, and they may be lifted by grasping around the thorax with one hand and around the rump with the other to hold them up. The teeth of the guinea pig may be clipped by holding the head with one or two hands with the forefinger under the jaw and the thumb behind the head. The guinea pig tolerates being placed upside down in a trough with the legs tied down in the same fashion as swine.

TECHNICIAN NOTE
However, the teeth of rodents will penetrate leather gloves, so protection is minimal and may be more psychologic than physical for the handler.
Smaller rodents and mammals are initially restrained by grabbing the tail (e.g., mouse, rat) or the scruff of the neck (hamsters, sugar gliders, gerbils) (Figures 7-90 and 7-91).
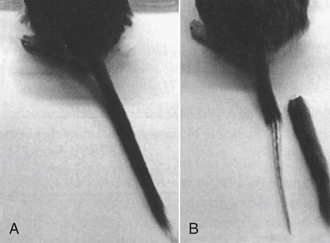
FIGURE 7-90 A, A normal gerbil tail, which should never be used to capture a gerbil. B, The skin has sloughed off the tail of this gerbil, which will require a surgical amputation to correct.
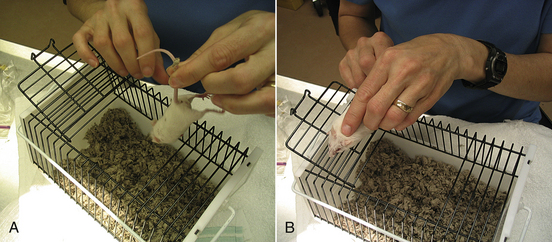
FIGURE 7-91 Grasping a mouse by the tail as it holds onto its cage (A) will allow one to grasp the back of the neck for adequate restraint (B).
Hedgehogs are covered with sharp spines, and most will require anesthesia when examinations need to be performed or diagnostic samples need to be obtained (Figure 7-92). Once restrained, these small patients are held by the scruff or around the neck with one hand while the other hand supports the body. Hamsters have a large amount of redundant tissue associated with the cheek pouches, and this must be gathered up in the hand to hold them. Most small rodents may be restricted from movement on a surface by placing a hand over them to form a cage with the head protruding between the first and second fingers. If a small rodent suddenly attempts to bite, it may be caught and restrained by driving it into a small tube. Rodent restraint tunnels are available in several sizes; usually they are made of Plexiglas and have several ports available for injection.
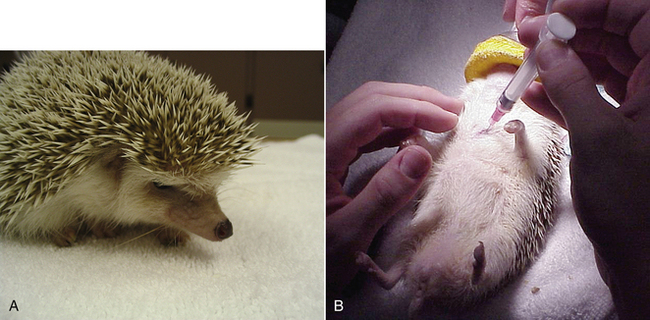
American Association for Laboratory Animal Science: LATG Training Manual, 2006, AALAS.
Beaver, B. Canine behavior: Insights and answers, ed 2. Philadelphia: Saunders, 2008.
Beaver, B. Feline behavior: A guide for veterinarians, ed 2. Philadelphia: Saunders, 2003.
Donaldson, J. The culture clash: A revolutionary new way to understanding the relationship between humans and domestic dogs. Berkley: James and Kenneth Publishers, 1996.
Fowler, M.E. Restraint and handling of wild and domestic animals, ed 3. Ames, IA: Wiley-Blackwell, 2008.
Fraser, A.F. Farm animal behavior and welfare, ed 3. Oxfordshire, UK: CABI, 1996.
Keeling, L.J., Gonyou, H.W. Social behavior of farm animals, ed 1. Oxfordshire, UK: CABI; 2001.
Kiley-Worthington, M. The behavior of horses in relation to management and training. London: JA Allen, 1987.
Landsberg, G., Hunthausen, W., Ackerman, L. Handbook of behavior problems in the dog and cat, ed 2. Philadelphia: Elsevier Ltd; 2004.
McGreevy, P. Equine Behavior: A guide for veterinarians and equine scientists. Philadelphia: Saunders Ltd, 2004.
Pyror, K. Don't shoot the dog. New York: Bantam, 1999.
Roberts, M. The man who listens to horses. New York: Random House, 1997.
Sheldon, C.C., Sonsthagen, T., Topel, J.A. Animal restraint for veterinary professionals. St Louis: Mosby, 2006.