Diagnostic Sampling and Therapeutic Techniques
SMALL ANIMAL SAMPLING AND THERAPEUTIC TECHNIQUES
Administration of Medication in the Small Animal
LARGE ANIMAL SAMPLING AND THERAPEUTIC TECHNIQUES
Venous Blood Sample Collection
Arterial Blood Sample Collection
Thoracocentesis (Thoracentesis, Pleurocentesis, Chest Tap, Pleural Tap)
When you have completed this chapter, you will be able to:
1 List and describe general principles for the collection of samples for laboratory testing.
2 Describe the patient's preparation, positioning, and procedures for blood collection from peripheral veins and capillary beds in small and large animals.
3 Describe indications and procedures for collection of arterial blood samples in small and large animals.
4 List and describe procedures for collection of urine samples from small and large animals and give advantages and limitations of each method.
5 Describe the indications and procedures for performing thoracocentesis, abdominocentesis, arthrocentesis, fine-needle aspiration, bronchoalveolar lavage, and collection of vaginal cytology samples in small and large animals.
6 Describe the indications and procedures for performing diagnostic peritoneal lavage.
7 Describe the two methods for performing a transtracheal wash and give advantages and disadvantages for each method.
8 Describe procedures for obtaining cerebrospinal fluid (CSF) and bone marrow aspirate samples and list indications, contraindications, and potential complications of the procedure.
9 List the routes used for administration of medications in small and large animals and describe procedures for administration of medications by each route.
10 Describe the procedure for placement and care of a peripheral intravenous (IV) catheter.
11 Describe the indications and procedure for placement and care of a jugular catheter.
12 List requirements for monitoring of patients with IV catheters.
13 Describe indications and methods for administration of oral medication of enteral feeding of small and large animals.
14 Describe procedures for collection and evaluation of milk samples from dairy animals.
15 Describe procedures for collection of rumen fluid in large animals.
BASIC GUIDELINES
Pretreatment blood and urine samples should be obtained before the administration of fluids and/or medications. The administration of fluids and the recent ingestion of a high-fat or high-protein meal may alter blood or urine laboratory values.
 TECHNICIAN NOTE
Pretreatment blood and urine samples should be obtained before the administration of fluids or medications.
All supplies needed for the collection of samples and for therapeutic procedures should be gathered ahead of time. Samples should be collected and stored in appropriate containers with the patient's name and hospital identification number printed on each label.
Whenever a needle is inserted through the skin as a part of a treatment (e.g., subcutaneous injection) or a sampling procedure (e.g., bone marrow aspirate), the skin should be properly prepared and free from obvious inflammation and infection. Microbes and other contaminants present on the skin surface may be introduced into the underlying tissue when the needle is inserted. Needles and IV catheters from which the protective coverings have been removed should remain sterile and should only be handled at the hub (e.g., the shaft should not be touched or set down on a nonsterile surface).
The knowledge of potential risk or complications will place the veterinary technician in a position to be proactive rather than reactive to problems. The technician should be able to assess the patient and recognize when problems are occurring and have a “game plan” in mind for addressing the problems. For example, a technician knowledgeable in IV catheter complications is performing IV catheter care and notices that the catheter insertion site is erythematous, swollen, painful, and warm to the touch. The veterinary technician assesses the problem as thrombophlebitis, determines that a new catheter is needed, and removes the old one.
SMALL ANIMAL SAMPLING AND THERAPEUTIC TECHNIQUES
Veterinary technicians perform venipuncture on a routine basis, either to collect blood samples for laboratory tests or to inject a drug or medication. Proper animal restraint is as important as the venipuncture technique (Chapter 7). Blood samples must be collected with minimal trauma to the vessel and minimal stress and discomfort to the patient (Box 20-1). Patients’ stress can affect several laboratory tests (e.g., leukogram, cortisol and glucose concentrations).
A venipuncture is performed with either a needle and syringe or a Vacutainer collection system. The Vacutainer system consists of a double-pointed needle, plastic holder, and collection tubes with and without anticoagulants (Figure 20-1). The method and needle gauge selected depend on the vessel size, amount of blood required, intended use of the sample, and technician's preference.
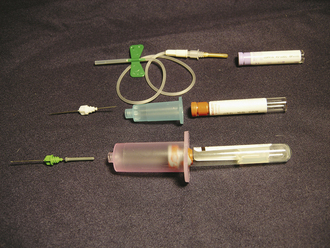
FIGURE 20-1 The Vacutainer blood collection system is used to collect blood samples directly into the collection tunes. The system consists of a needle, holder, and collection tubes. (From Hendrix CM, Sirois M, editors: Laboratory procedures for the veterinary technician, ed 5, St Louis, 2007, Mosby Elsevier.)
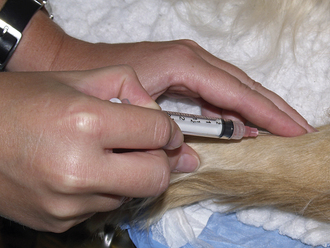
The majority of venipunctures in cats and small dogs are performed with 22-gauge needles. Larger-gauge needles, such as 20- and 18-gauge, may be used in large-breed dogs and in most farm animals. For any venipuncture technique, the needle should always be inserted into the vein with the bevel facing upward.
Blood collected for coagulation profiles (i.e., activated clotting time, prothrombin time, activated partial thromboplastin time) should be collected carefully with minimal tissue trauma and venous stasis. The needle should ideally penetrate the vessel on the first attempt to minimize the amount of tissue fluid that enters the sample; tissue fluid (thromboplastin) may initiate the clotting cascade.
Smaller, 25- to 28-gauge needles are used with smaller vessels, fragile vessels, or multiple venipunctures. Frequent sampling to establish a blood glucose curve is a situation in which the use of a small-gauge needle is appropriate. The amount of negative pressure applied to aspirate the blood into the syringe must not be excessive. Forceful retraction of the syringe plunger may result in hemolysis of the red blood cells as they pass through the needle, yielding erroneous laboratory values. The application of excessive negative pressure may also cause the vein to collapse.
Just before a venipuncture, the hair and skin over the vessel are wiped with a cotton ball saturated with 70% isopropyl alcohol. This helps to remove some superficial skin contaminants, causes vasodilation, and improves visualization of the vein. In animals with dense hair coats, the vessel may be easier to identify if the hair over the vessel is parted with the use of an alcohol-soaked cotton ball or shaved with a clipper. When blood is drawn for a bacterial culture, the region on top of the vein is shaved and aseptically prepared. Sterile gloves are worn when blood is collected for a culture.
The most important aspects of any venipuncture technique are the proper restraint of the animal and proper distention and immobilization of the vessel. These objectives are most easily accomplished when the procedure is done as a two-person project. The veterinary technician should only attempt the venipuncture when the vessel can be clearly delineated. Blind venipuncture attempts are doomed to failure and unnecessary patient's discomfort. If the technician is unable to locate the vessel (by visual inspection or digital palpation), the manner in which the vessel is distended and immobilized must be changed.
TECHNICIAN NOTE
The most important aspects of any venipuncture technique are the proper restraint of the animal and proper distention and immobilization of the vessel.
When collecting blood, excessive restraint should be avoided since it may incite more resistance from the animal than the venipuncture procedure itself.
To collect blood from a peripheral vein, introduce the needle into the occluded vessel as far distally as possible. If the initial venipuncture attempt is unsuccessful, reinsert the needle more proximal to the previous entry site. For a jugular venipuncture, the initial attempt is made in the caudal region of the jugular vein. Subsequent venipuncture attempts can be made in a more cranial region. If the vessel is damaged in the distal portion of the vein, a more proximal region is still patent and usable for blood collection.
After blood is collected, the needle is detached from the syringe, and the stopper is removed from the collection tube before the blood is transferred into the tube. This reduces the amount of hemolysis that may occur if blood is forcefully ejected through the narrow lumen of a needle. If blood is transferred into a tube containing an anticoagulant, such as lavender-topped ethylenediaminetetraacetic (EDTA) tubes, the stopper is quickly replaced, and the tube is gently inverted a few times to mix the blood with the anticoagulant. Vigorous shaking can cause hemolysis. The tube containing the anticoagulant should be at least half filled with blood to achieve the appropriate blood/anticoagulant ratio.
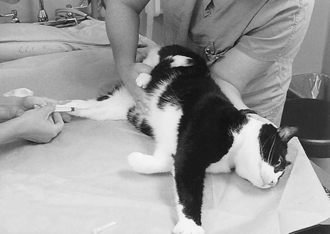
The most frequently used sites for canine blood collection are the cephalic, jugular, and lateral saphenous veins. The cephalic, jugular, femoral, and medial saphenous veins are used for feline venipunctures.
Cephalic Venipuncture: The patient may be positioned in sternal or lateral recumbency. The restrainer leans over the top of the animal and grasps the leg of interest at the elbow. The other hand and arm can be used to restrain the animal's head if the animal is awake to prevent an aggressive response to the skin puncture. If the animal is in sternal recumbency, the restrainer should lean on his or her elbow to help prevent the animal from withdrawing its leg at some critical time during the procedure. A tourniquet or thumb or forefinger is wrapped around the forearm at the level of the elbow. Pressure at this point occludes the cephalic vein. The skin is then rotated outward to roll the vein to the top (anterior) of the forearm.
The veterinary technician grasps the leg with one hand at the level of the metacarpus and further extends the leg. In “loose-skinned” animals, it may be necessary to flex the carpus. The objective is to tether the vein between the two points of traction (at the elbow and at the carpus) so that the vein is both distended and does not roll from side to side.
The needle is directed, as much as possible, along the longitudinal axis of the vein. The needle is inserted through the skin with the bevel facing up. The skin puncture is the painful part, and animals will often move in response to it. Once the animal has settled down, the needle can be directed into the vein. If blood does not spontaneously flow into the hub of the needle, gently aspirate to determine if the needle is or is not in the vein. If not, the needle should be advanced a bit farther and the process repeated. The needle can be advanced to its full length. If at this point the venipuncture has not been successful, the needle will have to be withdrawn to its subcutaneous (SQ) position (do not remove it entirely since another skin puncture will then be necessary). It is most important to withdraw the needle slowly, while gently aspirating. The deep wall of the vein may have been inadvertently penetrated, and the lumen will thereby be found as the needle is withdrawn.
Once the blood sample is taken or the drug is administered, the needle is withdrawn from the vein and digital pressure applied over the venipuncture site for at least 30 seconds. The site should be monitored for bleeding or hematoma formation for an additional several minutes.
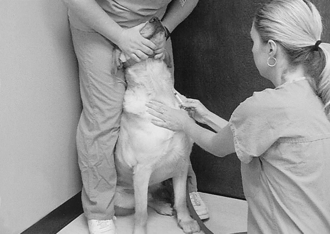
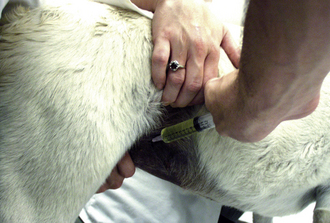
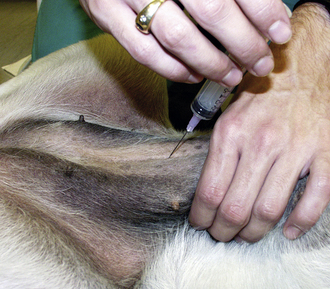
Jugular Venipuncture: The patient may be positioned in sternal or lateral recumbency. Some large-breed dogs prefer to remain seated on the floor (Figure 20-2). Alternatively the patient is restrained on a table in sternal recumbency (Figure 20-3). One hand grasps the legs at the carpel joint and stretches the legs over the edge of the table. In any position, the head will need to be extended. Either the restrainer or the veterinary technician occludes the vein by applying occlusive pressure at the thoracic inlet. Care must be taken not to compress the trachea or impair breathing. Vein distention and immobilization can be maximized by pressing into the thoracic inlet in a caudal direction and by further extension of the head. Extensive longitudinal traction, however, can collapse the vein. With optimal positioning, the vein is easy to palpate (or visualize) and does not roll much from side to side. In sternal positioning, the venipuncture is usually done in a cephalad direction; in lateral positioning, the venipuncture is generally done in a caudal direction. The venipuncture is performed as previously described.
Lateral Saphenous Venipuncture: The patient is usually positioned in lateral recumbency (Figure 20-4). The restrainer grasps the upper leg at the stifle. The other hand and arm can be used to restrain the animal's forelegs and head if the animal is awake. Circumferential pressure is applied at the stifle to occlude and distend the vein. The veterinary technician grasps the leg with one hand at the level of the metatarsus. It should not be necessary for the veterinary technician to use his or her thumb to help immobilize the vein. The venipuncture is performed as previously described.
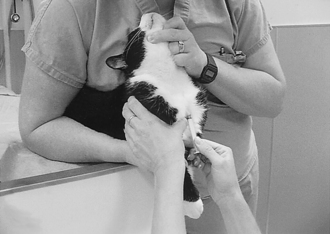
Medial Saphenous or Femoral Venipuncture: The medial saphenous or femoral vein is used to collect small volumes of blood. The patient is usually positioned in lateral recumbency. The restrainer grasps the lower leg at the stifle while reflecting the upper leg caudally with the forearm. The other hand and arm can be used to restrain the animal's forelegs and head if the animal is awake. Circumferential pressure is applied at the stifle to occlude and distend the vein. Alternatively, in the cat, grasp it by the scruff of the neck and place in lateral recumbency (Figure 20-5). The upper hind leg is abducted and flexed to expose the medial surface of the bottom leg. Applying pressure with the edge of the hand that abducts and extends the upper leg distends the vein. The veterinary technician grasps the leg with one hand at the level of the metatarsus. The venipuncture is performed as previously described.
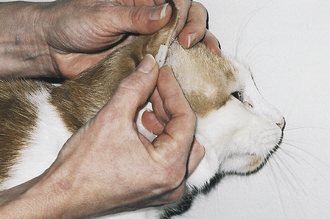
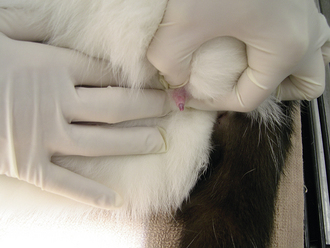
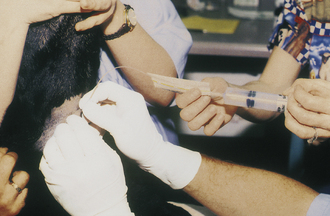
Marginal Ear Venipuncture: On occasion, the technician will collect blood from a peripheral capillary bed to check for erythroparasitic organisms, such as Babesia spp. or Haemobartonella spp. The collection of a small drop of capillary blood is also used by clients who monitor their diabetic pets’ blood glucose levels at home. A peripheral capillary blood sample can be obtained by clipping the quick of a toenail or lacerating the buccal mucosa. A more desirable, less painful alternative is to collect a sample from the marginal ear vein, which is most easily visualized as it courses around the periphery of the dorsal aspect of the pinna.
When a capillary sample is collected, the pinna of the ear is first warmed with a heated cloth, light source, or the technician's hands to help vasodilate the marginal ear vein and then wiped with a small amount of alcohol. A 25-gauge needle or lancet is used to nick the vein, and the pinna is massaged until a sufficient drop of blood is obtained (Figure 20-6). When a sample must be examined for erythroparasites, blood is collected into a heparinized capillary tube and is later smeared onto slides for a microscopic examination. If blood is collected to measure blood glucose, a Glucometer test strip is placed alongside the drop of blood on the pinna, and the blood is wicked directly onto the test strip. The test strip should be designed to measure a capillary, not venous, blood sample. The technician must make certain that the patient does not move its head or flick its ear, or the blood sample may be lost. After the blood sample has been obtained, firm pressure should be applied to the puncture site for approximately 15 seconds.
ARTERIAL BLOOD SAMPLE
One of the best ways to assess pulmonary function is through arterial blood gases. Blood gases tell us about the patient's ability to ventilate and oxygenate. Blood gases measure the partial pressure of carbon dioxide (PaCO2—ventilation) and oxygen (PaO2—oxygenation) in the blood. Blood gas measurements are performed on a pH and blood gas analyzer. In the last few years, new inexpensive point-of-care instruments have been developed to measure pH and arterial blood gases. These analyzers are cost-effective and easy to use.
TECHNICIAN NOTE
One of the best ways to assess pulmonary function is through the measurement of arterial blood gases.
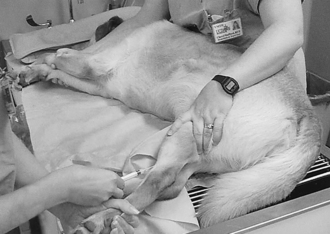
The collection of a blood sample for blood gas analysis entails a percutaneous puncture of an artery, such as the dorsal metatarsal or femoral artery. In the unconscious or anesthetized patient, the sublingual artery may be used. The dorsal metatarsal artery is smaller, but the interstitial connective tissues around it are “tighter” (compared with the femoral artery), which facilitates vessel positioning and minimizes postpuncture hematoma formation. The dead space of a 1- or 3-ml syringe (with a 25-gauge needle) is coated with lithium or sodium heparin (1000 U/ml); excess heparin is expelled from the syringe. In addition, a Vacutainer tube cork, alcohol swab, and a thermometer will be needed. When collecting the sample, care should be taken not to introduce air or apply excessive negative pressure, both of which can affect your PaO2 measurement. Once the sample collection is complete, withdraw the needle and apply digital pressure over the puncture site for at least 1 minute and monitor for bleeding or hematoma formation for another 4 minutes. Air is expelled from the syringe, and the syringe is capped with the cork and placed in an ice water bath if the lab test cannot be performed immediately. Blood gas samples may stay in an ice water bath for several hours before metabolism alters the pH or blood gas values.
Dorsal Metatarsal Artery Sample: An arterial puncture is usually done with the animal in lateral recumbency; however, it can be accomplished when the animal is standing if it resents the lateral recumbent positioning. If the patient is in lateral recumbency with the hock extended, it may be helpful to tape the paw to a table or sandbag. The pulse is palpated with one or two fingers of one hand (Figure 20-7). With the bevel up, the skin and arterial wall may be punctured in one motion following the path of the artery, or a two-step fashion: skin first then artery. Watch for a back flash of blood in the needle hub and then gently aspirate a 1- to 1.5-ml sample. If the arterial puncture is unsuccessful, the needle can be inserted a bit farther. As for a venipuncture, when the needle is withdrawn, it should be done slowly and with gentle aspiration applied to the plunger in case the deep wall of the artery was inadvertently punctured during the introduction. The needle is withdrawn to its SQ position, and the arterial puncture is reattempted.
Femoral Artery Sample: The arterial puncture is performed with the animal in lateral recumbency with the down leg extended caudally. The top leg should be positioned so that it is out of the way. After the puncture site is properly prepared, the first and middle finger of one hand locates the artery, and the leading edge of the same hand can be used to slide the skin and underlying SQ tissues toward the inguinal region. The femoral artery must be immobilized properly to prevent it from rolling away from the needle. The syringe is held at a 45-degree angle over the site where the pulse is strongest. The needle is advanced through the skin as previously described and the sample collected.
Arterial Catheter Placement: Arterial catheters are inserted for the continuous measurement of direct arterial blood pressure and for the collection of multiple arterial blood samples. The most common artery selected for catheterization is the dorsal metatarsal artery. The dorsal metatarsal has many advantages over the femoral artery. The cylindrical nature of the tarsus allows the catheter to be taped rather than sutured. There is less risk of hematoma formation and hemorrhage because of the tight SQ tissues. It is easier to maintain the catheter position because the catheter does not move and kink in the SQ tissues.
A 20- or 22-gauge over-the-needle (OTN) catheter may be placed in the dorsal metatarsal artery. The patient is placed in lateral recumbency with the hock extended, it may be helpful to tape the paw to a table or sandbag. The insertion site is clipped and aseptically prepared. The catheter is flushed with heparinized saline. The artery to be catheterized is palpated with one or two fingers of one hand. A relief hole is made completely through the dermis with the beveled edge of the needle (without entering the artery). The catheter is positioned SQ above the artery with the bevel up. The needle tip and artery are palpated simultaneously with the finger(s) of the opposite hand. The catheter is inserted into the artery steeply at first just so that the tip of the needle penetrates the upper wall of the artery and then flat against the skin surface and parallel with the longitudinal axis of the artery so that the bevel of the needle and the end of the catheter lie in the lumen of the artery. A “flash back” of blood should be seen in the hub of the needle; the catheter is gently advanced into the artery to its full length. The needle is replaced with a T-connector and stopcock. The catheter is taped in place and flushed with heparinized saline. See the section in this chapter on securing the peripheral catheter.
The catheter is either attached to a continuous flush system or flushed with heparinized saline every 2 hours. The toes should be checked for warmth every 2 to 4 hours. If the toes are cool, the catheter will need to be removed. Catheter care is performed every 48 hours.
URINE SAMPLE COLLECTION
A urine sample may be obtained by several methods. The veterinary technician should be familiar with the various techniques. Urine is most often collected for a gross and microscopic analysis and a culture if indicated. Common collection techniques include obtaining urine from the patient as it voids, from manual expression of the bladder, from catheterization of the bladder, and by cystocentesis. Most references advocate a volume of 7 to 10 ml for a quantitative urinalysis; however, for example, smaller samples are sufficient for a culture or spot assays for ketones or glucose.
Urine collected is stored in clean, dry containers. Urine that is collected and to be cultured is collected and submitted in sterile containers. Samples that are not analyzed within 30 minutes of collection are refrigerated in secured sealed containers. Urine samples are returned to room temperature before the analysis.
VOIDED COLLECTION
A naturally voided sample is easy to collect. It is most commonly obtained from canine patients by walking the dog outdoors and catching a midstream sample. These samples are adequate for a routine urine analysis. They are not acceptable samples for a culture because these free-catch samples contain bacteria, cells, and debris from skin, hair, and the genitourinary tract. The initial void of urine contains the greatest concentration of contaminants and should be excluded from collection. Innovative collection devices can be easily made to catch the urine of a voiding dog because most dogs stop urinating if a person gets too close. Examples are devices made of a log rod or a straightened clothes hanger with a loop at one end holding a disposable cup or container.
TECHNICIAN NOTE
Urine is most easily obtained from a dog by walking it outdoors and catching a voided midstream sample.
Hospitalized patients can be elevated on a raised grate in a clean cage. The urine is collected from the cage floor with a syringe after the animal urinates.
Fresh voided urine samples of cats are obtained from litter boxes that are clean and empty. Lining the litter box with a plastic bag or clear plastic food wrap aids in collecting the sample. For cats that prefer litter in the boxes, shredded wax paper or specialty nonabsorbent litter made of plastic beads, such as NOSORB (Catco, Inc., Cape Coral, Fla.) are options. After the cat urinates in the litter pan, the urine is collected by a syringe or poured into a clean container.
MANUAL BLADDER EXPRESSION
Urine collected by manual expression of the bladder can be used for a routine urinalysis, but should not be used for a culture because the urine obtained by this method will contain contaminants from the lower urinary tract, skin, and hair. Bladder expression can be difficult to accomplish in some patients because the transabdominal compression causes the pressure inside the bladder to increase, but the urethral sphincter may not relax simultaneously. Manual expression of the urinary bladder is warranted in patients with neurologic impairments when the animal cannot initiate voluntary urination or does not have the ability to completely empty the bladder.
To perform manual expression of the urinary bladder, place a hand on either side of the caudal abdomen of a patient that is standing or in lateral recumbency. Isolate the bladder between the palmar surfaces of the fingers, and apply firm and steady pressure until urine is produced. In small-breed dogs and in cats, it is possible to use only one hand.
If urine cannot be produced by manual expression with moderate compression, an alternate method of emptying the bladder or obtaining a sample must be employed. Do not overexert pressure. Extreme caution is exercised in patients with an overly distended bladder in the presence of urethral obstruction, such as seen in obstructed male cats. Urethral or vesicular rupture may occur in these patients.
CATHETERIZATION
Indications for urinary catheterization include a urine sample collection, to empty the bladder, to relieve a urethral obstruction, to allow access to the urinary tract for radiographic studies, and for conditions in which an indwelling urinary catheter is indicated. Complications of urinary catheterization include a urinary tract infection, particularly with indwelling catheters or in patients with immunosuppression. Even though aseptic techniques are employed while placing the catheter, it may induce urethral inflammation and a bacterial urinary tract infection. Furthermore, urethra and bladder irritation and trauma can be other complications. Trauma from catheterization may cause increases in the red blood cell count, protein, and the number of transition epithelial cells in the sample. Urine samples may also contain contaminants from the genital region and urethra. Urine obtained by catheterization is, however, acceptable for a bacterial culture if a sample cannot be obtained by cystocentesis.
Indwelling urinary catheters are placed in patients at risk for urethral obstruction, such as male cats who have recently had urethral calculi removed, and also in patients with neurologic impairment or traumatic conditions that interfere with normal urination. Catheterization is also an important part of quantizing urinary output.
The prepuce or vulva is gently rinsed with a warm antimicrobial solution and water twice and then dried. Sterile gloves are worn to detach or connect the catheter to extension tubing or a collection system. A closed system is created by connecting the catheter to IV extension tubing that is connected to a sterile collection bag. Commercial urinary collection bags are available on the market, or an empty sterile fluid bag can be used. The collection bag serves as a urine reservoir. Its contents must be measured and emptied periodically.
Indwelling urinary catheters should be inspected for occlusion. The patient is also monitored for adequate urine output. A normotensive, normovolemic patient with intact renal function should produce 1 to 2 ml of urine per kilogram of body weight per hour. If there is not adequate urine in the reservoir bag, the patient's urinary bladder should be palpated for distention. The urinary catheter should be inspected for obstructions or kinks. The bladder can be gently compressed to determine whether urine will flow through the catheter. A small volume of sterile 0.9% saline solution can be flushed through the catheter as an attempt to relieve an obstruction.
Indwelling urinary catheters should be removed as soon as possible to reduce the inflammation of the urinary tract and catheter-induced infections. If catheterization is required long term, a new catheter should be placed every 4 to 5 days.
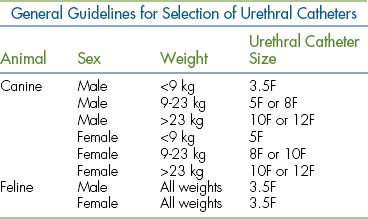
Urinary catheters are available in French sizes. See Table 20-1 of general guidelines for catheter selection. Note the length of available urinary catheters on the market. Many catheters that are manufactured for the human market do not possess the length for large breed canine male anatomy. Likewise, long-length catheters should be premeasured externally on the patient and excessive lengths not advanced in smaller patients because the catheter can tie itself in a knot within the urinary bladder, making withdrawal impossible without surgical intervention. Measurement therefore is made to the caudal portion of the bladder.
Male Dog
The placement of a urinary catheter in a male dog is not difficult unless a urethral obstruction exists. Polypropylene urinary catheters are rigid and easy to pass into the urinary bladder for a sample collection or to empty the bladder. If the catheter is to remain indwelling, a softer, flexible feeding tube or silicone self-retaining Foley catheter is more desirable and comfortable for the patient.
The dog is placed in lateral recumbency with the upper leg abducted. Carefully clip any long hairs around the preputial orifice. Flush the prepuce with a dilute antiseptic solution and rinse with warm sterile saline solution or water. An assistant retracts the prepuce so that the tip of the penis is exposed and maintains this position. The tip of the penis is gently washed with an antiseptic solution and rinsed with warm saline solution or water. Sterile gloves are donned. The catheter is taken aseptically out of the packaging, and the distal tip of the catheter is lubricated with a sterile water-soluble lubricant or sterile lidocaine ointment. If sterile gloves are not worn, the catheter should be kept wrapped so that it can be handled aseptically as it is advanced through the urethra. Sterile scissors can be used to cut a movable “butterfly” tab at the end of the packaging. The tab is then used to feed the catheter into the bladder and allows the operator to avoid touching the sterile catheter (Figure 20-8).
FIGURE 20-8 Urinary catheterization of a male dog. A butterfly tab is used to aseptically advance the catheter through the urethra. (From Ettinger SJ, Feldmen E, editors: Textbook of veterinary internal medicine, ed 6, Philadelphia, 2005, Elsevier Saunders.)
Insert and advance the catheter into the urethra. The catheter should never be forced. If the catheter cannot be passed, a smaller catheter should be used. It is common to feel some resistance at the level of the os penis, the portion of the urethra that curves around the ischial arch, and at the level of the prostate gland in older intact males. Steady gentle pressure should overcome this slight resistance. The catheter can be guided around the curvature at the ischial arch by applying digital pressure on the perineum externally or by pressing the catheter with an index finger placed in the rectum.
Urine should flow into the catheter as it enters the neck of the bladder. The catheter is then advanced 1 cm farther or to the predetermined measurement. A sterile syringe is attached to the catheter, and urine is slowly aspirated from the bladder. The first few milliliters of urine suctioned from the catheter should be discarded because it may contain contaminants and should not be submitted for a urinalysis or culture.
The catheter may be withdrawn from the bladder when the desired procedure is completed. If the catheter is to remain in the bladder, it must be secured. If the catheter is a self-retaining Foley catheter, the appropriate volume of sterile saline or water is injected into its distal balloon cuff via the one-way valve at the proximal end of the catheter. The catheter must be secured in the following fashion (optional for a Foley catheter): Two stay-suture loops are made through the skin on two sides of the distal prepuce with 3-0 or 4-0 nylon suture material. An adhesive tape “butterfly” tab is folded around the catheter and over on itself at the location where the catheter exits the penis. A suture is then passed through one side of the tape and then through the nylon loop in the prepuce. This is repeated on the other side of the tape and the other nylon loop in the prepuce. This secures the catheter to the prepuce so that it remains in place. The stay-suture loops remain in place in the prepuce and allow catheter adjustments or changes without having to pass another needle through the prepuce.
Female Dog
Urinary catheterization is more challenging in the female dog than in the male. Catheterization can be accomplished with the patient in a standing position, in lateral recumbency, or sternal recumbency with the hind legs dangling from the end of the table. On a conscious dog, it is preferred that the dog stand with its hindquarters positioned at the end of an examination table. The assistant should support the patient under the abdomen to prevent lowering of the hindquarters during catheterization. Excessive long hairs are clipped from the vulvar area. The vulva and perineal areas are gently washed with a dilute, warm antiseptic solution and rinsed with sterile saline solution or water. The ventral vaginal floor is instilled with 1.0 ml of sterile 2% lidocaine jelly. The two techniques to pass the catheter are by visualization with the use of a speculum and a light source or a blind technique using a digit to palpate and guide the catheter. A sterile speculum is used for a visualization of the urethral orifice. Examples of a speculum include a lighted vaginal speculum, a Killian nasal speculum, an otoscope fitted with a large-diameter speculum, and a laryngoscope blade. The speculum of choice is gently inserted into the vagina. Exercise caution to avoid the clitoral fossa. After donning sterile gloves, insert the speculum vertically and straighten to horizontal when the pelvic canal is entered. With the aid of a light, locate the urethral papilla and urethral opening and insert a lubricated catheter. The papilla and urethral orifice can be found 2 to 4 cm into the vagina in most dogs (Figure 20-9). Advance the catheter until urine is obtained or at the premeasured length. If a speculum is not available, the blind technique can be performed. Wearing sterile gloves, the technician places a lubricated finger into the vagina and slides it 2 to 5 cm along the ventral floor until the papilla and external urethral orifice is located. The catheter is introduced into the vagina and guided into the urethral orifice by the finger in the vestibule. The technician will acknowledge the proper placement by palpating the catheter within the urethral orifice and not in the cranial vestibule (Figure 20-10). The catheter is advanced until urine is obtained or at the premeasured length. A sterile syringe is attached to the catheter, and gentle negative pressure is applied for the desired sample. If the catheter is to remain in place, it is ideal to select a self-retaining Foley catheter. Once the catheter is placed in the bladder, the balloon cuff is inflated with the appropriate volume of sterile saline or water to prevent the catheter from slipping out of the bladder. The catheter is then taped to the tail to prevent the dog from stepping on it. A closed collection system is placed on the free end of the Foley catheter.
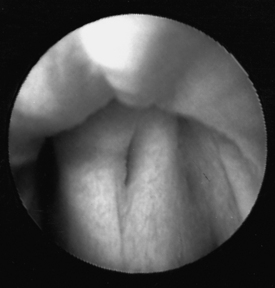
FIGURE 20-9 Urethral orifice on the ventral floor of the vagina in a female dog. (From Ettinger SJ, Feldmen E, editors: Textbook of veterinary internal medicine, ed 6, Philadelphia, 2005, Elsevier Saunders.)
Male Cat
Routine catheterization of male cats for a urine collection is rare. The most common reason for catheterizing a male cat is to relieve a urethral obstruction. Catheterization of male cats will often warrant the use of sedation or a general anesthetic. Exercise extreme caution when sedating obstructed cats. Cats that have been obstructed long term are often obtunded and hyperkalemic and should therefore be carefully evaluated and monitored before the administration of anesthetic agents. The cat is placed in lateral or dorsal recumbency with his hind legs drawn cranially. The prepuce is retracted to expose the glans of the penis (Figure 20-11). The perineum is prepared aseptically as described for the male canine catheterization, and the penis is extended dorsally so that the urethra is parallel to the vertebral column. An evaluation of the tip of the penis of an obstructed cat should be done at this time. Wearing gloves, first palpate the tip of the penis to check for the presence of a distal urethral plug or calculus. If an obstruction is present in the tip of the penis, gently massage the penis between the thumb and forefinger to attempt to dislodge the plug. If this is unsuccessful, proceed with catheterization. With sterile gloves, lubricate a 3.5F polypropylene or silicone tomcat catheter and pass it into the urethra. If resistance is met, the catheter is slightly withdrawn and slightly rotated as it is readvanced. If the catheter cannot be easily advanced, a small volume of sterile saline or water is injected through the catheter. Extreme care must be exercised when attempting retropulsion of a urethral calculus. Avoid excessive force or volume of fluid that could result in significant urethral trauma or rupture of the urinary bladder. Once the catheter is placed and there is good urine flow, secure the catheter in place in the same fashion described for the male dog. The cat should be fitted with an Elizabethan collar to prevent removal of the catheter and urine collection system.
Female Cat
Routine catheterization of female cats for a urine collection is also rare. Just as in the male cats, this is due to difficulty and sedation requirements. The cat is placed in sternal recumbency, and the perineal region is prepared aseptically. The technician dons sterile gloves, the lips of the vulva are pulled caudally, and a sterile 3.5F catheter is inserted into the vagina. Keeping midline, the catheter is advanced. The urethra papilla is located about 0.7 to 1.0 cm within the vagina. The catheter should pass into the urethra with little resistance. When urine flows out of the catheter, attach a syringe. Discard the first 1 to 2 ml of urine that flows and obtain a second sample for an analysis. Remove the catheter or secure the catheter in place and attach a closed urine collection system as previously described.
CYSTOCENTESIS
Cystocentesis is the percutaneous aspiration of urine from the bladder. A cystocentesis procedure is indicated to obtain a sterile urine sample for analysis and/or culture and sensitivity testing. The sample is free of bacteria, cells, and debris from the lower urinary tract. It also minimizes iatrogenic urinary tract infections caused by catheterization, especially in patients with preexisting diseases of the urethra and/or urinary bladder. Cystocentesis sampling can also aid in the localization of hematuria, pyuria, and bacteriuria. Cystocentesis is used as a last resort to empty an overly distended bladder when a urethral obstruction prevents urinary catheterization. The common contraindication for cystocentesis is an attempt to perform the procedure when there is inadequate urine in the bladder or when the patient resists restraint and abdominal palpation. It is recommended to wait until there is sufficient urine in the bladder or seek ultrasound guidance along with proper physical and chemical restraint, if necessary. Although statistically rare, laceration of the bladder and laceration of the bowel resulting in peritonitis add to the complication list. Patients having recent abdominal surgery or trauma, suspected bleeding disorders, pyometra, or suspected caudal abdominal or bladder tumors should not undergo cystocentesis procedures.
Supplies needed to perform a cystocentesis in canine and feline patients include a 22-gauge, 1- to 1.5-inch needle attached to a 12-ml or larger syringe. The patient can be standing, in lateral recumbency, or ventral recumbency. The site is ventral or ventrolateral insertion into the bladder wall, depending on the patient's positioning. When cystocentesis is performed, most but not all of the urine should be removed from the bladder. Excessive pressure from a full bladder might lead to extravasation of urine from the puncture site when the needle is withdrawn. On the other hand, the removal of the entire volume of urine increases the risk of contact between the needle and the bladder wall, which may result in damage to the bladder. Thus it is ideal to insert the needle a short distance cranial to the trigone region of the bladder. Having the needle a short distance cranial to the junction of the bladder with the urethra rather than the vertex of the bladder, permits the removal of urine and decompression of the bladder without the need for reinsertion of the needle into the bladder lumen. If the needle is placed in or adjacent to the vertex of the bladder, it may not remain in the bladder lumen because the bladder progressively decreases in size following the aspiration of urine. Furthermore, the technician should position the needle at a 45-degree angle through the bladder wall, creating an oblique needle tract. By directing the needle in this fashion, the elasticity of the vesicle musculature and the interlacing arrangement of the individual muscle fibers will provide a better seal of the small pathway created by the needle when it is removed. Procedures for ventrolateral (Figure 20-12) and ventral cystocentesis (Figure 20-13) procedures are outlined in Box 20-2. Note that in male dogs the prepuce and penis are diverted laterally, and the needle is inserted on the ventral midline or slightly paramedian. If blood enters the needle, another cystocentesis attempt is made with a different needle and syringe. The needle should never be redirected once it is in the abdominal cavity because accidental laceration of viscera may occur. Lastly the technician needs to remember to always release negative aspiration pressure on the plunger of the syringe before withdrawing the needle and syringe apparatus.
FECES SAMPLE COLLECTION
Fecal samples are commonly collected from the ground, floor, cage bottom, or litter box after the animal defecates. Alternative methods include a lubricated fecal loop or a gloved finger inserted into the rectum to remove feces. Gross and microscopic examinations of feces for mucus, blood, intestinal parasites, and ova are commonly performed in veterinary practices. Fresh fecal samples are placed in a sealed container or bag. If the samples are to be checked for parasites but are not examined for several hours, the samples should be refrigerated. Refer to Chapter 17 for more information about a sample collection for a parasitologic examination.
THORACOCENTESIS
Thoracocentesis is a procedure, which may be used to diagnose or treat pleural filling defects (pneumothorax or pleural effusion). Air and fluid, which may compress the lungs within the pleural cavity, can be removed via thoracocentesis allowing the lungs to reexpand. Pleural filling defects should be considered when the patient has tachypnea; short, shallow breaths; respiratory distress; open-mouth breathing; and cyanosis. Chest auscultation may reveal diminished or absent breath sounds and muffled heart sounds. If a pneumothorax or pleural effusion is suspected, oxygen should be administered, and a thoracocentesis should be performed to stabilize the patient before stressing the patient while taking radiographs.
TECHNICIAN NOTE
Pleural filling defects should be considered when the patient has tachypnea; short, shallow breaths; respiratory distress; open-mouth breathing; diminished breath sounds; and cyanosis.
The veterinary technician sets up for thoracocentesis by gathering sterile gloves, a 2-(5.08 cm) to 5-inch (12.7 cm) OTN catheter, IV extension tubing, three-way stopcock, syringe, #15 scalpel blade, 2% lidocaine, clippers, antiseptic scrub and solution, and lab tubes (EDTA and clot tubes and culture transport media). The thoracocentesis is performed at the seventh to eighth intercostal space. An area several inches in diameter is clipped and surgically prepared. It is best to prep an area on the thorax dorsally for the collection of air and ventrally for fluid. Lidocaine (1 to 2 ml) is injected into and around the intended insertion site.
After putting on surgeon's gloves, assemble the equipment. It is helpful to add two or three small fenestrations to the catheter with the scalpel blade. Attach the stopcock to the syringe, and attach the extension tubing to the stopcock (Figure 20-14). An additional extension tube can be added to the free port of the stopcock and the end of the tube placed in a bowl or graduated cylinder to collect the pleural fluid.
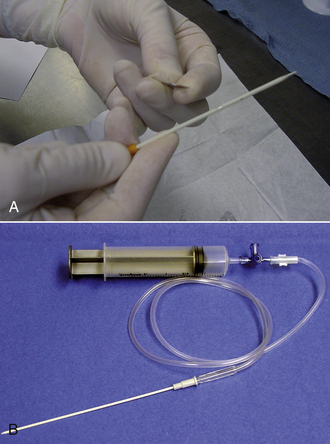
FIGURE 20-14 A, Using a blade to place two to three fenestrations in an OTN catheter. B, The setup for a thoracocentesis using a syringe, stopcock, extension tubing, and OTN catheter.
The patient may be standing or placed in either sternal or lateral recumbency. Intercostal vessels and nerves run along the caudal aspect of the rib, therefore the catheter will be inserted in the caudal aspect of the intercostal space and cranial to the anterior edge of rib. With the catheter perpendicular to the chest wall, the catheter is advanced gradually through the chest wall until a flash of fluid is seen in the hub or a pop is felt. The angle on the catheter is changed so that it is in the direction parallel to the long axis of the rib. The catheter is advanced a few millimeters so that the tip of the needle does not extend beyond the catheter; the needle and catheter are directed ventrally. The catheter is advanced off of the needle; the catheter is quickly attached to the extension tubing (Figure 20-15). In cats, a butterfly catheter can be used instead of extension tubing and catheter. In this instance, the needle is inserted in a direction that is parallel to the long axis of the rib with the bevel facing the thoracic cavity. If the thoracocentesis is nonproductive, it may be necessary to withdraw a few millimeters and redirect the catheter or needle. Using gentle pressure, aspirate until you achieve a slight negative pressure or until the patient's condition improves. Ultrasound can also be useful for determining the endpoint for the procedure.
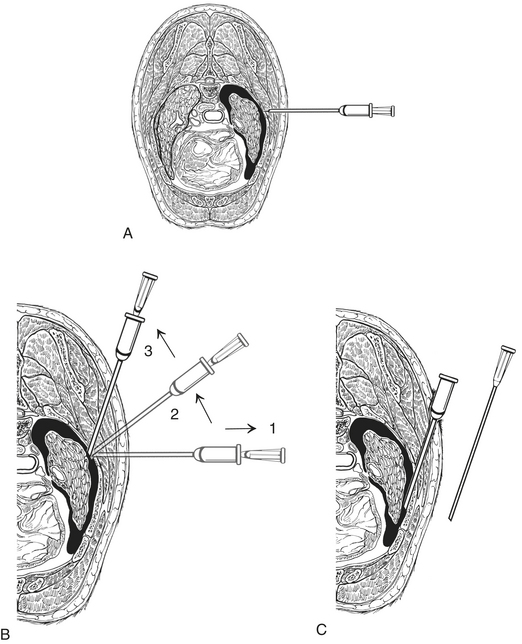
FIGURE 20-15 An OTN catheter is used to perform a thoracocentesis. A, The catheter is perpendicular to the chest wall and is advanced through the chest wall gradually. B, The needle is withdrawn slightly and the angle of the catheter changed so that it is parallel to the long axis of the rib. C, The catheter is advanced into the pleural space, and the catheter is attached to the extension tube, and gentle aspiration is applied. (From King LG: Textbook of respiratory disease in dogs and cats, St Louis, 2003, Saunders.)
Complications include: pneumothorax, lung laceration, and laceration of an intercostal vessel or internal thoracic artery leading to hypovolemia secondary to hemothorax.
Postthoracentesis nursing care includes close observation, respiratory rate measurement, auscultation of lung sounds, and measurement of oxygen saturation with a pulse oximeter. Lab samples may be submitted for cell count, total protein, cytology, biochemical analysis (e.g., triglycerides, glucose, and lactate), and culture and sensitivity.
ABDOMINOCENTESIS
Abdominocentesis is the aspiration of fluid from the abdominal cavity. The procedure is considered diagnostic and therapeutic. It can aid in the diagnosis of hemoabdomen or uroabdomen, peritonitis, or ascites (from cardiac or hepatic causes). It is not indicated when the patient has suffered a penetrating abdominal injury or is suspected of having a pyometra.
The veterinary technician sets up for the procedure by gathering sterile gloves, two to four 20- or 22-gauge needles, syringe, clippers, antiseptic scrub and solution, and lab tubes (EDTA and clot tubes and culture transport media). The abdominocentesis is performed at the right, midabdominal region so as to avoid the liver, spleen, and urinary bladder. An area several inches in diameter is clipped and surgically prepped. A local anesthetic is not usually necessary. The patient may be standing or placed in either sternal or lateral recumbency. Using aseptic technique, the needle is gently introduced into the peritoneal cavity. Gently aspirate or allow fluid to flow from the hub into the test tubes. Rotation of the needle or the placement of a second needle into the abdomen 2 cm from the first can stimulate fluid flow. If no fluid is retrieved, the procedure should be repeated in one or two other locations. As an alternative, the abdominocentesis can be performed with an 18- to 20-gauge OTN catheter.
This procedure has a high incidence of false-negative results. Large volumes (5 to 7 ml/kg) of peritoneal fluid are necessary for detection by this method. The use of a syringe can increase the likelihood of false-negative results as a result of the occlusion of the needle with omentum or viscera. If the abdominocentesis result is negative, a diagnostic peritoneal lavage may be indicated.
Postprocedure nursing care includes monitoring of vital signs, observing for pain, abdominal distention, and continued bleeding or bruising of the centesis site. Lab samples may be submitted for cell count, packed-cell volume, total protein, cytology, biochemical analysis (e.g., creatinine, potassium, bilirubin, and lactate), and culture and sensitivity.
DIAGNOSTIC PERITONEAL LAVAGE
Diagnostic peritoneal lavage (DPL) is the infusion of fluid into the abdominal and then the retrieval of the fluid for laboratory analysis. It has a higher diagnostic accuracy than abdominocentesis. The indications are the same as abdominocentesis or when the abdominocentesis result is negative. DPL has the same contraindications as abdominocentesis and is also not indicated when there is historical, physical, or radiographic evidence for the need for an exploratory laparotomy. Caution should be exercised in those patients with respiratory distress because the instilled fluid will place pressure on the diaphragm and potentially impair ventilation.
The veterinary technician sets up for the procedure by gathering a peritoneal lavage catheter or a long OTN catheter, IV administration set, isotonic crystalloid, basic surgical set, sterile gloves, lab tubes (EDTA and clot tubes and culture transport media), lidocaine, and surgical prep materials.
The bladder is emptied, and the patient is placed in lateral recumbency. The skin of the ventral abdomen is clipped and prepared caudal to the umbilicus. The skin and abdominal wall are infiltrated with lidocaine. If a peritoneal lavage catheter is used, the veterinarian may make a small midline incision just caudal to the umbilicus through the skin, SQ tissue, and superficial abdominal fascia. As an alternative, the veterinarian may make the incision just to the right of the umbilicus so as to minimize the risk of trauma to the spleen and descending colon. If an OTN catheter is used, the veterinarian will make a stab incision. The catheter is inserted through the incision and directed caudally and dorsally. The catheter is gently aspirated; if a diagnostic sample is obtained, there is no need to perform the lavage. If not, approximately 20 ml/kg of warmed crystalloid solution is infused into the abdomen. The patient is gently rocked from side to side. The fluid is allowed to flow freely from the catheter or gently aspirated. If the fluid is clear, the catheter is removed; otherwise, it is sutured in place temporally for serial evaluations.
Post-DPL nursing care is the same as abdominocentesis.
TRANSTRACHEAL WASH
It has been proven that culture swabs of the pharynx and the tonsil region are unreliable in evaluating lower respiratory tract disease because of the contamination of samples with oral flora (Bordetella may be an exception). Appropriate sampling is obtained more consistently by using techniques that bypass the mouth and oropharynx completely. Transtracheal lavage and aspiration provide a means to obtaining material from the tracheobronchial tree for a culture and cytology that is uncontaminated by the oral cavity. The technique is simple, clinically useful, and can be accomplished in a relatively short time period.
The veterinarian makes the decision to perform a transtracheal lavage based on clinical, radiographic, and hematologic findings. Specific examples for indications include: acute bronchopneumonia for a culture and cytology of the provocative agent; identifying the presence of inflammation and whether likely infectious or noninfectious; identification of the cells involved in inflammation (eosinophils, neutrophils, etc.); identification of parasitic eggs or larvae; identification of infectious agents (bacteria, fungi); and the identification of abnormal tracheobronchial cells (chronic inflammatory changes, neoplastic cells). The patient most likely will have a chronic productive cough. Patients may elicit a cough upon a physical examination by external palpation of the laryngeal area.
Patients who are not ideal candidates for a transtracheal lavage procedure are those with severe respiratory distress and are compromised when manipulated. Patients with coagulopathy conditions may require plasma transfusions before the procedure or may be best suited for a tracheal lavage procedure through a sterile endotracheal tube (see endotracheal lavage).
Risks or complications relative to the procedure include postprocedural hemorrhage, SQ emphysema, acute dyspnea, pneumomediastinum, pneumothorax, and iatrogenic infection.
Note that it is best to have the patient awake with a cough reflex present. Therefore heavy sedation or a general anesthetic is not advised for the procedure. An oxygen source, including a facemask, should be at hand at all times. Preoxygenation of the patient via a facemask is advised, even in eupneic animals. The following describes the common procedure techniques and approaches to tracheal lavages.
PERCUTANEOUS TECHNIQUE
Equipment: A firm 16-gauge × 2-inch indwelling OTN catheter, a 3.5 Fr polypropylene urinary catheter, 20-ml or 35-ml syringe filled with sterile nonbacteriostatic saline (approximately 0.5 to 1.0 ml/kg of body weight), three-way stopcock (optional), #11 scalpel blade (optional), sterile gloves, 2% lidocaine drawn up in a syringe, bandage material (sterile 2- × 2-inch gauze with antiseptic gel, plus gauze roll and tape). Alternatively, you can also use a 14-gauge catheter and a 5 Fr urinary catheter. Technique:
1. Positioning. Restrain the animal either in sitting or sternal recumbency. Large-breed dogs are managed better on the floor and in a corner of a room. Extend the animal's head dorsally so that the nares point toward the ceiling.
2. Site. Cricothyroid ligament or intertracheal membrane (through trachea between cartilage rings). For the latter approach, it is generally practiced to use a lower site near the thoracic inlet in large-breed dogs to ensure that the catheter tip will reach the tracheal bifurcation (dependent on catheter length).
3. Preparation. Standard clipping of hair and surgical prep over area. Infiltrate with 2% lidocaine to level of ligament.
4. Incision. Stab incision 2 to 3 mm is optional. No suturing required. Alternatively, tenting of the skin and introduction of catheter through the skin before positioning and advancing through cricothyroid ligament or intertracheal membrane is advised.
5. Placement of catheters. Rigid 16-gauge indwelling catheter with stylet in place is placed through SQ tissues to level of the ligament. Steady the trachea with one hand, and with the other hand hold the catheter. With firm action then pass through ligament and into lumen of trachea. The catheter angle should be at 45 degrees once in the tracheal lumen, pointing down toward the tracheal bifurcation. Advance the catheter over the stylet and remove stylet. Keep a hand on the hub of the catheter at all times. Next, verify placement by attaching a syringe to the catheter in place in the trachea. Air should be easily aspirated. Pass the urinary catheter through the indwelling catheter to a predetermined level (measure from larynx to caudal border of the scapula to approximate distance to tracheal bifurcation) (Figure 20-16).
6. Obtaining sample. Attach a sterile 20-ml or 35-ml syringe containing no more than 10 ml of nonbacteriostatic saline to the urinary catheter. Rapidly infuse the saline and aspirate while slightly moving the urinary catheter back and forth in the trachea gently. It may be helpful to coupage the animal's chest at this time because the greatest amount of material will be aspirated if suction is applied while the animal coughs. Repeat this procedure until the fluid in the syringe is cloudy or contains visible clumps of mucus. The presence of the optional stopcock allows air to be evacuated from the syringe without disrupting the assembly. If desired, repeat aspiration procedure with a new syringe for two samples: one for a culture and one for cytology. When the procedure is complete, cap the syringe containing the lab samples with a new needle. Note: Do not expect to retrieve all of the saline infused through the catheter. A yield of 20% to 25% is common.
7. Patient monitoring. Monitor the patient closely during the sample collection. Oxygen can be delivered directly through the catheter or by facemask, if necessary.
8. Removal of catheters. Remove urinary catheter first, then the indwelling catheter. This will prevent contamination of soft tissues with the catheter tip.
9. Bandage placement. A light pressure wrap with a sterile 2- × 2-inch gauze square with antiseptic dressing applied on the entry site is sufficient. This may prevent excessive bleeding or SQ emphysema.
Method 2: Through-the-Needle Catheter
Equipment: Through-the-needle catheter, 19-gauge × 12 inches, 20-ml syringe filled with 10 ml of nonbacteriostatic saline, three-way stopcock, #11 scalpel blade (optional), sterile gloves, 2% lidocaine drawn up in a syringe, bandage material (sterile 2- × 2-inch gauze with antiseptic gel, plus gauze roll and tape). Technique:
1. Positioning, site, preparation, and incision (steps 1 to 4) are the same as in method 1.
2. Placement of catheter. The trachea is stabilized with one hand while holding the catheter with the other hand. The needle of the catheter is placed through the SQ tissues until it contacts the ligament. The angle of the needle is perpendicular to the trachea with the bevel pointing down. With a firm action, introduce the needle through the ligament, and then change the angle of the needle to 45 degrees, pointing downward toward the tracheal bifurcation. Advance the catheter through the needle, sliding the catheter down the enclosed plastic housing. Make sure the needle is pointing down toward the bifurcation. If not, the catheter may feed back up through the larynx and cause the animal to chew or gag. After advancing the catheter to its full length, withdraw the needle from the trachea and skin, leaving the catheter in place. If the needle is left in the trachea and the animal begins to move, the catheter may be severed off by the needle tip, leaving the catheter as a foreign body in the trachea. The needle guard provided with the catheter should be placed over the needle at this point to prevent injury to the animal or cutting of the catheter with the exposed sharp tip.
3. Obtain the sample and monitor the patient the same way as described in method 1 (steps 6 to 7).
4. Withdraw the catheter. Remove the catheter from the trachea and skin, making sure not to cut the catheter with the needle.
5. Bandage placement. Same as described in method 1 (step 9).
Method 3: Sterile Endotracheal Tube
Equipment: A sterile endotracheal tube suitable for the patient's size. A 5F or larger polypropylene urinary catheter, 20-ml syringe filled with sterile nonbacteriostatic saline, three-way stopcock, sterile gloves, 2% lidocaine (for feline patients to facilitate intubation and reduce laryngeal spasms), laryngoscope, gauze roll to secure endotracheal tube, anesthetic agents necessary to achieve intubation with endotracheal tube.
1. An anesthetic plan should be established for the patient. It is necessary to induce anesthesia in the animal just to the depth necessary to cleanly place a sterile endotracheal tube. Care should be taken not to contaminate the tip of the endotracheal tube in the oral cavity. Laryngeal spasms may be reduced, especially in the feline patient, with the use of a few drops of 2% lidocaine placed on the arytenoids before intubation. Common anesthetic agents used are ketamine hydrochloride and diazepam, propofol, and thiopentathal. Monitor the animal closely. Apnea is a common finding with propofol and barbiturate induction agents. Once the endotracheal tube is placed and secured with roll gauze, the animal can be allowed to recover from the induction dose to a lighter plane of anesthesia so that a cough response is elicited when the procedure is performed. It is necessary to hold the head of the patient in case the animal begins to chew the endotracheal tube. It is ideal to position the patient in ventral recumbency.
2. Placement of catheter. With sterile gloves, advance the polypropylene urinary catheter to a predetermined distance to the tracheal bifurcation (measure from larynx to caudal border of the scapula to approximate distance to tracheal bifurcation).
3. Obtain the sample as described in method 1, step 6.
4. Remove the polypropylene catheter.
5. Monitor and recover the patient. Provide supplemental oxygenation through the endotracheal tube as needed. Monitor patient's respiratory effort and signs for distress. Thickened mucus secretions may occlude airway. Suction endotracheal tube with an aspiration catheter, if necessary. Remove endotracheal tube when patient regains swallowing reflex and no longer tolerates the tube in place. Continue to monitor patient until ambulatory.
SAMPLE HANDLING
Tracheal lavage samples are commonly submitted for both a culture and cytologic examination. Aerobic and anaerobic cultures are often requested by the clinician. If a reference laboratory is used, check with the laboratory for their protocols on sample handling. They may provide transport media for your samples. If samples are submitted in a syringe, the needle should be sealed with a rubber stopper, the sample refrigerated, and cultured within 12 hours. If smears for cytology are made before shipment, make smears from both the supernatant and sediment after centrifugation. Be sure to make monolayer smears and air-dry. Smears may then be packaged in a protective container for shipment. If an on-site cytology examination is preferred, suitable stains are Romanovsky's or Giemsa-type stains.
CYTOLOGIC SAMPLE INTERPRETATION
The material obtained from deep transtracheal lavage procedures will include cellular elements normally lining the tracheobronchial tree; cells infiltrated from inflammatory, hemorrhagic, congestive, neoplastic, or other pathologic processes; and background material derived from mucus, proteinaceous exudate, or cellular fragments. Etiologic agents may be observed including bacteria, fungi, and parasites.
ARTHROCENTESIS
Arthrocentesis is the aspiration of fluid from a joint. The disorders involving joints are etiologically diverse, ranging from congenital, developmental, and acquired disorders to various infections and immunologic diseases. Depending on the specific disorder, joint disease may be a primary or secondary symptom. For the veterinarian to establish and differentiate the diagnosis of joint disease in the dog and cat, a synovial fluid analysis is essential.
Indications for a joint fluid analysis include persistent or cyclic fever, especially a fever of unknown origin (FUO). Indications also include patients that have generalized stiffness or limb lameness, especially associated with systemic signs of illness, fever, leukocytosis, neutrophilia, hyperfibrinogenemia, malaise, and anorexia. Arthrocentesis may be indicated in patients with a definite lameness. Palpation of localized pain and/or joint swelling may be detected along with a change in stability or range of motion involving the affected joint or joints.
Contraindications for joint fluid collection include those patients with moderate to severe pyoderma or lick granuloma. The risk is too great for potentially inoculating the joint from the infected skin. Risks and complications include trauma with or without hemorrhage into the joint, especially when degenerative changes involving the joint are present making access difficult, and when patients are uncooperative and are not immobilized. Iatrogenic contamination or inoculation of the joint is a complication prevented with good aseptic techniques.
PROCEDURE: JOINT FLUID COLLECTION OF DISTAL JOINTS IN THE DOG AND CAT
The equipment needed for arthrocentesis is: ¾-inch or 1-inch, 25-gauge needles and 3-ml syringes; 1-inch or 1½-inch, 22-gauge needles and 3-ml syringes; clean microscope slides and coverslips; sterile gloves; clippers; and aseptic surgical preparation supplies.
Patient restraint is essential. Joint fluid can sometimes be obtained from the distal joints without sedation or any type of anesthetic if the patient is not painful. However, sedation or light tranquilization and the use of analgesics are necessary for uncooperative and/or patients experiencing pain.
The patient's preparation includes placing the animal in lateral recumbency. Prepare the sites by clipping the animal's hair and proceeding with an aseptic surgical preparation.
With sterile gloves donned, palpate the joint space to be entered with the index finger. Introduce the needle attached to the syringe. Hold the syringe in such a manner that you can easily aspirate back on the plunger and you do not have to reposition your hands on the syringe. A steady hand is essential to minimize joint trauma and to produce a noncontaminated (bloody) sample (Figure 20-17). A slight negative pressure is applied to the syringe upon entry into the joint. The suction should always be released before withdrawing the needle. This will prevent contamination (blood) from the skin, SQ tissues, and synovium. An adequate sample is often just enough fluid to fill the needle hub.
FIGURE 20-17 Hold the syringe in such a manner that you can easily aspirate back on the plunger and you do not have to reposition your hands. The shown “dart” technique is favorable with many clinicians and technicians.
Common sites for arthrocentesis in the dog and cat include the distal joints, including the carpus, tarsus, and stifle (Figure 20-18). Techniques for these sites are as follows:
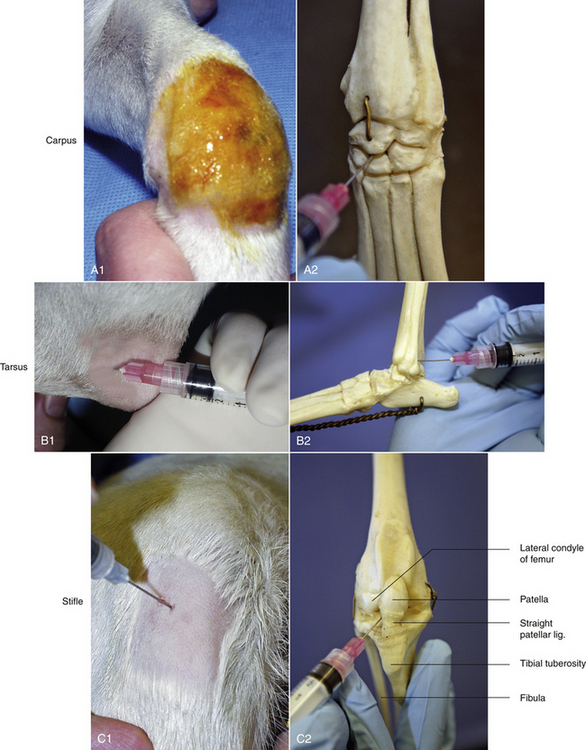
FIGURE 20-18 The carpus (A1 and A2), tarsus (B1 and B2), and stifle (C1 and C2), are common sites for arthrocentesis in the dog and cat. Illustrations show the skeletal joint anatomy and a patient. The carpus can be approached perpendicular at any intercarpal space; A1 and A2. The tarsus can be approached laterally with the needle directed caudal to lateral malleolus and keeping the syringe and needle parallel with the metatarsal bones; B1 and B2. Reference landmarks for the stifle joint are the patella, straight patellar ligament, tibial tuberosity, and the lateral condyle of the femur (C2).
Carpus: The joint is held in flexion. The needle can be inserted in any palpable intercarpal space. The medial radiocarpal joint is most commonly used. This is to avoid the cephalic vein that courses over the carpal joint. The needle is inserted perpendicular to the skin to avoid the articulating surfaces.
Tarsus: The jock is held in partial flexion: 90 degrees with metatarsals and tibia. The joint may be approached either medially or laterally. During a lateral approach, care must be taken to avoid the caudal branch of the saphenous vein. The needle is inserted just caudal to the lateral malleolus and dorsal to the tibial tarsal bone. The needle is directed under the lateral malleolus where it forms a lip over the fibular tarsal bone. Keep the syringe and needle parallel (flat) with the metatarsal bones, heading in the direction of the animal's toes. The insertion of a ¾-inch, 25-gauge needle is often advanced to its full length before obtaining fluid in a medium- to large size dog.
Stifle: The stifle joint is partially flexed during the procedure. The patella, straight patellar ligament, tibial tuberosity, and the lateral condyle of the femur provide landmarks for tapping the stifle. These landmarks form a triangle that aid in entering the joint space. The needle is inserted just lateral to the straight patellar ligament. The needle is directed medially (approximately 35-degree to 45-degree angle) and slightly upward into the origin of the cruciate ligaments between the femoral condyles. A longer 1-inch to 1½-inch needle is usually necessary for tapping the stifle.
JOINT FLUID ANALYSIS
A single drop of synovial fluid is sufficient for gross and histologic appearance. The synovial joint analysis is complete with an additional drop of synovial fluid for a bacterial culture (aerobic, anaerobic, and Mycoplasma). If samples are submitted to a reference laboratory, synovial fluid can be placed in a small EDTA tube. When synovial fluid is minimal, excess EDTA should be decanted from the EDTA collection tube to minimize a diluting effect.
Gross appearance: A normal synovial fluid sample is a small volume of about 0.05 to 0.3 ml. It is colorless, clear, and viscous. An increased volume in synovial fluid can be observed in both noninflammatory and inflammatory joint diseases. A bloody tap as a result of trauma during the collection procedure can usually be distinguished from hemarthrosis because blood is incompletely mixed with the synovial fluid. Blood can be aspirated from inflamed (septic; acutely traumatized, coagulation defects) joints. A yellow-tinged fluid is a result of previous hemorrhage with release of hemoglobin pigments into the joint fluid (inflammatory, degenerative, and traumatic joint disease). If either red blood cells (RBCs) or white blood cells (WBCs) or both are in excess, an increase in turbidity or lack or clarity is observed. The viscosity can be subjectively evaluated by observing the fluid exiting the needle and onto a microscope slide. A normal joint sample will form a long string between the needle and slide. In addition, the drop on the slide should remain global rather than dispersing over the slide. A thin, runny consistency is a frequent, consistent finding in inflammatory disorders. Occasionally, poor viscosity is observed in degenerative or traumatized joints.
Culture: Aerobic, anaerobic, and Mycoplasma cultures are most often negative in polyarthritis. A negative culture therefore supports a noninfectious inflammatory polyarthritis disorder.
Histologic appearance: Normal values are noted in Box 20-3. Absolute cell counts can be done with a hemocytometer. Often joint fluid samples are small, and cell counts are estimated. Estimated counts are more often practiced in a clinical setting. This can be accomplished by recording the number of nucleated cells per microscopic field and comparing the counts with a peripheral blood smear of known concentration of nucleated blood cells.
1. Blood smear = 6 WBC/high-power field (hpf) from a blood sample containing 18,000 WBC/μl
Synovial fluid smear = 0 to 1 WBC/hpf
Estimated count = 0 to 3000/mm3
The estimated count and zero to an occasional WBC observed suggest a normal joint.
2. Blood smear = 6 WBC/hpf from a blood sample containing 20,000 WBC/μl
The estimated count and frequent appearance of WBCs on the smear suggest a markedly elevated nucleated cell count.
Differential: Mononuclear cells. Normal synovial fluid contains a mixture of small and large mononuclear cells. The absolute number of mononuclear cells varies considerably. Therefore the subclassification and absolute count of mononuclear cells provide limited diagnostic information. Elevations tend to occur with traumatized or degenerative joints, chronically inflamed joints, and joints with osteochondrosis.
Polymorphonuclear neutrophils (PMNs): They are generally absent or, if present, should account for less than 10% of the nucleated cell count. An increase in the relative (normal cell count) or absolute number of PMNs indicates inflammation of the synovial joint lining. Generally the more severely inflamed joints will contain a greater concentration of WBCs with a greater percentage of PMNs.
BONE MARROW ASPIRATION
Bone marrow aspiration is performed to evaluate the cells in the bone marrow. Bone marrow aspirations for cytology or a core biopsy are safe, easily performed techniques that may yield valuable information regarding the cause or pathogenesis of many disease processes.
Indications for bone marrow aspiration include patients with nonresponsive anemia, thrombocytopenia, neutropenia without suspicion of infection (i.e., sepsis), pancytopenia, suspected hematopoietic malignancies (i.e., myelogenous leukemia), polycythemia, and inappropriate RBC response, such as the presence of nucleated RBCs in peripheral blood without the presence of reticulocytes or without anemia. Patients that are suspected to have neoplasia, such as lymphoma or multiple myeloma, undergo bone marrow aspiration procedures. Clinical staging of lymphoma or mast cell tumors are also indications.
Contraindications include patients with clotting factor abnormalities and patients with severe thrombocytopenia. This is a relative contraindication and may require the administration of plasma or platelet-rich plasma before the procedure.
Complications include infection at the site if aseptic technique is not maintained, especially in leukopenic patients; damage to soft tissue structures; and hematoma formation if a coagulopathy or thrombocytopenia is present.
TECHNICIAN NOTE
Stainless steel Rosenthal bone marrow aspirate needles are manufactured with a matched stylet. The stylet and needle both have a matching ID number that identifies them as a unit.
The supplies needed to perform a bone marrow aspiration procedure include a bone marrow aspiration needle. The needle may be purchased from a variety of manufacturers, but common types used in a small animal practice are 18-gauge, 1-inch Rosenthal needles with a matched stylet and 16-gauge,  15⁄16-inch Illinois needles with a matched stylet and depth stop (Figure 20-19). Other equipment required is: #11 scalpel blade, 12- or 20-ml syringe; sterile gloves; sterile drape; local anesthetic, such as 2% lidocaine in a syringe with a needle; clean glass slides; and EDTA collection tube. A complete blood count (CBC) with reticulocyte count is done within 24 hours before or after the aspirate so the peripheral and marrow cell populations can be composed. The bone marrow aspiration procedure is a very painful procedure. Heavy sedation with good analgesic agents in combination with a local infiltrate anesthetic or general anesthetic is warranted.

FIGURE 20-19 Bone marrow aspiration needles: 18-gauge stainless steel Rosenthal needle; 16-gauge Illinois-style needle with depth stop.
Bone marrow aspirations are most commonly performed in the ilium, humerus, and femur in small animal patients (Figure 20-20). The patient's size, age, and conformation determine which site is used. It is important to remember that aged patients’ bone marrow is less active in long bones than flat bones, therefore in geriatric patients, a higher success rate for a cellular diagnostic sample is sought in a flat bone, such as the ilium. Bone marrow aspiration procedures are performed with strict aseptic technique. The hair over the site is clipped, and the skin is surgically prepared. Sterile gloves are worn by the person performing the aspiration. The patient's positioning for the dorsal iliac crest is sternal or lateral recumbency; lateral recumbency for the humeral head; and lateral recumbency for the intratrochanteric fossa of the femur.
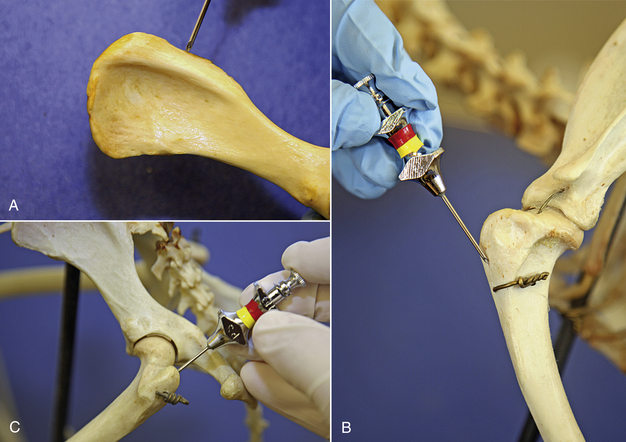
FIGURE 20-20 Common sites for bone marrow aspiration in the dog and cat patient: A, wing of the ilium, B, the greater tubercle of the proximal humerus, and C, the trochanteric fossa of the femur.
ILIAC BONE MARROW ASPIRATION
The patient is placed in sternal or lateral recumbency with its legs drawn forward to better palpate the wings of the ilium. The hair is clipped from the procedure site, and the skin is prepared for aseptic surgery. Local infiltration of 2% lidocaine is done by injecting into the skin, SQ tissue, and periosteum of the bone. A stab relief incision is made into the skin over the iliac crest with a #11 scalpel blade. The bone marrow needle's stylet is inspected, confirming that the stylet is perfectly occluding the distal tip and in place or the needle will become plugged with cortical bone. If a Rosenthal needle style is used, the operator must hold the needle in such a fashion that the stylet does not back out by placing counter pressure on the stylet with an index finger or palm of the hand. One hand is placed on the ilium to stabilize it. The bone marrow needle with its stylet in place is advanced through the skin incision and onto the bone. The needle is advanced into the bone by rotary motion, twisting the wrist only in a clockwise, counterclockwise motion. The goal is to keep a single axis and to avoid wobbling of the needle. This is accomplished by keeping the elbow immobilized and using wrist action only. Considerable force is typically required. The needle is advanced into the bone 1 to 1.5 cm or until the needle is well seated.
Once the needle is well seated and stabilized in the bone, the stylet is removed from the needle and placed on a sterile field. A 12- or 20-ml syringe is firmly attached to the bone marrow needle, and negative pressure is applied to the syringe plunger. The aspiration should be very quick and negative pressure immediately discontinued once 0.1 to 1.0 ml of sample is obtained. The actual aspiration of the marrow fluid is the most painful for the patient, and the conscious, sedated patients may show signs of discomfort. The restrainers of unanesthetized patients should be prepared for the patient to react with a yelp, cry, or movement.
Once the bone marrow enters into the syringe and negative pressure is released, the syringe is removed from the bone marrow needle. The sterile stylet is replaced into the needle. Immediately make six to eight fresh smears. This is accomplished by placing a drop of the sample on tilted microscope slides or by putting some of the sample into a Petri dish and tilting the dish so that the blood separates from the marrow particle. The bone marrow is usually more viscous than blood, contains bony spicules, is a deeper red, and contains fat globules (Figure 20-21). The bone marrow particles can be picked up with a tip of a hypodermic needle or microhematocrit tube and transferred to a microscope slide. A pull slide is made with each sample. A pull slide is made by placing a clean glass slide on top of the slide containing the sample and pulling the slides apart to create two slides for a cytologic analysis. The excess bone marrow sample should be immediately placed in an EDTA collection tube. It is helpful to do this exercise simultaneously, having someone making slides and another pair of hands placing the excess sample into the anticoagulant EDTA collection tube. If this collaboration cannot be done, it is recommended to have the collection syringe precoated with an anticoagulant, such as 2.5% to 3.0% EDTA solution.
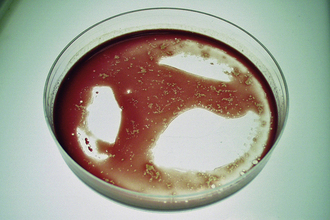
While the patient still has the bone marrow aspiration needle in place, quickly take one of the pull slides and examine it to determine if bone marrow elements are present (Figure 20-22). This screening can be done with a drop of new methylene blue stain and a coverslip. If the sample is not adequate, another sample can immediately be obtained. The patient will therefore not have to be rescheduled for another invasive procedure, and the veterinarian will not be delayed in getting a result and diagnosis.
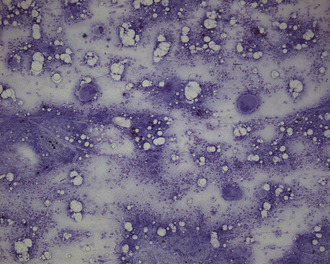
FIGURE 20-22 Microscopic view of a bone marrow aspirate under low 10× power stained with new methylene blue. Note nucleated precursor cells and large megakaryocytes.
Once the sample is determined to be adequate, the bone marrow needle is removed in the same fashion it was placed, by clockwise, counterclockwise motion, pulling out it. Once removed, pressure is held on the site until hemostasis occurs.
The dried unstained smears are packaged in a protective container for a reference laboratory along with the excess sample in the EDTA collection tube.
HUMERAL BONE MARROW ASPIRATION
The humerus is an excellent bone site for marrow aspiration. The craniolateral aspect of the greater tubercle of the proximal humerus is the insertion site. The advantage of this site is that it has less tissue, fat, and muscle overlying the bone. When a patient is heavily muscled or overweight, the dorsal iliac crest is difficult to palpate, and this site is always palpable and superficial in animals with this conformation. The humerus is also advantageous to use in animals with narrow iliac wings, such as small toy-breed dogs and cats.
The patient is placed in lateral recumbency, and the presenting proximal humerus is clipped, surgically prepped, and infiltrated with a local anesthetic. The bone marrow needle is placed perpendicular to the humeral shaft as the elbow is flexed, and the shoulder is rotated or abducted externally. The assistant holding the position of the limb should concentrate on using pressure points, such as the elbow and the blade of the scapula, as the operator advances the needle with constant pressure and force. Squeezing the soft tissues while trying to maintain the position of a limb often results in severe bruising in the thrombocytopenic patient. The techniques for site preparation, needle placement, bone marrow aspiration, and slide preparation are identical to those described for the iliac bone marrow aspiration.
FEMORAL BONE MARROW ASPIRATION
The femur can be used in small-breed dogs and cats for bone marrow aspiration. Site preparation, needle placement, marrow aspiration, and slide preparation procedures are identical to those described for bone marrow aspiration from the ilium.
The patient is placed in lateral recumbency, and the presenting hip region is surgically prepared over the palpable greater trochanter of the femur. The needle placement is within the trochanteric fossa of the femur on the medial aspect of the greater trochanter of the proximal femur. Once aseptically prepped, 2% lidocaine is injected into the skin, SQ tissue, and periosteum over the trochanteric fossa. A stab incision is made through the skin. The operator grasps the femur, and the hip is held in a flexed position. The bone marrow aspiration needle is introduced medial to the greater trochanter and parallel to the femoral shaft. Once the needle is well seated within the shaft of the femur, the sample is taken and processed as described previously.
FINE-NEEDLE ASPIRATION
Fine-needle aspiration is a quick procedure performed routinely in veterinary practices to acquire a sample of fluid or tissue cells from an accessible mass from the dermis, viscera, or a lymph node. These cytologic samples aid in differentiating between inflammation and hyperplasia of structures, such as lymph nodes or mammary glands. They also help to differentiate between inflammation, neoplasia, and hyperplasia of the skin, SQ, or other superficial masses. Complications of fine-needle aspiration procedures include minor hemorrhage, tissue damage, and infection.
Supplies needed to perform a fine-needle aspiration include 25- to 22-gauge needles. The needle lengths are determined by the depth of the mass to be sampled. Other supplies are 3- to 6-ml syringes, clean glass microscope slides, and surgical scrub or alcohol for skin preparation.
The animal is restrained so that the mass to be aspirated is accessible. The skin over the underlying mass is either surgically prepped (for visceral aspirates) or wiped with alcohol to remove superficial contaminants. Secure the mass with a free hand and introduce a 22-gauge needle into the mass with the other. In large masses, the needle is directed into the peripheral parts of the lesion to avoid the necrotic center. The needle is redirected within the tissue once or twice and is removed. A syringe containing at least 1 ml of air is attached to the needle. Depress the syringe plunger quickly because the expulsion should be rapid and forceful to remove all the material from the needle lumen onto a clean microscope slide. If the aspirated material is liquid, a push slide can be made; if the material is more viscous, a pull smear is made.
An alternate technique for performing fine-needle aspiration employs the use of a 3- to 12-ml syringe attached to the needle. After the needle is inserted into the mass, suction is applied to the syringe plunger to aspirate cells into the needle. During the process, the needle may be redirected once or twice; however, the negative pressure is released before withdrawing the needle from the mass. The needle is then detached from the syringe, and the operator aspirates 1 to 2 ml of air into the syringe and reattaches the air-filled syringe onto the needle. The syringe plunger is then forcefully depressed as described before, expelling the contents of the needle onto a clean microscope. Slides are made either by a push or pull technique.
VAGINAL CYTOLOGIC SAMPLING
The collection of vaginal cytology is a very quick and easy procedure to accomplish. Vaginal cytology is performed to determine the patient's present stage in the estrous cycle for breeding purposes or to collect samples to help determine the cause of vaginal disease. The patient is placed in a standing position with support under her abdomen so that she does not lower her hindquarters or in lateral recumbency. The vulva is gently wiped with warm water. The labia are separated with a gloved hand, and a cotton swab is carefully inserted and rolled against the vaginal wall. The cotton swab is removed from the vagina and is rolled onto a clean glass microscope slide for a cytologic examination.
ADMINISTRATION OF MEDICATION IN THE SMALL ANIMAL
Multiple routes exist for the administration of fluids and medication (Box 20-4). The route used depends on many factors, including, but not limited to, the patient's condition and temperament, type of medication or fluid, urgency involved in administering the fluid or medication, cost, ease of administration, and whether a systemic or local effect is desired.
INTRAVENOUS ADMINISTRATION
Many medications are administered directly into a vein. IV injection is used for drugs or fluids that must rapidly reach high blood levels or that would be irritating to tissue or insufficiently absorbed if given by another route (Box 20-5). Certain anesthetics, chemotherapeutic agents, anticonvulsant drugs, and drugs used in cardiopulmonary resuscitation are given IV. If an extremely rapid onset of action is required, the IV or intraosseous route is chosen.
The most frequently used sites for IV injection in the dog are the cephalic and lateral saphenous veins. Cats are most often given IV injections in the cephalic, medial saphenous, and femoral veins. The jugular vein is used to administer injections in both large and small animals if an IV jugular catheter is in place.
When an IV injection is administered, the vessel is occluded with a tourniquet or digital pressure. Air bubbles are expelled from the syringe before the needle is inserted into the vein. The skin and hair over the vein is swabbed with alcohol, and the needle is inserted into the vein. Blood will appear in the needle hub when the needle penetrates the vein, but IV placement is confirmed by aspirating blood back into the syringe. Pressure is released from the vein, and the syringe contents are injected. The needle is withdrawn, and firm pressure is applied to the venipuncture site until hemostasis occurs.
Intravenous Catheter Placement
Patients often require temporary venous access for medications, fluid, and electrolyte replacement therapy or transfusion of blood products. Medications and fluids with osmolalities less than or equal to 600 mosm may be safely administered via a peripheral vein. Site selection depends on the available vessels, condition of the vessels and patient, expense, and the urgency of the situation. The veterinary technician should be familiar with the types of catheters, placement techniques, and catheter maintenance.
A variety of catheters are commercially available. The length and gauge (diameter) of the catheter to be used are dependent on the species and size of the patient and the veins available and their condition. There are four general categories of IV-access devices. They include the winged needle (butterfly), over-the-needle, through-the-needle, and the multilumen catheter (Figure 20-23).
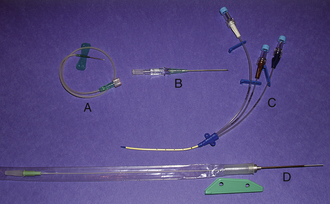
FIGURE 20-23 Examples of four types of IV catheters. Catheter A is a butterfly; catheter B is an OTN; catheter C is a multilumen (Triple-lumen); and catheter D is a through-the-needle.
The winged needle is for short-term use when the animal is not moving around very much. Applications might include blood collection or the administration of nonirritating medications. It is easy for the indwelling sharp needle to puncture the vessel wall, allowing for SQ infiltration of fluids or medications. The needles have plastic wings on the shaft to facilitate placement or taping in place. Plastic tubing of various lengths extends from the needle to the syringe connector port. The OTN catheter is the most common type of catheter used today. It is used primarily for peripheral vein catheterization. This type of catheter is fitted outside or over a steel needle. The needle point extends a millimeter or so beyond the catheter tip for entry into the vein. Catheters passed through the needle are called through-the-needle catheters. Through-the-needle catheters are usually longer than OTN catheters (8 inches to 12 inches) and are used primarily in the jugular vein. A plastic sleeve to prevent contamination protects the catheters. Once the catheter is placed and the needle withdrawn from the insertion site, a needle guard is placed. The needle guard protects the needle from sticking the animal and shearing the catheter, but can be fairly bulky in the small animal. Multilumen catheters have two to three separate lumens in one catheter. Multilumen catheters allow simultaneous infusions at one catheter site. Though one catheter is placed, the multilumen catheter provides the same functions as two to three separately introduced single-lumen catheters. The catheter placement is usually completed percutaneously with a guidewire. Multilumen catheters are more expensive than the commonly used IV catheters.
Although there might be slight variation, the setup for venous (peripheral and jugular) or arterial catheterization is essentially the same, no matter what type of catheter is being placed. The veterinary technician will gather a catheter (butterfly, OTN, through-the-needle, or multilumen); a syringe filled with heparinized saline flush; injection cap or T-connector; tape and/or nonabsorbable suture; bandage material; clippers; and antiseptic scrub and solutions.
Peripheral Vein Catheterization
Common peripheral insertion sites include the cephalic, medial (cat) and lateral (dog) saphenous veins. There is a tendency to insert a lateral saphenous catheter in the vessel as it traverses the hock; as an alternative, it might be preferable to insert the catheter in the lateral saphenous vein on the caudal surface of the leg because it is easier to secure in this location.
The area of the insertion site is generously shaved. A surgical preparation is performed with antiseptic scrub and solution. Aseptic technique is important to prevent indwelling catheter related infection. A facilitative incision or relief hole reduces the skin tension and friction against the catheter. The relief hole may be made with a #11 blade or a 20-gauge needle. A 0.5- to 1-mm incision is made directly over the vessel extending through the dermis.
TECHNICIAN NOTE
A facilitative incision or relief hole reduces the skin tension and friction against the catheter; it is indicated in severely dehydrated patients or patients with tough skin.
It is indicated in severely dehydrated patients or patients with tough skin. Care should be taken to avoid the vessel when making the relief incision. Local anesthetic blocks are rarely needed. The vein is occluded upstream of the insertion site by a tourniquet or an assistant. The distal portion of the leg is grasped in the palm of the hand of the veterinary technician, and the leg is extended to tense and immobilize the vein. It is not recommended to use the thumb to stabilize the vein since this compress and collapses the vein. Flexion of the carpus will increase the stretch on the vessel and improve the vessel immobilization in achondroplastic breeds. With the bevel up, the catheter is inserted through the skin or relief hole at approximately a 15-degree angle. The catheter is advanced into the vessel; when blood appears in the flash chamber (hub), the needle and catheter are advanced together as a unit for an additional 1 to 4 mm. This will ensure that the end of the catheter is entirely inside the lumen of the vessel. Then while holding the needle steady and maintaining the longitudinal tension on the leg, the catheter is then advanced off of the needle and into the vessel lumen. The catheter is capped with an injection cap or T-connector and flushed with heparinized saline. A ½-inch (1.3 cm) strip of adhesive tape is wrapped around the circumference of the hub of the catheter and leg to secure the catheter. A 2 × 2 gauze pad is placed over the insertion site. A 1-inch (2.54 cm) second piece of tape is placed sticky side down underneath the catheter and then wrapped around the leg. Roll gauze is wrapped around the catheter and leg proximal and distal to the insertion site. Finally, tape is applied to the top and bottom of the gauze where it interfaces with the skin.
Jugular Vein Catheterization
There are several advantages to the placement of a jugular catheter over a peripheral catheter: (1) Administration of fluids that have an osmolality greater than 600 mosm/L and constant rate infusions of drugs known to cause phlebitis, such as diazepam, pentobarbital, and mannitol; (2) measurement of central venous pressure (CVP); (3) facilitates frequent aspiration of blood samples; (4) necessary for the administration of total parenteral nutrition (TPN).
TECHNICIAN NOTE
Fluids or drugs that have an osmolality greater than 600 mosm/L should be administered through a jugular vein.
The key to a successful jugular catheter insertion is the patient's positioning and vessel immobilization. If the patient is not positioned properly, it can be difficult to visualize and immobilize the vein. Jugular catheters are placed antegrade with the tip of the catheter always directed toward the heart. The placement of the jugular catheter is best done with the patient in lateral recumbency. The patient's head is extended and its forelimbs positioned caudally by an assistant. Sedation of uncooperative patients is recommended. The placement of a bag of fluids, a sandbag, roll gauze, or rolled towels under the neck may be helpful (Figure 20-24). This flexes the neck and helps to make the vessel more accessible. The assistant should hold off the vein by pressing into the thoracic inlet, this should cause the vein to engorge and “stand up.” The other end of the vein is immobilized by extending the head.
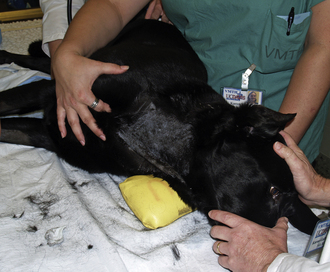
FIGURE 20-24 A sandbag placed under the neck facilitates jugular catheter placement by flexing the neck and providing better access to the vessel.
TECHNICIAN NOTE
The placement of a bag of fluids, a sandbag, or rolled towels under the neck helps to make the vessel more accessible for a jugular catheter placement.
The area of the insertion site is generously shaved. A surgical preparation is performed with antiseptic scrub and solution. To place a through-the-needle catheter, the catheter needle should be introduced SQ. The needle tip is positioned over the vein and aligned as close as possible to the longitudinal axis of the vein. The needle tip is inserted into the vein; it may be necessary to angle the needle somewhat to pick up the superficial vein wall. Once it is estimated that the entire needle tip is within the lumen of the vein, the needle is stabilized, and the catheter is threaded into the vein (Figure 20-25). Once the catheter is fully advanced into the vein, apply pressure over the venous puncture site and back the needle out. Once the bleeding has stopped, secure the needle guard around the needle. The plastic protective bag and stylet are removed; the catheter is aspirated to confirm its proper placement and to clear the catheter of air. It is then flushed with heparinized saline. The catheter should be capped with an injection cap or T-connector and again flushed with heparinized saline. The catheter is sutured or stapled close to the insertion site. The insertion site is then covered with a sterile 2- × 2-inch gauze pad and the catheter site is bandaged.
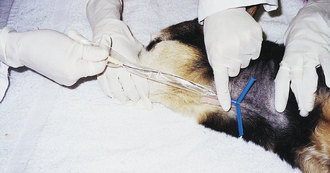
The Seldinger guidewire technique facilitates the placement of a multilumen catheter. The Seldinger technique uses a smaller introducing catheter, or trocar, and a guidewire to safely gain venous access. Before beginning the procedure, the required distance for catheter insertion is premeasured. The aim for a jugular catheter is to have the tip of the catheter lying within the thoracic cavity, just cranial to the right atrium. This distance is commonly estimated by measuring the distance from the intended insertion site to the caudal edge of the triceps muscle. The insertion site is widely clipped and surgically prepared in a routine manner. The infiltration of the intended insertion site with local anesthetic is recommended in awake animals. The technician wears sterile gloves; in some circumstances, a hat, mask, and sterile gown may also be appropriate. The distal port of the multilumen catheter is identified; this is the port that terminates at the very tip of the catheter and will be the one through which the guidewire is passed. All ports of the multilumen catheter are flushed with heparinized saline, and all ports with the exception of the distal port are capped. The insertion site is draped; this is important because the guidewire is long and flimsy and the risk for guidewire contamination is high if draping is not sufficient.
TECHNICIAN NOTE
The required distance for a jugular catheter insertion is estimated by measuring the distance from the intended insertion site to the caudal edge of the triceps muscle.
A small relief incision is made through the dermis with a scalpel blade at the site of the intended insertion. The introducing needle or short OTN catheter enters the skin through the relief incision and is inserted into the underlying vessel. The guidewire is threaded through the inserting needle or catheter into the vein (Figure 20-26). The distal end of the wire has a flexible J-tip to prevent puncturing through the vessel wall. In some instances when it is difficult to pass the J-tip along the vessel, it may be advantageous to use the straight end of the guidewire instead. To prevent embolism of the guidewire, the technician should retain a hold of the wire at all times. Once the guidewire is inserted approximately ⅔ to ¾ of its length into the vessel, the introducing needle or catheter is removed, and a vessel dilator is threaded over the wire, the skin entry site may need to be enlarged with a #11 blade to accommodate the dilator. The dilator is grasped near the distal tip, and using a forward twisting motion, the dilator is advance into the vessel (Figure 20-27). To minimize blood loss, pressure is applied over the insertion site with aseptic gauze pads as the dilator is removed leaving the guidewire in place. In the case of a sheath introducer, the dilator is incorporated in the sheath and is removed once the sheath is in place. The multilumen catheter is threaded over the guidewire until the proximal end of the guidewire protrudes from the hub of the catheter. If an excessive length of the guidewire was advanced into the vessel, it will be necessary to back the guidewire out of the vessel to achieve this. Finally, while holding the proximal end of the guidewire, the catheter is advanced into the vessel the desired distance as determined by a premeasurement (Figure 20-28). The wire is removed, and all ports are aspirated to remove any air and to ensure that blood is easily drawn through the catheter. If necessary, the catheter may be repositioned to allow the effective aspiration of blood; aseptic technique must be maintained throughout this time. All ports are then flushed with heparinized saline. The catheter is then sutured in place; the insertion site is covered by aseptic gauze and bandaged appropriately.
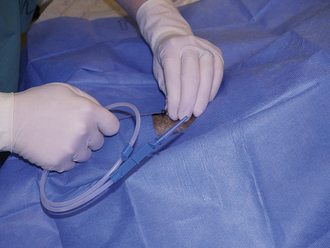
FIGURE 20-26 When using the Seldinger technique, the guidewire is threaded through the OTN catheter; care should be taken not to contaminate the flimsy wire.
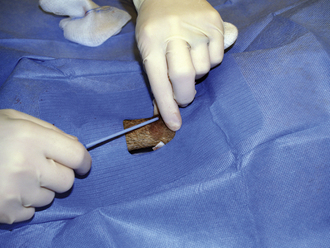
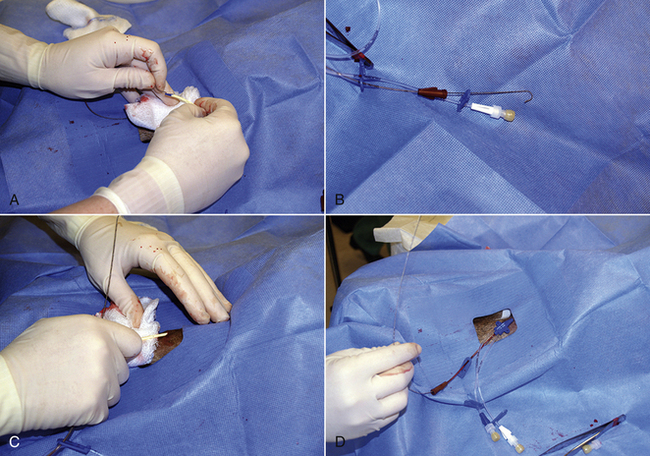
Intravenous Catheter Maintenance
IV catheter care should be performed every 48 hours or on an as-needed basis. The catheter dressing should be removed and the site inspected. The veterinary technician looks for signs of phlebitis, an infection, and/or thrombosis. Signs of phlebitis may include erythema, swelling, tenderness upon palpation, and an apparent increase in skin temperature over the vein. The signs of an infection include those seen with phlebitis and may include a purulent discharge. Thrombosis is characterized by a vein that “stands up” without being held off and a thick cordlike feeling to the vein. When signs of phlebitis or thrombosis are apparent, the catheter should be removed and a new one placed at a different site. While flushing the catheter with heparinized saline, the insertion site should be observed for leaking of fluid at the insertion site and pain upon injection. If either is observed, the catheter should be removed and replaced with a new one. If any portion of the catheter is exposed, it should not be reinserted, and it should be documented in the medical record. If the catheter site looks good, the site should be cleaned with an iodophor or chlorhexidine solution. When the catheter site is dry, cover the insertion site with the sterile 2- × 2-inch pad. Then rebandage the catheter. Traditionally, it has been recommended not to leave a catheter in place any longer than 72 hours. These recommendations come from human medicine. It has been our experience that as long as routine catheter care is performed and the catheter removed when problems are first noticed, one can often exceed the 72-hour rule.
IV catheters should be observed several times a day. If the catheter bandage is found to be wet, the reason should be identified, and the bandage should be changed. Swelling distal to the catheter is usually indicative of a tight bandage. Swelling proximal to the catheter may be due to infiltration. If the patient is molesting its bandage, the reason should be investigated; there may actually be a problem with the catheter or bandage. Catheters that are not used continuously for fluid administration should be flushed with 4 U/ml of heparinized saline (1000 Units/250 ml normal saline) every 4 hours. Bags of heparinized saline should be discarded every 12 to 24 hours to minimize the risk of contamination. If a catheter is not going to be used for a prolonged period of time, a heparin lock should be considered. The dead space of the catheter is filled with 100 U/ml heparin every 12 hours. The concentrated heparin solution is never flushed into the patient; it is aspirated before the administration of medication or before renewing the heparin lock. The catheter should be clearly labeled so as to prevent inadvertent flushing of the concentrated heparin into the patient.
Intravenous Chemotherapy Administration
The use of chemotherapeutic agents to treat neoplasia is becoming more common in companion animal practices. The veterinary technician should be familiar with chemotherapy administration protocols and safety precautions (see Chapter 10). Because many chemotherapeutic agents are carcinogens, it is advisable to minimize exposure to the drugs during administration. Latex gloves, safety glasses, masks, and nonpermeable, long-sleeved, elastic-cuffed gowns should be worn. Materials used for chemotherapy administration should be discarded in leakproof hazardous waste containers. Drug aerosolization is decreased if an alcohol-soaked gauze sponge is placed over the catheter cap when the needle on the chemotherapy drug syringe is inserted into or removed from the catheter.
IV catheters are used to administer cytotoxic solutions, especially those that cause tissue irritation when injected extravascularly. Examples of such drugs, which are termed vesicants, include doxorubicin, vincristine, vinblastine, and actinomycin D.
IV chemotherapy catheters must be placed with extreme care. The catheter should be placed in a peripheral vein, and the vessel must be punctured only once during placement. If a “clean stick” is not achieved on the first placement attempt, a different vein should be used. This prevents tissue irritation caused by drug leakage from the previous puncture site. It is permissible, but not advisable, to place the catheter in the same vein in a more proximal site if the initial site has been given time to seal with a clot. Nonheparinized 0.9% sterile saline solution should be used to flush the catheter when specific chemotherapy drugs, such as doxorubicin, that precipitate when mixed with heparin are used.
Catheters used for drug administration should be frequently evaluated for patency. The area proximal to the catheter site should be freely visible so that extravasation may be observed. Signs that the chemotherapeutic agent has leaked out of the vein include the loss of catheter patency, redness or swelling at or proximal to the injection site, and vocalization or signs of discomfort by the patient.
If extravasation occurs, as much of the drug should be removed from the site as possible by aspirating 5 ml of blood back through the catheter. The tissue surrounding the site should be infused with saline solution, corticosteroids, or 2% lidocaine, and either warm or cold compresses should be applied, depending on the chemotherapy drug used.
When chemotherapy administration is complete, the catheter is flushed with several milliliters of sterile, nonheparinized 0.9% saline solution. An alcohol-soaked gauze sponge covers the catheter as it is removed from the vein. The skin puncture site is covered with an antibiotic-treated gauze pad and securely bandaged.
When less than 2 ml of a chemotherapeutic drug, such as vincristine, is injected IV, a 23- or 25-gauge butterfly catheter is often used. After the drug has been administered, the catheter is flushed with several milliliters of saline solution. The tubing is crimped to prevent fluid from leaking back out of the catheter, and the needle is removed from the vein. The needle is covered with an alcohol-soaked gauze pad as it is removed from the skin, and the venipuncture site is bandaged.
Subcutaneous Administration
The SQ injection is easily and frequently performed and is the most common route for vaccine administration. Although absorption may be slow in obese animals because of the relatively poor vascular supply in fat, SQ injections, in general, allow for relatively rapid absorption of the injected substance. However, the SQ route is not recommended in severely dehydrated or critically ill patients when immediate absorption is required. In an emergency situation, the IV or intraosseous route provides much faster absorption. The IV route is preferred when large volumes of fluid must be administered.
Moderate volumes of isotonic fluids can be injected under the skin to rehydrate animals if IV or intraosseous access is unavailable. Approximately 50 to 100 ml of body-temperature fluids can be injected per site, depending on the patient's size. Owners of patients that may require long-term fluid supplementation at home (e.g., those with chronic renal disease) can be instructed in how to administer SQ fluids.
The preferred site for most SQ injections is the dorsolateral region from the neck to the hips. The dorsal region of the neck and back should be avoided because of the difficulty in treating any abscesses or masses that may occur after an injection. When vaccinations are administered, especially to feline patients, the intrascapular region should be avoided because of the incidence of vaccine-induced tumors. Feline vaccinations should be administered in as distal a portion of an extremity as possible. The following sites are recommended for feline vaccination: right front leg, rhinotracheitis-calici-panleukopenia; right rear leg, rabies: left rear leg, feline leukemia. The intrascapular area should also be avoided for insulin injections because of the relatively poor absorption of insulin from that site and the fibrosis that may occur as a result of repeated injections. Insulin should be injected in alternating sites along the dorsolateral or ventrolateral aspect of the trunk.
When an SQ injection is administered, a fold of skin is tented, and the needle is inserted at the base of and parallel to the long axis of the fold. If the needle is inserted perpendicular to the long axis, the needle may penetrate both sides of the skin, and the syringe contents may be accidentally deposited on the patient's hair. The syringe plunger is retracted slightly, and the needle hub is checked for blood before injection. If blood appears in the hub, a vessel has been penetrated, and the needle should be removed and reinserted in another location. After the injection, the skin is briefly massaged to facilitate drug distribution. If multiple vaccinations or medications are administered, the injection sites should be a minimum of several centimeters apart.
INTRAMUSCULAR ADMINISTRATION
The intramuscular (IM) route is appropriate for the injection of small volumes of medication. Drugs are most often administered in the lumbosacral musculature lateral to the dorsal spinous processes or in the semimembranosus or semitendinosus muscles of the rear leg. Deep lumbar injections in the third to fifth lumbar region are used to administer heartworm treatment. The placement of the needle in the lumbosacral muscles is not recommended in very thin animals. When injections are made into the semimembranosus or semitendinosus muscles, the needle should enter the lateral aspect of the muscle and be directed caudally to prevent penetration of the sciatic nerve. Contact of the needle with the sciatic nerve may cause pain and lameness. Occasionally the triceps muscles on the caudal aspect of the front legs are used as injection sites. The neck is never used as a site for IM injections.
When an IM injection is performed, the muscle is isolated between the fingers and thumb, and a 22- to 25-gauge needle attached to a syringe is embedded in the muscle. As with SQ injections, the needle hub is checked for blood before the administration of medication to make certain a vessel is not inadvertently penetrated. If blood is observed, the needle is removed and inserted in another site. Once the placement within the muscle has been verified, the drug is slowly injected. The site is massaged for a few seconds after the injection to help distribute the substance.
INTRADERMAL ADMINISTRATION
Intradermal (ID) injections are performed to desensitize the skin with a local anesthetic or to perform allergy skin testing. Most animals will not tolerate skin testing unless they are sedated. The hair on the lateral aspect of the trunk is shaved with a #40 clipper blade. The skin is carefully wiped with a water-moistened gauze sponge. Vigorous scrubbing or the use of an antimicrobial cleaning solution is contraindicated because skin irritation that may occur interferes with testing. For an ID injection, a fold of skin is lifted, and a 25- to 27-gauge needle attached to a 1-ml syringe is inserted with the bevel up into the dermis. A 0.1-ml volume of allergen is injected. The injection site will look like a translucent lump if the injection is performed correctly. The skin is then examined for tissue reaction.
INTRANASAL ADMINISTRATION
Certain vaccines—such as those for feline infectious peritonitis, feline viral rhinotracheitis-calici-panleukopenia, and Bordetella bronchiseptica—are formulated for intranasal (and/or intraocular) administration. The patient's muzzle is held in one hand and elevated slightly. The tip of the vaccine dispenser is placed into the nostril, and the dispenser is compressed. Alternatively the patient's head can be tilted back, and the pipette containing the vaccine can be squeezed to dispense the liquid onto the plane of the nose. The vaccine runs into each nostril as the animal inhales. This method frequently results in less sneezing after the administration than when the dispenser tip is placed directly into the nostril.
Diazepam can be administered intranasally for the immediate treatment of status epilepticus if intravascular access cannot be obtained. Diazepam is absorbed more rapidly into the systemic circulation by the intranasal route than by the intrarectal route.
INTRATRACHEAL ADMINISTRATION
In an emergency situation, such as during cardiopulmonary resuscitation, drugs can be injected directly into the trachea of an unconscious animal. The absorption by this route is extremely rapid.
TECHNICIAN NOTE
In an emergency situation, such as during cardiopulmonary resuscitation, medications can be injected directly into the trachea because the absorption of the drug by this route is extremely rapid.
When an intratracheal injection is performed, a polypropylene urinary catheter or rubber feeding tube is inserted into the trachea, either directly or through an endotracheal tube. The drug contained in a syringe is forcefully injected through the urinary catheter or feeding tube. Approximately 10 ml of air or 3 to 10 ml of sterile saline solution is injected through the catheter or tube immediately afterward to disperse the drug. The acronym ALE (e.g., atropine, lidocaine, or epinephrine) is useful in helping to remember which drugs can be administered via the endotracheal tube. The intratracheal dosage is usually twice the IV dosage.
INTRAOSSEOUS ADMINISTRATION
Needles are placed directly into the bone marrow cavity to deliver fluids, drugs, and blood products when IV catheterization is not possible or cannot be performed rapidly. The intraosseous route is often overlooked and may be useful in emergency situations. Medications and fluids quickly enter the central circulation via the intramedullary vessels in the marrow cavity. The intraosseous placement of a needle or catheter allows rapid fluid delivery to neonates, small animals, and patients with circulatory collapse. Intraosseous needles are removed as soon as IV access can be established.
The placement of an intraosseous needle or catheter is contraindicated in patients with sepsis. Catheters are not placed in bones that are fractured or infected. Skin overlying the insertion site should be free of infection so that skin-surface pathogens are not introduced into the underlying tissue during an intraosseous needle placement. If the bone cortex is punctured multiple times during insertion attempts, a different bone should be used; fluid that is administered may leak from the bone into the SQ tissue.
Sites for intraosseous administration include the tibia, femur, humerus, and occasionally the iliac wing or ischium. The intraosseous catheter or needle should have a stylet that helps prevent the needle from bending or becoming occluded with a core of bone as it is inserted. Needles used include 15- to 18-gauge bone marrow needles specially designed for intraosseous access. If intraosseous access is needed in a neonate, an 18- to 22-gauge hypodermic needle can be used. If the hypodermic needle plugs with a core of bone, it can sometimes be flushed out with saline solution. A 22-gauge, 3.75-cm needle can be nested inside an 18-gauge, 2.5-cm needle to serve as a stylet during placement.
Needle placement for the purpose of delivering medications or fluids into the intraosseous space follows the protocol described for needle placement for bone marrow aspiration. When an intraosseous catheter or needle must be placed in the femur, the hip region is shaved and aseptically prepared. The patient is placed in lateral recumbency, and the technician stands at the dorsum of the patient. The trochanteric fossa of the femur of the upside leg is identified on the medial aspect of the greater trochanter of the proximal femur.
Approximately 0.5 to 1.0 ml of 2% lidocaine is injected into the skin, SQ tissue, and periosteum over the trochanteric fossa to provide local anesthesia. A stab incision is made through the skin. The femur is grasped, and the hip is held in a flexed position. The intraosseous needle is introduced medial to the greater trochanter and parallel to the femoral shaft. The needle is inserted through the skin incision and into the femur by using firm, steady pressure as the wrist is rotated back and forth. The insertion of the needle through a skin incision helps decrease the likelihood that skin contaminants will be carried into the bone. During a needle insertion, care is taken to prevent piercing the sciatic nerve, which is posteromedial to the greater trochanter of the femur. When the needle enters the marrow cavity, the needle will feel firmly embedded. The placement can be ascertained through aspiration of bone marrow into a syringe attached to the needle hub.
Once placed, the needle is secured by wrapping a “butterfly” tab of tape around it as it exits the skin. The tape is sutured to the skin. A povidone-iodine ointment-treated gauze pad is applied to the skin entry site. A bulky, gauze bandage is placed around the needle for further stabilization. The patency of the intraosseous needle is maintained by flushing every 6 hours with 1 to 2 ml of heparinized 0.9% saline solution. The needle may remain in place for up to 3 days, but is difficult to maintain in an ambulatory patient.
INTRAPERITONEAL ADMINISTRATION
The intraperitoneal (IP) route involves the placement of substances directly into the abdominal cavity. This route is occasionally used to administer noncaustic fluids, blood products, or medications. It may be used in neonates when intravascular or intraosseous access is difficult to obtain. Specific chemotherapy drugs, such as asparaginase, can be given IP. Body-temperature fluids may be infused into the abdominal cavity to lavage the abdomen in animals with peritonitis or pancreatitis. Warm or cool fluid IP lavage may be used to help treat patients with severe hypothermia or hyperthermia.
Substances injected into the peritoneal cavity are absorbed more rapidly than those administered SQ, but more slowly than those given by the intravascular or intraosseous route. When a drug or fluids must be administered into the peritoneal cavity, the ventral abdomen between the umbilicus and the bladder is shaved and aseptically prepared. An 18- to 22-gauge needle or catheter is inserted into the abdominal cavity on the ventral midline, a few centimeters caudal to the umbilicus. A syringe is attached and aspirated. If the needle is in the proper location in the peritoneal cavity, no blood or fluid will be aspirated into the syringe. If blood or fluid enters the syringe tip, the needle may have punctured a vessel or abdominal organ. The needle is removed, and a new needle is inserted in a different site. If the syringe remains empty when negative pressure is applied, the medication or fluids have been injected.
TOPICAL OPHTHALMIC ADMINISTRATION
If it is necessary to administer topical ophthalmic medications to treat ocular diseases or for specific vaccines, such as feline rhinotracheitis-calici-panleukopenia, there is a formulation designed for intranasal and/or intraocular administration. To successfully place a medication onto the surface of the eye, the technician must have good restraint of the patient. Control of the front limbs of the patient is essential, along with minimizing the movement of the animal, to prevent the medication from being inadvertently placed on the eyelids or face. The eye medication dispensed to a patient should only be used exclusively on that patient and no other patients to prevent transmitting ocular infections. The tip of the medication dispenser should not come into direct contact with any surface of the eye, including the cornea, to prevent contamination and scratching of the cornea. If an ophthalmic medication is a solution and it appears cloudy, contains particulate matter, or has a color change, it should not be used.
Ophthalmic medications should be administered slightly warm or at room temperature. The technician can take refrigerated medications and place them in the palm of his or her hand for 1 to 2 minutes before administration because this makes it more comfortable for the patient. The eyelids are held open with the thumb and index finger of one hand, and the hand holding the medication is rested on the patient's head as 1 drop of the medication is deposited onto the sclera (Figure 20-29). For medications that are ointments, the lids are held open with the thumb and index finger of one hand and a 3- to 5-mm strip of ointment is squeezed onto the upper sclera or lower palpebral border. The ointment dissipates across the cornea when the animal blinks.
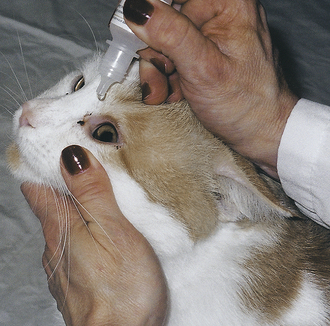
If the patient requires multiple topical ophthalmic medications in the same eye, these should be applied 3 to 5 minutes apart to allow for sufficient absorption. In the scenario of needing to administer both a solution and an ointment, the solution should be placed in the eye 3 to 5 minutes before the ointment. If the ointment is applied first, it may coat the cornea and interfere with the absorption of the solution.
AURAL ADMINISTRATION
The key to successfully medicating an ear is to have the medication in contact with the ear canals’ epithelium to enhance the medication's absorption and effectiveness. Therefore the ear must be cleared of debris before the medication is applied.
When medication is placed in the ear canal, the pinna is grasped and pulled upward and slightly out laterally similar to the motion of introducing an otoscope cone for an otoscopic examination. This helps to straighten the vertical ear canal. The tip of the medication dispenser is then placed into the vertical ear canal, and the dispenser is squeezed. The base of the ear is massaged to distribute the medication.
TRANSDERMAL ADMINISTRATION
Certain medications applied topically to the skin have systemic and local effects. Many drugs commonly administered by the oral route, such as prednisone or methimazole, can be formulated into an ointment for transdermal application. Other medications, such as nitroglycerin, are manufactured as a cream to be applied directly on the skin.
Medications, such as nitroglycerin, may be absorbed by the individual making the application; therefore disposable gloves should be worn to prevent absorption. A small quantity of ointment is applied to a sparsely haired region, such as the pinna of the ear, the groin, or a shaved area on the ventral thorax. If gloves are unavailable, the ointment can be applied to a small piece of wax paper and wiped onto the skin. The treated area is covered with a light bandage so it will not be accidentally touched. A note is placed on the front of the patient's cage specifying the medication used, the site to which the medication has been applied, and the duration of time that must pass before the application site can be safely touched.
Many topical medications are dispensed in a liquid or aerosol form to control fleas, ticks, mites, heartworms, and intestinal parasites. Depending on the product, the medication is either sprayed on the hair on the entire body or applied to the skin between the shoulder blades. Manufacturer's directions regarding application should be followed closely. Gloves are worn during the application, and the site of administration should not be touched for a specified period after the application.
The transdermal application of analgesics is gaining popularity. One analgesic manufactured in a form specifically for transdermal application is fentanyl citrate. A fentanyl-impregnated self-adhesive patch is placed directly onto a shaved, dry region of skin. The technician should not touch the adhesive side of the patch containing the fentanyl because the medication is absorbed topically. Gentle pressure is applied with the palm of the hand over the patch application site for 1 minute to help the patch adhere to the skin. Each patch can only be applied once because it may not adhere to the skin and deliver the complete dose of fentanyl if it is removed and reapplied. The patch can be covered with tape on which the date and time of placement have been recorded.
It is important to place the fentanyl patch in a location from which the animal cannot remove it, such as on the intrascapular region. It should not be applied to skin that will be in contact with a heating pad, heat lamp, or other external heat source. The rate of drug delivery is increased when the skin beneath the patch warms and the cutaneous vessels vasodilate.
The topical application of creams (e.g., EMLA cream, lidocaine, and prilocaine) desensitizes the skin so that a venipuncture is more comfortable for the patient. This topical anesthetic must be in contact with the skin for at least several minutes (ideally 30 to 60 minutes) for it to reach its maximal effectiveness.
INTRARECTAL ADMINISTRATION
The mucosa of the large intestine is capable of absorbing medications delivered intrarectally. Medications delivered by this route may have both local and systemic effects. The absorption is most effective when the intestine is free of fecal material. Antiemetic tablets or suppositories can be administered intrarectally to vomiting patients that cannot be medicated orally. A gloved, lubricated finger is used to insert the tablet into the rectum a distance of at least 5 cm. The medication is then gradually absorbed.
Antiseizure drugs, such as diazepam, can be given intrarectally if an IV or intranasal administration is difficult to perform. A lubricated short rubber feeding tube or urinary catheter is inserted 8 to 10 cm into the rectum. The diazepam is placed into a syringe and injected through the catheter. Several milliliters of warm water are then flushed into the catheter to disperse the drug. Diazepam can also be injected directly into the rectum with a needleless syringe.
Enemas are also administered per rectum. A syringe containing the enema is lubricated and inserted into the rectum. After the enema is injected, the animal should be placed in an area where it can defecate, such as outdoors or near a litter box.
Warm-water enemas are administered through lubricated plastic tubing inserted through the rectum and into the large intestine. Water is funneled or injected into the end of the tube held in a raised position. The tube is moved back and forth and is slowly advanced up the intestinal tract as fecal material is expelled.
When a medication, such as lactulose, is added to the enema solution, it must be retained within the large intestine for a specified length of time. The solution is injected into a urinary catheter or feeding tube placed into the descending colon. The rectum is held closed with a gloved hand to prevent the enema from exiting. After the allotted time has passed, the catheter is removed and the intestine is evacuated.
ORAL ADMINISTRATION
The administration of medication by direct placement into the oral cavity is frequently and easily performed. Technicians should be adept at administering oral medications to animals and capable of demonstrating techniques to pet owners.
TECHNICIAN NOTE
Technicians should be adept at administering oral medications to animals and able to demonstrate techniques to pet owners.
Oral medications are usually administered in liquid, capsule, or tablet form. Liquids are easy to administer through a dropper or syringe. Pulverized tablets and the contents of capsules can be mixed with a small volume of food, water, or flavored liquid. When liquids must be administered with a syringe or dropper, the patient's lower lip is pulled out at the commissure. The tip of the syringe or dropper is placed between the cheek and the gums, and small volumes of liquid are injected. The muzzle should be held at a neutral angle and not elevated. Hyperextension of the neck or movement by the patient during administration may result in fluid aspiration into the trachea. If the patient struggles or coughs or if fluid spills out of the mouth, the patient should be allowed to rest before further administration attempts.
A tablet or capsule is most easily administered to a dog if it is hidden in meat, cheese, or a chunk of canned pet food. Cats rarely consume pills hidden in food. Cats will meticulously eat the food that surrounds the pill and leave the medication. If a patient has a diminished appetite, it may not consume the entire amount of medication-laced food and will not receive a sufficient dose of medication.
An animal that will not consume baited food is medicated by tilting the head back, prying open the jaws, and placing the pill far back on the base of the tongue (Figures 20-30 and 20-31). The tablet will be expelled if it is not placed far enough back in the pharynx. The technician holds the muzzle closed, rubs under the animal's chin, taps the tip of the nose, or blows air into the nostrils to stimulate the animal to swallow. When the animal licks its nose, it can be assumed that the tablet has been swallowed.
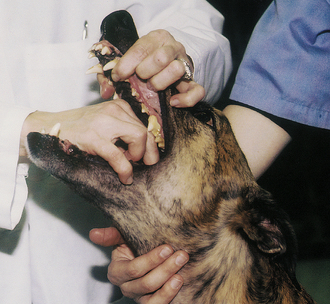
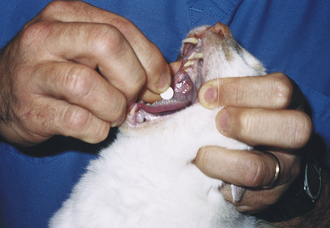
FIGURE 20-31 A cat's neck is hyperextended so its nose points toward the ceiling. The lower jaw is open as a tablet is placed in the back of its mouth.
A specially designed device is available to administer tablets to fractious cats and dogs. The tablet is secured in the tip of a plastic rod that is inserted into the back of the mouth. The rod plunger is quickly depressed, and the pill is propelled down the esophagus. Technicians can demonstrate the use of the “pill gun” to owners for the administration of medication at home.
OROGASTRIC INTUBATION
Sometimes it is necessary to administer medication, food, or fluids through a tube passed through the mouth and directly into the stomach. This technique is used to administer activated charcoal solutions or lavage the stomach to treat animals that have ingested toxins. Orphan or weak neonates who cannot nurse can be fed milk replacer via a tube passed through the mouth and into the distal esophagus or stomach. An orogastric tube (OGT) is also passed in an attempt to decompress a patient with gastric dilation (bloated stomach). Dogs usually permit an OGT placement with moderate resistance. Cats, with the exception of neonates, usually require sedation.
The length of 10 to 22F plastic or rubber tube required to extend from the tip of the nose to the thirteenth rib is measured and marked on the tube with tape or ink (Figure 20-32). If the tube is to be placed in the distal esophagus to feed an animal, the distance between the tip of the nose and the eighth rib is marked. Water-soluble gel is used to lubricate the tip of the tube. The animal is restrained in sternal recumbency or in a standing or seated position. A roll of tape, a plastic or wooden speculum with a hole in the middle, or a plastic syringe case with smooth ends is placed behind the canine teeth to hold the mouth open. The muzzle is kept in a normal position and held so the mouth speculum does not become dislodged.
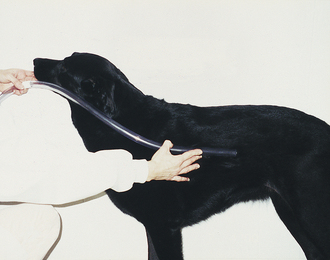
FIGURE 20-32 A length of stomach tube is measured from the nose to the thirteenth rib. It is marked with tape.
The tube is slowly passed through the speculum (Figure 20-33). Swallowing will be noted as the tube passes over the base of the tongue and into the esophagus. If the animal coughs, the tube may have entered the trachea and should be removed. Once the tube is in the esophagus, it is advanced the premeasured length until it enters the stomach.
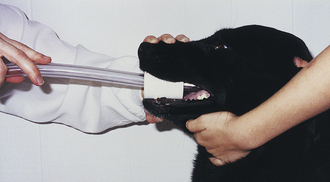
FIGURE 20-33 A roll of tape holds the mouth open as a stomach tube is passed through the roll and into the oral cavity.
The correct placement of the tube in the gastrointestinal tract should always be verified before the introduction of any medications or fluids. Refer to the discussion of nasoesophageal and nasogastric tubes (NGTs) for instruction on how to check the tube placement.
Fluid is added to the tube with a 60-ml syringe, metal drench pump, or funnel. After the fluid has been administered, the tube is bent to occlude it and then withdrawn in a downward direction. This technique prevents a backflow of fluid from entering the trachea.
Enteral Feeding Tubes
Enteral feeding has proved to be an excellent method for maintaining a normal nutritional status when oral intake is not possible. Indications for placing enteral feeding tubes include critically ill animals and patients with chronic disorders, such as renal impairment, that may not be able to normally consume enough calories for proper nutrition and therefore require nutritional support. If the gastrointestinal tract is capable of digestion and absorption, then food slurries, fluid, or medication can be administered through tubes placed directly into the esophagus, stomach, duodenum, or jejunum. The technician needs to be familiar with the technique that the veterinarian uses to place enteral feeding tubes and be knowledgeable about tube maintenance. The selection of the feeding tube device is dependent on many issues, including the duration of enteral support, aspiration risk, and the animal's temperament.
Nasoesophageal tubes are occasionally used for short-term feeding and the administration of medications. If a patient requires nutritional support beyond 10 days, the placement of an esophagostomy or gastrostomy tube is preferred (Figure 20-34). Esophagostomy and gastrostomy devices can remain long term (weeks to months), although occasional replacement may be necessary depending on the construction and wear of the tube. If the stomach must be bypassed completely, a duodenostomy or jejunostomy tube is surgically placed.
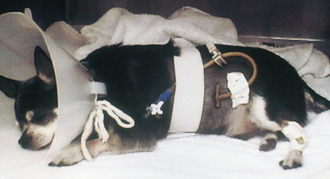
FIGURE 20-34 A gastrostomy tube is placed to feed a patient that has undergone esophageal surgery. The Elizabethan collar prevents chewing on the tube or IV lateral saphenous catheter.
All enteral feeding tube types should be flushed before and after use. A small volume of warm water is administered to help prevent lumen obstructions. Fluids should always be injected slowly. Before the injection of fluid into a gastrostomy tube, the tube is aspirated with a syringe to make certain the stomach contents have emptied from the previous feeding. If the stomach is still full, the veterinarian should be consulted; the full volume of the next meal should not be instilled into the gastrostomy tube until the previous meal has passed from the stomach. The tube insertion site and tube position are inspected daily to make certain that the tube has not shifted and the skin is free from inflammation, redness, tenderness, and discharge.
Nasoesophageal Tubes
Nasoesophageal tubes are easy and inexpensive to place in an animal that requires short-term feeding, such as a severely anorexic cat. These tubes are contraindicated in patients that are vomiting or do not have a gag reflex. A 5 to 8 Fr pediatric feeding tube is held up to the animal to determine the appropriate length that is required. For nasoesophageal placement, the distance between the nares and distal esophagus at the eighth or ninth rib is marked on the tube with ink or tape. The patient is held in sternal recumbency, in a seated or standing position. The head is held securely with the neck slightly extended. From 0.5 to 1 ml of 2% lidocaine is infused into one nostril of the dog, and 5 drops of 0.5% proparacaine are placed into one nostril of the cat. The tip of the tube is coated with Xylocaine jelly and placed in the nostril dorsomedial to the alar fold. The tube is advanced into the nostril and directed ventrally. The tube then continues down the ventral meatus and into the nasopharynx. The animal will usually swallow when the tube enters the pharynx (Figure 20-35).
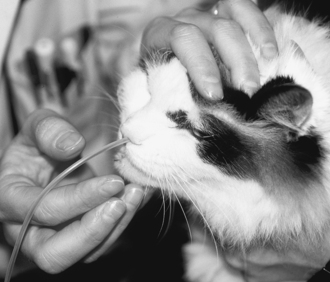
FIGURE 20-35 The tip of a nasoesophageal tube that has been lubricated is advanced into the nostril and directed ventrally. (From Ettinger SJ, Feldmen E, editors: Textbook of veterinary internal medicine, ed 6, Philadelphia, 2005, Elsevier Saunders.)
The tube is placed in the distal esophagus. The proper placement may be checked by injecting 5 to 10 ml of air into the tube and simultaneously auscultating the cranial abdomen. If gurgling sounds or borborygmi are present, the tube has been placed in the gastrointestinal tract. Alternatively, 5 ml of sterile saline solution may be injected into the tube; if the animal coughs, the tube is in the trachea and should be removed. A radiograph can also be taken to evaluate the tube placement. The most common complications of a nasoesophageal tube placement are epistaxis, rhinitis, tracheal intubation, and secondary pneumonia, and vomiting.
Suture material or tissue adhesive is used to secure the tube to the patient (Figure 20-36). The tube should be sutured or glued close to its entrance to the nostril, onto the bridge of the nose, and onto the forehead. The remainder of the tube should be taped to the dorsum of the neck, and the animal should be fitted with an Elizabethan collar to prevent chewing of the tube. A cap is placed on the end of the tube to prevent reflux.
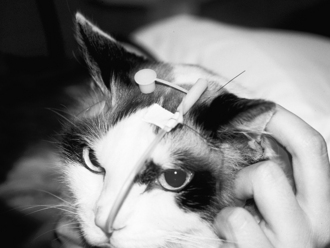
FIGURE 20-36 The nasoesophageal tube secured to the patient. The tube is sutured or glued close to the nostrils, on the bridge of the nose, and onto the forehead with “butterfly” tape. (From Ettinger SJ, Feldmen E, editors: Textbook of veterinary internal medicine, ed 6, Philadelphia, 2005, Elsevier Saunders.)
Esophagostomy Tube Placement
The placement of a feeding tube directly into the esophagus to provide nutritional support has proved to be an effective technique. Esophagostomy tubes are preferred over pharyngostomy tubes because these cause less laryngeal irritation and obstruction and are less likely to induce vomiting and become dislodged. Esophagostomy tubes are easily inserted under a light general anesthesia plane, are minimally invasive, and no specialized equipment is required, such as an endoscope. There are, however, specially designed percutaneous kits available on the market: the ELD Tube Applicator (Jorgensen Laboratories, Inc.) and the Van Noort Oesophagostomy Tube Set (SurgiVet). Instruction sheets detailing the procedures involved in using these devices are available from the manufacturers. If a commercial kit is not used, the technique using right-angled forceps and a 14F to 20F red rubber feeding tube is commonly practiced.
TECHNICIAN NOTE
Patients tolerate esophagostomy tubes better than pharyngostomy tubes because these cause less laryngeal irritation and obstruction and are less likely to induce emesis and become dislodged.
An esophagostomy tube is placed in the midcervical esophagus on the left side of the neck (Figure 20-37). The animal is placed in right lateral recumbency, and the left cervical region is shaved and surgically prepared. The point of the shoulder and the angle of the mandible are used as guides to measure the distal and proximal limits of the cervical esophagus. The length of a red rubber feeding tube needed to extend from the skin of the midcervical region to the seventh rib is measured and marked on the tube with ink or tape. A pair of extra long curved forceps (such as Carmalt, Mixter, Schnidt, or Kantrowitz) is placed into the oral cavity and advanced to the left midcervical region of the esophagus. The forceps’ tips should be palpable on the patient's neck. A stab incision is made with a scalpel blade through the skin and SQ tissue over the tips. The scalpel blade is used to carefully dissect the SQ tissue over the esophagus until the forceps are able to bluntly penetrate the esophagus. The tips of the hemostats are then brought to the exterior and opened just enough to grasp the fenestrated end of the feeding tube. The forceps with the attached feeding tube are withdrawn back through the skin and into the esophagus toward the oral cavity. Once the fenestrated end of the tube reaches the mouth, the tube is bent and redirected back down the esophagus to the level of the seventh rib. Retention sutures, such as the Chinese finger-knot suture, are used to secure the distal end of the tube to the skin. A povidone-iodine–treated gauze sponge is placed around the skin-tube interface, and a bandage is applied over the neck. The exposed tube end is capped with a catheter adapter and a catheter cap. Once esophagostomy tubes are removed, healing occurs by second intention. Stricture of the esophagus at the site of tube removal is minimal.
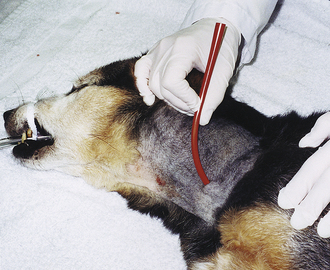
Gastrostomy Tube Placement
Gastrostomy tube feeding is recommended for long-term nutritional support and is especially suited for patients suffering from dysphagia; megaesophagus; and head, laryngeal, or esophageal trauma. Gastrostomy tubes are generally larger in diameter (18F to 24F). A gastrostomy tube placement for nutritional support is contradicted in patients that vomit frequently, have gastrointestinal obstruction, or are obtunded. Some animals require life-long gastrostomy tube feedings. This requires dedicated owners who are devoted to nursing their pets and ensuring that their animal receives daily nutritional requirements 365 days a year.
Gastrostomy tubes can be placed percutaneously or during laparotomy. The placement is achieved with a PEG technique using an endoscope or a blind percutaneous technique. The percutaneous placement of a gastrostomy tube can be accomplished in 10 to 15 minutes. PEG tube kits are commercially available, but many hospitals make their own tube kits. Kits include a gastrostomy tube with its proximal end secured into a tapered plastic cannula or pipette to provide a sharp tapered guide, allowing the gastrostomy tube to be brought through the gastric and abdominal walls with minimal trauma. Also included are an external flange or stent, a clamp to anchor the external flange, a large clamp to prevent gastric contents from backing up into the proximal feeding tube, and a syringe adaptor to facilitate feeding.
Gastrostomy tube styles vary with the distal tip design. They may possess a Pezzer-style mushroom tip, or a rolled up “bumper,” a round and flat disk, or a Foley balloon design (Figure 20-38).

FIGURE 20-38 Examples of gastrostomy tube designs. From top to bottom: Pezzer or mushroom tip; Foley balloon; and bumper or disk style.
Gastrostomy tubes are commonly made from either latex or silicone. The life of latex products is not long, usually up to 12 weeks. The volatile acidity of the stomach breaks down the latex, and the tube may dislodge as a result of the digestive disintegration of the tube. Furthermore, latex products can cause tissue irritation that can be observed at the stoma site. Latex gastrostomy tubes are soft and very pliable, and the long external feeding tube can be easily managed against the body wall. Latex gastrostomy tubes are inexpensive and are an excellent economical choice for short-term feeding. Silicone tubes can be more rigid and do not coil as easily against the body wall. They are, however, more tissue friendly, causing fewer tissue reactions. They are very sturdy in the gastric environment and are known to last 8 to 12 months, depending on the design of the tube. Silicone tubes with a Foley balloon design usually fail by 12 to 16 weeks because of balloon failure, but silicone tubes with a mushroom tip design will last many more months. Silicone tubes are, in general, more expensive than latex tubes, but are preferred for long-term feeding.
Endoscopic Placement Technique
Patients are placed in right lateral recumbency. Aseptic surgical preparation is done on the left paracostal area. A mouth gag is placed in the anesthetized animal, and a flexible gastroscope is inserted through the mouth and advanced into the stomach. The endoscopist fills the stomach with air until distention is obvious externally. Gastric distention is important because it will push the liver, spleen, and colon away from the gastrostomy site, leaving the gastric wall in direct contact with the left abdominal wall. Communication between the endoscopist and surgeon at the patient's side is necessary to confirm a good placement site by the surgeon poking with a gloved index finger just posterior to the thirteenth rib over the distended stomach. The endoscopist can visualize the gastric wall collapse around the finger of the surgeon. The endoscopist confirms the placement site location in the stomach, making certain that the site will be made in the body of the stomach or the greater curvature, outside the antrum. The surgeon then makes a small 3-mm incision with a scalpel blade at the desired site over the distended stomach. A needle or cannula is inserted through the skin incision and pushed through the abdominal and gastric walls. A strong nylon suture material is threaded through the needle or cannula into the stomach. The suture material is seen by the endoscopist who grasps the thread with an endoscopic snare or forceps. The suture thread is then brought out through the mouth along with the gastroscope. The needle or cannula is removed from the abdominal wall. A prepared PEG tube, attached in a tapered plastic cannula or pipette, is tied or attached to the suture exiting the oral cavity. The gastrostomy tube is well lubricated, and the surgeon places traction on the transabdominal suture, pulling the PEG tube through the animal's mouth, esophagus, and through the gastric and abdominal walls. The gastroscope is reintroduced, and the positioning of the gastrostomy tube is evaluated under direct vision. The surgeon applies traction on the gastrostomy tube until the gastric and abdominal walls are in contact. The contact should not be too tight because pressure necrosis can occur if the distal tip is too snug against the gastric mucosa. The endoscopist evaluates the gastric wall, making certain there are not any signs of mucosal blanching. The PEG tube is then fixed externally by a flange or stent, made of a small 3-cm piece of tubing with a hole cut in the center. The flange is simply passed over the PEG tube and placed in close contact with the abdominal wall. Care should be taken not to place the flange too snug. Allowance should be made for postoperative swelling. A plastic clip, a cable tie, or even tape should be placed around the PEG tube adjacent to the flange to anchor it in position. The flange helps to immobilize the tube and prevent inward and outward movement. A light dressing is placed around the gastrostomy tube site. The tube may be held in place against the body wall by a protective bandage or fishnet style stockinette (Figure 20-39).
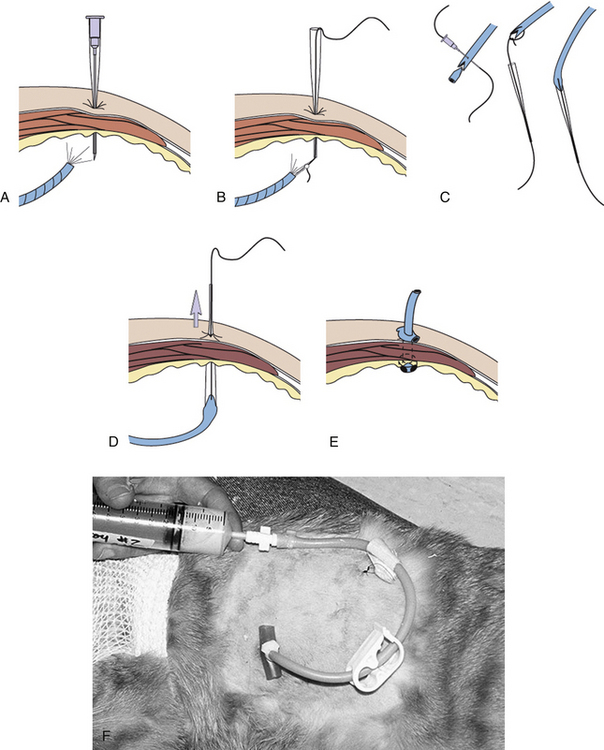
FIGURE 20-39 PEG technique. A, With the dog placed in right lateral recumbency, the gastroscope is introduced into the stomach. The lumen of the stomach is filled with air. A cannula with stylet is inserted through the skin and pushed through the abdominal and gastric walls. B, The stylet is removed from the cannula, and a nylon suture is advanced into the stomach. The endoscopist grasps the thread with an endoscopic snare or forceps. The suture is then brought out through the mouth along with the gastroscope. C, The prepared PEG tube, attached in a tapered plastic pipette, is tied or attached to the thread exiting the oral cavity. D, The gastrostomy tube is lubricated, and traction is placed on the transabdominal thread, pulling the gastrostomy tube through the animal's mouth, esophagus, and through the gastric and abdominal walls. The gastrostomy tube is advanced until its distal tip rests gently against the gastric mucosa. E, An external flange is fitted down the tube against the skin to prevent the tube from slipping into the stomach. F, Gastrostomy tube in place with clamp in open position for food administration. The stockinette dressing is pulled over the gastrostomy tube after feeding is complete. (From Ettinger SJ, Feldmen E, editors: Textbook of veterinary internal medicine, ed 6, Philadelphia, 2005, Elsevier Saunders.)
Blind Percutaneous Placement Technique
There are several percutaneous placement kits commercially available. Each product varies with the manufacturer; however, all kits employ a rigid introduction tube, usually made of stainless steel. The patient is placed in right lateral recumbency and aseptically prepared, identical to the endoscopic technique preparation. The rigid introduction tube is passed through the mouth, esophagus, and into the stomach of an anesthetized patient. The rigid tube's distal tip is slightly angulated so that slight upward pressure on the tube presents to the surgeon the gastric wall against the prepared abdominal body wall. Suture material is introduced through the abdominal and gastric wall by a trocar blade mechanism inside the rigid introduction tube or a needle and wire passed from the exterior abdominal wall through the rigid insertion tube to the oral cavity. A prepared gastrostomy tube is attached to the suture or wire exiting the mouth. The gastrostomy tube is then advanced into the stomach by external traction by the surgeon, pulling the gastrostomy tube through the gastric and abdominal walls. The gastrostomy tube is then secured as described earlier.
Gastrostomy tubes should remain in place for 10 to 14 days, giving time for good stoma formation. If the patient removes the tube or tube failure occurs, resulting in undesirable removal of the gastrostomy tube, a new replacement tube should be inserted as soon as possible. Replacement gastrostomy tubes are available in various styles, just like the initial placement tubes. Foley balloon styles are the most common replacement tube type. Ideally, replacement gastrostomy tubes may be replaced through the existing stoma site, requiring little or no sedation of the patient. The new tube can be gently guided through the existing external stoma at the skin, through the adhered abdominal and gastric walls, into the stomach. The Foley balloon is inflated within the lumen of the stomach and retracted back against the gastric mucosa and secured by an external flange against the body wall.
Clients with pets that require long-term or lifelong gastrostomy tube feedings may want to consider a low-profile gastrostomy device. These devices set flush with the skin level, have a tube shaft the length of the patient's stoma, and possess a mushroom tip that sits snug against the gastric mucosa. A nice feature of most low-profile tubes is that they employ an antireflux valve at the mushroom tip, preventing gastric contents from leaking back through the tube. To replace an existing gastrostomy tube with a low-profile device, the stoma length must first be determined. Commercially available low-profile devices come with a measuring device. The stoma measuring device is inserted through the fistula into the stomach. The measuring device is retracted until the distal end of the device lies gently against the mucosa of the stomach. Depending on the manufacturer, the measuring device will have circumferential marks indicating depths from 1.5 to 4.4 cm. A gastrostomy device of an appropriate length is chosen on the basis of the length of the stoma, as determined by the distance from the distal tip of the stoma measuring device and the external surface at skin level. A technician can easily make his or her own measuring device with a simple Foley urinary catheter. Use a permanent marking pen to indicate incremental measurements from the inflated balloon. Design your measurements from commercially available lengths of low-profile devices. The low-profile gastrostomy device kits come with an obturator. The blunt-ended obturator is used to extend the mushroom at the distal tip of the tube. Placement of the obturator is never done through the shaft of the device because this will damage the integrity of the antireflux valve, but placed through the side holes of the mushroom tip. This elongates the mushroom tip, facilitating the placement through the stoma and into the stomach. Once the proximal end of the device is at skin level, the obturator is withdrawn, allowing the mushroom tip to regain its conformation. A plug or cap is placed in the tube opening. A connecting tube is attached to the gastrostomy device for feeding. Straight bolus feeding adaptors are preferred for veterinary medicine over angulated adaptors designed for enteral feeding pumps. A decompression tube is another accessory that penetrates through the gastrostomy device's antireflux valve. A syringe can be adapted to decompress the stomach in patients that accumulate excess trapped air and gas.
Low-profile devices available commercially are made from silicone, so they have higher tissue compatibility than latex tubes. Canine and feline patients tolerate the apparatus much better than the longer gastrostomy tubes. Owners of the patients are elated to “have their animal back,” a pet that looks “normal,” without a long tube, bandaging, or support device for the external tube. Owners have noted healthier stoma sites and appreciate the ease of feeding and care. Because of its snug low-profile fit, dislodgment of the tube does not occur as with the initial PEG tube. This is also a relief for the pet owner who may be accustomed to replacing gastrostomy tubes three to four times per year. A low-profile gastrostomy device can last up to 1 year (Figure 20-40).
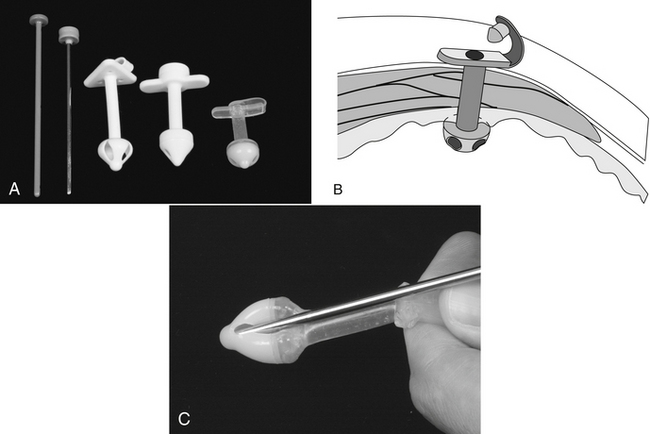
FIGURE 20-40 A, Low-profile gastrostomy devices and their obturators used to elongate the distal tip for placement. Left to right: The Ross Laboratories Stomate low-profile device, the Cook low-profile device, and the Bard “Button” low-profile device. B, The low-profile device placed in the stomach and its outer wings lying flush against the skin of the abdominal wall. The small cap is removed, and a feeding adapter with a syringe is connected to the low-profile device for administration of food. C, Correct technique to elongate the distal tip with the obturator before placement. Placement of the obturator is never done through the shaft of the device because this will damage the integrity of the antireflux valve located within the distal tip of the device. (From Ettinger SJ, Feldmen E, editors: Textbook of veterinary internal medicine, ed 6, Philadelphia, 2005, Elsevier Saunders.)
CASE PRESENTATION 20-1
Sandy is a 26.4 kg, 3-year-old, intact male Labrador cross. Sandy came to the hospital as a referral case from a local practice with the diagnosis of pyothorax. Two days earlier, the clients noticed sudden onset of dyspnea, difficulty breathing when lying down, panting excessively, and increased breathing effort.
Significant physical findings included: 5% dehydration, muffled heart sounds, absent breath sounds ventrally (bilateral) and present dorsally, and hyperpnea with increased abdominal component to the inspiratory phase. Sandy was placed in an oxygen cage with an FIO2 (fractional inspired oxygen concentration) of 60% while the veterinary technician prepared for an IV catheter placement, thoracocentesis, and possible chest tube placement.
While on “flow by oxygen,” an IV catheter was placed, and pretreatment blood samples were drawn for a CBC and chemistry profile; a urine sample was collected by free catch. The patient was started on lactated Ringer's solution with potassium supplementation. Following a surgical prep of the right chest wall, a thoracocentesis was performed with a 14-gauge OTN catheter. 1420 ml of purulent fluid was removed. A sample was submitted to the lab for cytology and a culture and sensitivity. It was decided to place a chest tube and initiate continuous chest drainage. Sandy was given Midazolam and butorphanol for sedation. Oxygen was administered by mask until he desaturated 10 minutes following sedation (SpO2 decreased from 95% to 82%); at that point he was intubated and given 100% oxygen, the SpO2 increased to 97%. The remainder of the procedure was uneventful, and radiographs were taken after chest tube placement (Figure 1). Sandy's chest tube was connected to a continuous chest drainage system (Figure 2), and Sandy was placed back in an oxygen cage.
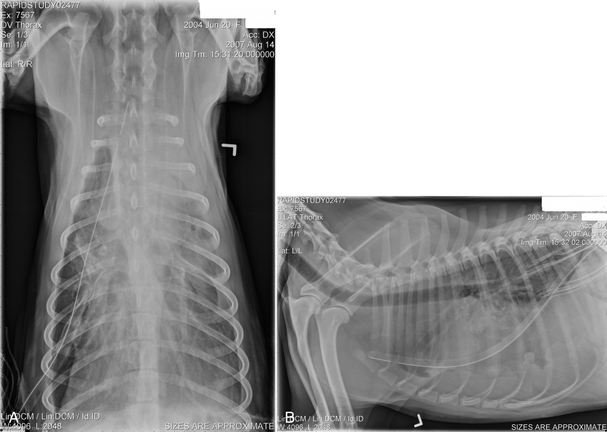
FIGURE 1 A and B, DV and lateral thoracic radiographs following chest tube placement. Bilateral pleural effusion is present.
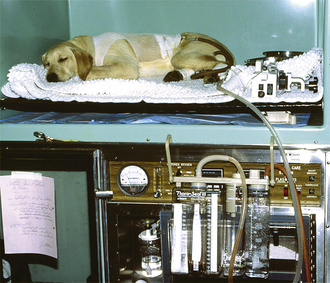
FIGURE 2 A, Patient (not Sandy) with a chest tube connected to a continuous chest drainage (Thora-Seal III) system.
Significant lab findings include: WBC 31,260 cells/μl (Normal 6000 to 13,000), metamyelocytes 1240 with moderate toxicity, bands 14,570 with moderate toxicity (Normal: rare), and neutrophils 8060 with slight toxicity (Normal 3000 to 10,500). The chemistry and urine analysis was unremarkable. Cytology revealed a total nucleated cell count of 193,560 with 88% neutrophils and 12% large mononuclear cells. The direct smear was noted to be markedly cellular and contained a small amount of blood. Nucleated cells consisted of a preponderant population of variably degenerate neutrophils. Mixed bacterial organisms (cocci and short and long thin rods) were occasionally seen within the cytoplasm of neutrophils. Lesser numbers of foamy activated macrophages were seen. The cytology was interpreted as septic purulent exudate suspicious for a penetrating foreign body injury or migrating foxtail. Eventually the organisms identified from the culture were Actinomyces species and Pasteurella multocida.
Nursing concerns/plans included:
• Administer IV antibiotics (ampicillin and enrofloxacin). Care was given to administer at the proper rate and avoid administering with incompatible drugs.
• Continued monitoring of vital signs.
• Assess respiratory status by auscultation, respiratory rate and effort, oxygen saturation, and intermittent arterial blood gases.
• Monitor the chest drainage system and document the hourly chest drainage.
• Monitor body weight and ins and outs making adjustments in the fluid therapy plan to account for the abnormal fluid loss resulting from the pyothorax.
On day 2 of the hospitalization, it was decided to try Sandy on room air and check an arterial blood gas. The blood gas results were: pH 7.42 (Normal 7.35 to 7.45), PCO2 36 mm Hg (Normal 35 to 45), PO2 64.6 mm Hg (Normal 80 to 120), HCO3 22.5 mEq/L (Normal 18 to 24); the results confirmed hypoxemia (decreased PaO2). Sandy was placed back on oxygen with an FIO2 of 40%. His SpO2 on room air was 90% and increased to 95% when on 40% oxygen.
The remainder of Sandy's hospitalization was uneventful; periodic samples of chest fluid were aseptically collected from the chest tube and submitted to the lab for an analysis. He was finally able to be placed on room air on day 6. The pyothorax resolved, and the chest tube was pulled on day 8. Sandy was discharged home on day 9 with orders to continue oral antibiotics and see the referring veterinarian in 1 week.
LARGE ANIMAL SAMPLING AND THERAPEUTIC TECHNIQUES
VENOUS BLOOD SAMPLE COLLECTION
Blood sampling is a routine and, in most cases, simple method to obtain a large amount of diagnostic data. The choice of blood collection tube (or syringe with anticoagulant added) will determine what laboratory parameters can be obtained. Some tests require serum (obtained after clotting of whole blood sample), some require plasma (the serum plus fibrinogen) obtained by using an anticoagulant, and some tests require whole blood for analysis. Blood sample tubes containing an anticoagulant should be filled to capacity to ensure the correct blood to anticoagulant ratio. Insufficient blood mixed with the anticoagulant may lead to erroneous laboratory results. Once collected, the sample should be gently inverted several times to ensure adequate mixing of the blood with the anticoagulant.
For all sites and species, the hair and/or skin should be cleaned with isopropyl alcohol to remove any obvious debris. In addition to providing antibacterial activity, the alcohol facilitates visualization of the vein and acts as a local vasodilator. If blood cultures are desired, a full sterile prep (as described earlier) is required.
TECHNICIAN NOTE
Cleaning the hair and/or skin with isopropyl alcohol provides antibacterial activity and facilitates visualization of the vein.
The choice of vein depends on the appearance of the vessels, the position of the animal, and the disposition of the animal. If repeated samples will be required, the technician should start first with a more distal venipuncture site, with subsequent samples taken progressively more proximal on the vein. The bevel-up position of the needle facilitates venipuncture and is less traumatic to the skin and vein on puncture. If the need to collect multiple samples is anticipated, placement of an IV catheter should be considered.
A syringe and needle may be used or Vacutainer needle and collection tube. When a needle and syringe are used, the needle may be inserted first and then the syringe attached, or in some cases, the needle may be attached to the syringe before insertion. The Vacutainer system can be used by inserting the long end of the double-ended needle into the vein and then slipping a blood collection tube over the exposed needle. Alternately the tube may be placed on the double-ended needle before injection by inserting the tube into the holder and pressing the rubber stopper against the metal end of the needle until the top of the rubber stopper is aligned with the circumferential score on the tube holder. Do not push it further until the needle is inserted into the lumen of the vein. Once in the lumen, the tube is pushed fully onto the needle. If the tube is pushed fully onto the needle before the other needle end is in the vein, the vacuum is broken, and the blood will not flow into the tube.
EQUINE VENIPUNCTURE
Common veins used for blood sampling in the adult equine include the jugular, the cephalic (located on the medial aspect of the forelimb), the transverse facial (runs transversely beneath the facial crest and above the transverse facial artery), and the lateral thoracic vein (located in the cranial ventral third of the thorax caudal to the point of elbow).
Additionally, for recumbent equine neonates, the saphenous vein (on the medial aspect of the hind limb) can be safely used.
Restrain the horse as necessary, depending on the behavior of the horse. A halter and lead rope may be the only restraint required, but additional restraint is necessary in some horses.
Jugular Vein: To occlude and distend the vein, pressure is placed on the jugular furrow in the lower third of the neck. Using an alcohol-soaked sponge or cotton ball, the ballottement of the vessel is performed (stroked several times in a downward direction). A 19- to 25-gauge × ⅝ to 1.5-inch needle is inserted into the lumen of the vessel, and blood is aspirated using a syringe or Vacutainer tube (Figures 20-41 and 20-42).
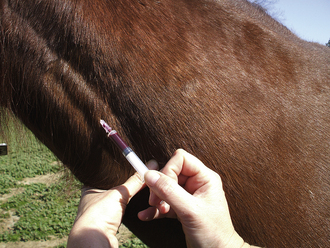
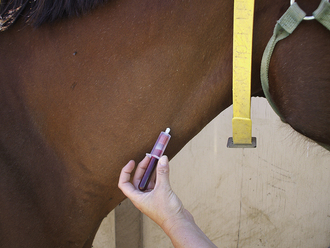
Some animals object vehemently to the needle insertion. For these patients, if the needle is inserted first and the animal jumps, twitches, or otherwise moves, the needle is more apt to remain in place without the weight of the syringe. Once the animal settles, the syringe is attached. and the blood sample aspirated.
Transverse Facial Vein: This vein runs transversely beneath the facial crest and above the transverse facial artery and can be located midway between the medial canthus of the eye and the rostral end of the facial crest (Figure 20-43, A).
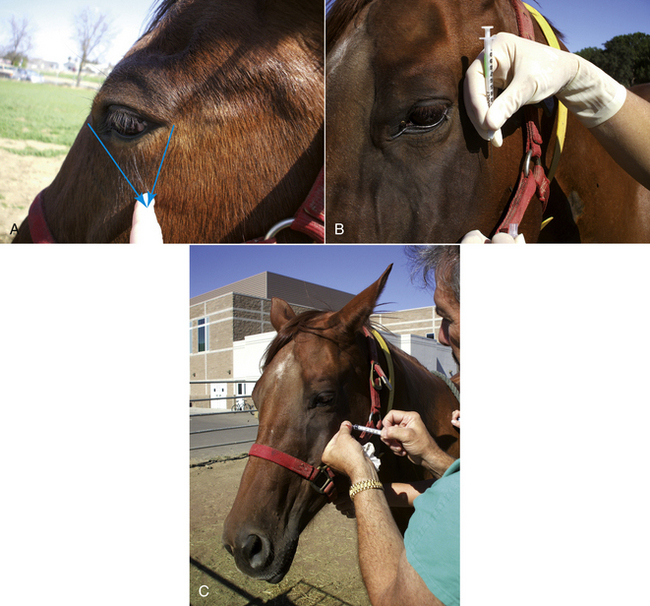
FIGURE 20-43 A, The needle insertion site for a transverse facial blood sample can be located by drawing imaginary lines from the medial canthus and lateral canthus, intersect them at the facial crest, and insert the needle just below the facial crest. B, Holding syringe to protect eye in case horse moves while preparing to insert needle. C, Blood collection from transverse facial vein.
TECHNICIAN NOTE
To locate the site, the technician may place the thumb at the medial canthus and the index finger at the lateral canthus and draw an imaginary V shape diagonally down to the facial crest.
It is commonly used in nonfractious horses to collect small volumes of blood. There is no need to occlude the vein. A 22- to 25-gauge × ⅝- to 1-inch needle is inserted perpendicular to the skin beneath the facial crest and advanced until bone is felt. The syringe is then attached, and the needle is withdrawn slowly while aspirating. When blood enters the syringe, the placement is maintained until the collection is completed (see Figure 20-43, B). There is a very minimal risk for hematoma formation or bleeding from this site. Horses rarely object to the needle insertion at this site. Caution must be used when handling needles around the face of the horse because carelessness can lead to puncture of the eye. The hand that holds the needle should always be cupped, protecting the eye from the needle.
Cephalic Vein: The cephalic vein is located on the medial aspect of the forelimb and can be safely accessed in many horses. The site is cleaned with a wipe of rubbing alcohol, which also enhances the visibility of the vein. The vein is occluded above the needle insertion site (as with all veins, the blood flows back toward the heart). A 20- to 22-gauge × 1- to 1.5-inch needle is inserted (Figure 20-44). Horses may quickly lift up the foot when the needle is inserted, so it is beneficial to insert the needle first and then attach the syringe when the horse has placed the foot back on the ground to reduce the likelihood of the needle coming out of the horse when the foot is lifted. Since this site is low on the animal, the risk for hematoma formation is enhanced, so after removal of the needle, the technician must make a concerted effort to apply pressure to the site. If the technician is completing other work on the patient, a cotton ball may be placed on the site and adhesive tape wrapped around the limb, but this can only be left on very briefly because circulation can be compromised. The technician must remove the tape before leaving the patient.
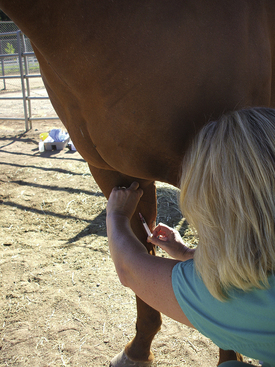
Saphenous Vein: The saphenous vein is located on the medial aspect of the hind limb. It is unsafe for the technician to use this site in nonanesthetized adult horses. It can be used successfully in recumbent neonates. Care needs to be taken to apply sufficient digital pressure after the removal of the needle.
BOVINE VENIPUNCTURE
Jugular Vein: Restrain the animal with its head elevated slightly and tied securely. If necessary, nose tongs may be applied for additional restraint. Distend the jugular vein by placing pressure low in the jugular furrow. The bovine jugular vein is very large, and the palm of the hand should be used to occlude the vessel. Firmly wiping the jugular groove several times in a downward direction with an alcohol-soaked sponge aids in visualizing the vein. Thrust the needle (16- to 18-gauge × 1.5 inch) into the vein with the needle tip directed cranially at about a 45-degree angle (Figure 20-45). Maintain distention of the vein while collecting the blood and then apply digital pressure at the site when the needle is removed.
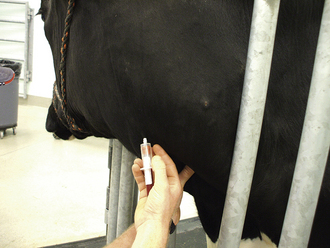
Coccygeal Vein (Tail Vein): The tail vein is commonly used when bleeding a large number of cattle and when the individual's jugular vein is thrombosed or inaccessible. The animal is restrained in a chute or stanchion, and a tail jack is applied. The tail jack provides restraint and also places the tail in the best position for a venipuncture. With one hand, the tail is lifted up and toward the back of the animal until it is vertical. The ventral surface of the tail is cleaned with 70% isopropyl alcohol to remove dirt and fecal material. An 18- to 21-gauge × 1.5-inch needle is attached to a syringe. The diameter of the coccygeal vein is considerably smaller than the jugular vein, so larger needles are inappropriate. Locate the soft space between two vertebrae by palpating between two bony prominences. These are hemal processes, which are bony canals on the ventral aspect of the vertebral bodies that protect the artery and vein. Insert the needle perpendicular to the midline until bone is felt and then slowly back the needle out slightly from the bone while applying suction to the syringe. Blood should flow freely into the syringe. If preferred, a Vacutainer needle and tube can be used instead of the needle and syringe (Figure 20-46).
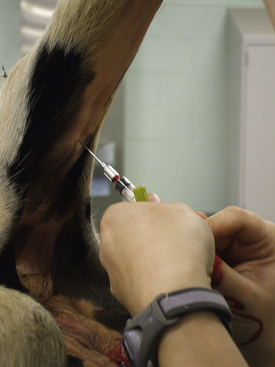
After the sample collection, withdraw the needle, lower the tail, and apply pressure to the site for approximately 15 seconds to discourage hematoma formation. The coccygeal artery lies in close proximity to the coccygeal vein and may be inadvertently punctured. If this is done, digital pressure should be applied to the site for at least 1 minute to prevent hematoma formation.
Subcutaneous Abdominal Venipuncture (Milk Vein): The right and left milk veins are located along the ventrolateral body wall of the thorax and abdomen. These provide major venous drainage of the udder. Use of these veins for a venipuncture can result in life-threatening conditions for the cow. The milk veins are very large and are prone to prolonged and pronounced bleeding, large hematoma formation, and are at great risk for an infection because they are easily contaminated by feces, dirt, and other material when the animal is recumbent. Thrombosis of the milk vein may lead to insufficient circulation to the udder, and collateral circulation is inadequate to overcome the problem. It is recommended that these veins never be used for venipuncture.
On very rare occasion and as a last resort, a veterinarian may direct the technician to collect a blood sample from the milk vein. In the event that no other vein is available for sampling and the veterinarian has deemed it necessary to collect a sample from the milk vein, the animal must be restrained adequately in a chute or stanchion with a tail jack or leg restraint applied. The technician should stand next to the shoulder of the cow facing the tail or stand close to the flank facing the head. Bend just enough to insert the needle while keeping your head up to avoid contact when the cow kicks (there is a strong likelihood that the animal will kick when the needle is inserted).
Select an accessible site. Clean with isopropyl alcohol, stabilize the vein with one hand, hold the skin taut, and insert the needle (18- to 22-gauge × 1.5-inch needle) in either direction (the blood flows cranially) with the syringe attached. Alternatively a Vacutainer collection needle may be inserted and a Vacutainer collection tube attached. After the needle is removed, prolonged digital pressure must be applied over the puncture site (for several minutes).
CAMELID VENIPUNCTURE (LLAMA, ALPACA, LAMOID, SOUTH AMERICAN CAMELID)
Jugular Venipuncture: Llamas and alpacas provide challenges to jugular venipuncture. In adult animals, visualization of the jugular vein is not possible. There is no visible jugular groove, the skin over the jugular vein is thick (in males it can be 1 cm thick), and they have long fiber. The transverse process of a cervical vertebra has a ventral projection that curves around the jugular furrow, and llamas and alpacas have valves in the jugular vein that function to keep the blood flowing toward the heart rather than allowing backflow when the head is lowered.
A jugular venipuncture can be performed in a high or low site. The high site can be located by creating an imaginary line along the ventral border of the mandible and dropping an imaginary line vertically down from just in front of the ear. The intersection of these two lines provides a guide for locating the vein. In some animals, a fluid wave may be visualized by occlusion and ballottement of the vein (stroking the vein toward the occluding hand). The skin is thickest at this point, but the jugular vein is separated here from the carotid artery by a muscle, making the likelihood of arterial penetration less at this site than the low neck site (Figure 20-47).
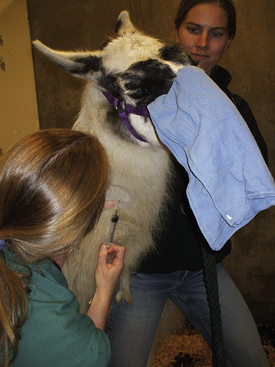
FIGURE 20-47 Blood collection from llama jugular vein. A towel can be draped loosely through the halter on bridge of nose to protect personnel from being spit upon if the animal objects to the procedure.
The low position is located by palpating the ventral projection of the transverse process of the sixth cervical vertebrae (this is close to the thorax and prominent) and occluding the vein just above the transverse process (Figure 20-48). As with the high neck site, ballottement of a fluid wave can help to identify the vein. The skin is thinner at this location, and movement of the head is less of a problem than with the high neck site, but the fiber is thicker. The carotid artery and jugular vein are in close proximity in this area, which increases the chance of arterial penetration.
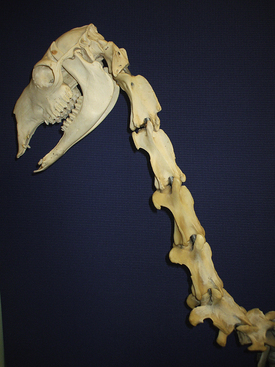
Saphenous Venipuncture: The saphenous vein is superficial and on the medial aspect of the stifle. This vein can be used in recumbent animals. The vein lies in close proximity and cranial to the artery.
Auricular (Ear) Vein: The ear vein can yield small amounts of blood, sufficient for many laboratory tests. Digital pressure is usually sufficient to raise the vein, but if necessary, an elastic band can be wrapped temporarily around the base of the ear, as a tourniquet.
Middle Coccygeal Vein: Located as in cattle, but is more superficial in camelids, just under the skin.
Cephalic Vein: The cephalic vein lies similar in placement to that of dogs and can be accessed in adults when the animal is in sternal recumbency (Kushed position).
Neonatal Camelids (Crias): The common veins used in neonates are the jugular, cephalic, saphenous, and occasionally the ear. The jugular vein is much easier to use in the neonate than the adult because the skin is thin and the jugular vein can be easily distended and visualized (Figure 20-49).