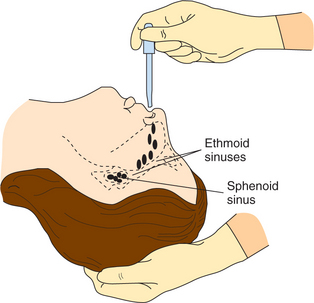
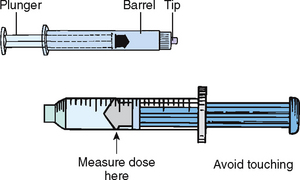
| STEPS |
RATIONALE |
| For all injections |
|
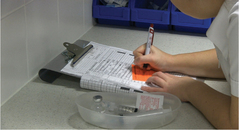
| 1. Review prescriber’s medication order for client’s name, medication name, dose, time and route of administration. |
Ensures safe and correct administration of medication. |
| 2. Assess client’s history of and known response to allergies. |
Certain substances have similar compositions; nurse should not administer any substance with known allergic response. |
| 3. Observe verbal and non-verbal responses towards receiving injection. |
Injections can be painful. Anxiety can increase pain. |
| 4. Assess for contraindications. |
|
| |
A. For subcutaneous injections |
Reduced tissue perfusion interferes with medication absorption and distribution. Physiological changes of ageing or client illness may influence the amount of SC tissue a client possesses. This influences methods of administering injections. |
| |
Assess for factors such as circulatory shock or reduced local tissue perfusion. Assess adequacy of client’s adipose tissue. |
|
| |
B. For intramuscular injections |
Atrophied muscle absorbs medication poorly. Factors interfering with blood flow to muscles impair medication absorption. |
| |
Assess for factors such as muscle atrophy, reduced blood flow or circulatory shock. |
|
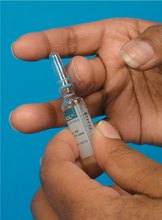
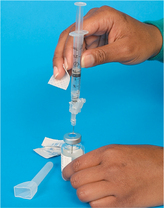
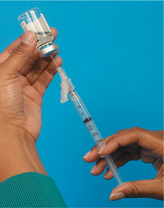
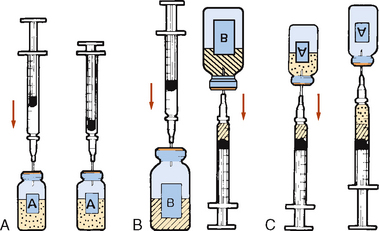
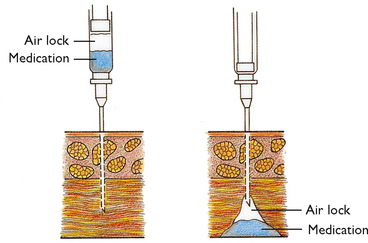
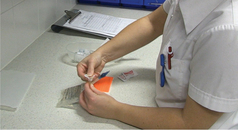
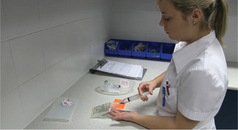
| 5. Prepare correct medication dose from ampoule or vial (see Skill 31-7). Check carefully. Be sure all air is expelled. |
Ensures that medication is sterile. Preparation techniques differ for ampoule and vial. |
| 6. Identify client; check identification bracelet with MAR and ask client’s name. |
Ensures correct client receives ordered medication. |
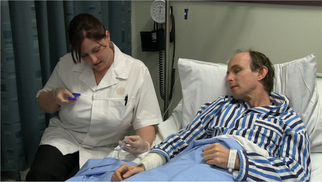
| 7. Explain steps of procedure and tell client injection will cause a slight burning or sting. |
Helps minimise client’s anxiety. |
| 8. Close room curtain or door. |
Provides privacy. |
| 9. Wash hands thoroughly; apply disposable gloves. |
Reduces transfer of microorganisms. |
| 10. Keep sheet or gown draped over body parts not requiring exposure. |
Selection of correct injection site may require exposure of body parts. |
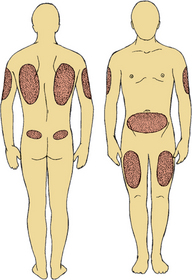
| 11. Select appropriate injection site. Inspect skin surface over sites for bruises, inflammation or oedema. |
|
| |
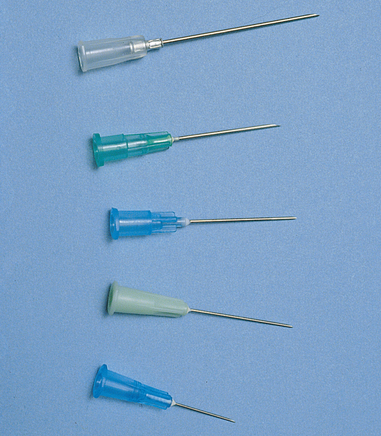
a. subcut: Palpate sites for masses or tenderness. Avoid these areas. For daily insulin, rotate site daily. Be sure needle is correct size by grasping skinfold at site with thumb and forefinger. Measure fold from top to bottom; needle should be half length.
|
|
| |
b. IM: Note integrity and size of muscle and palpate for tenderness or hardness. Avoid these areas. If injections are given frequently, rotate sites.
|
|
| |
c. ID: Note lesions or discolourations of forearm. Select site three to four fingerwidths below antecubital space and a handwidth above wrist.
|
|
| Critical decision point: Injection sites should be free of abnormalities that may interfere with medication absorption. Sites used repeatedly can become hardened from lipohypertrophy (increased growth in fatty tissue). An ID site should be clear so that results of skin test can be seen and interpreted correctly. |
| 12. Help client to comfortable position: |
|
| |
a. subcut: Have client relax arm, leg or abdomen, depending on site chosen for injection.
|
Relaxation of site minimises discomfort. |
| |
b. IM: Have client lie flat, on side or prone, depending on site chosen.
|
Reduces strain on muscle and minimises discomfort of injections. |
| |
c. ID: Have client extend elbow and support it and forearm on flat surface.
|
Stabilises injection site for easiest accessibility. |
| |
d. Talk with client about subject of interest.
|
Distraction reduces anxiety. |
| Critical decision point: Ensure that client’s position is not contraindicated by medical condition. |
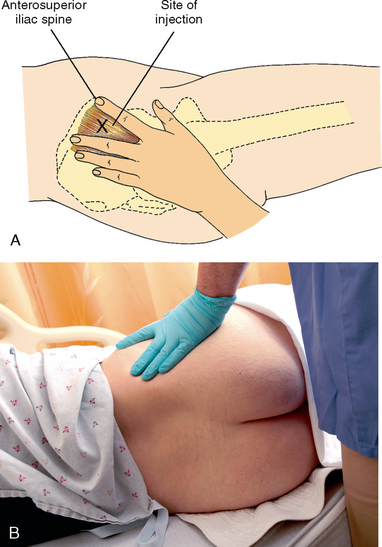
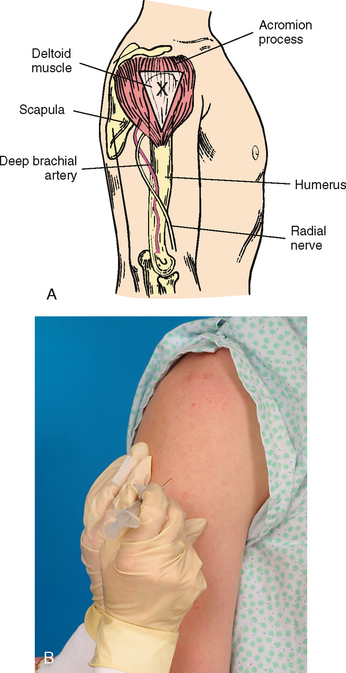
| 13. Relocate site using anatomical landmarks. |
Injection into correct anatomical site prevents injury to nerves, bones and blood vessels. |
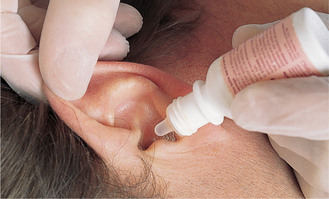
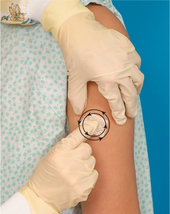
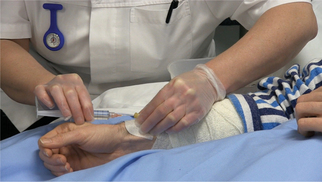
| 14. Clean site with an antiseptic swab. Apply swab at centre of the site and rotate outwards in a circular direction for about 5 cm (see illustration). |
Mechanical action of swab removes secretions containing microorganisms. |
| Note: Some agencies may not require the use of alcohol swabs before giving an injection, but the evidence for this is not clear so many agencies will still require this step. |
|
| 15. Hold swab or gauze between third and fourth fingers of non-dominant hand. |
Gauze or swab remains readily accessible when needle is withdrawn. |
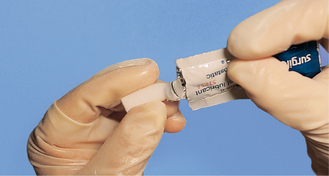
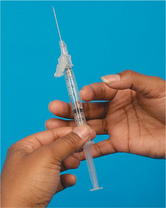
| 16. Remove needle cap from needle by pulling it straight off. |
Prevents needle from touching and contaminating sides of cap. |
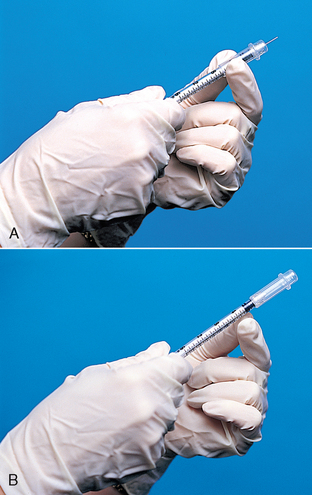
| 17. Hold syringe between thumb and forefinger of dominant hand: |
|
| |
a. subcut: Hold as dart, palm down (see illustration) or hold syringe across tops of fingertips.
|
Quick, smooth needle insertion minimises discomfort. |
| |
b. IM: Hold as dart, palm down.
|
|
| |
c. ID: Hold bevel of needle pointing up.
|
With bevel up, medication is less likely to be deposited into tissues below dermis. |
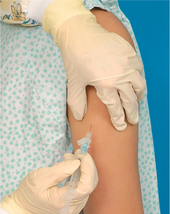
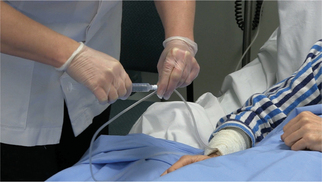
| 18. Administer injection: |
|
| |
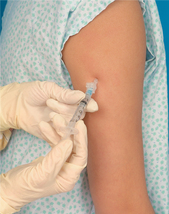
A. Subcutaneous |
|
| |
|
(1)For average-size client, spread skin tightly across injection site or pinch skin with non-dominant hand.
|
Needle penetrates tight skin more easily than loose skin. Pinching skin elevates subcutaneous tissue and may desensitise area. |
| |
|
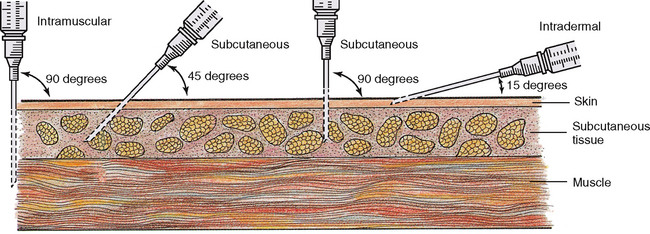
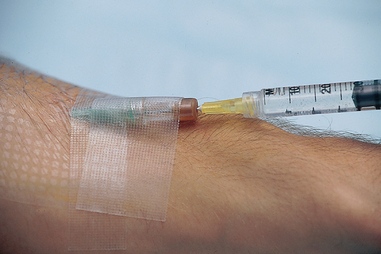
(2)Inject needle quickly and firmly at 45- to 90-degree angle. Then release skin, if pinched.
|
Injecting medication into compressed tissue irritates nerve fibres. |
| |
|
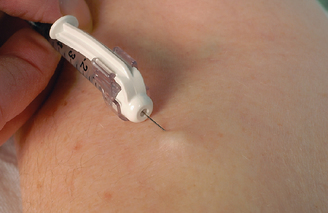
(3)For obese client, pinch skin at site and inject needle at 90-degree angle below tissue fold.
|
Obese clients have fatty layer of tissue above subcutaneous layer. |
| |
|
(4)Inject medication slowly.
|
Aspiration of heparin injection may cause the needle to move, creating tissue damage and bleeding (haematoma). |
|
|
|
|
| |
B. Intramuscular: |
|
| |
|
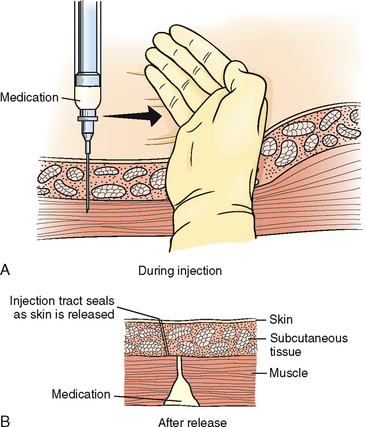
(1)Position non-dominant hand at proper anatomical landmarks and pull skin down to administer in a Z-track.
|
Speeds insertion and reduces discomfort. Creates zigzag path through tissues that seals needle track to avoid leaking of medication into subcutaneous tissue. |
| |
|
(2)If client’s muscle mass is small, grasp body of muscle between thumb and fingers.
|
Ensures that medication reaches muscle mass. |
| |
|
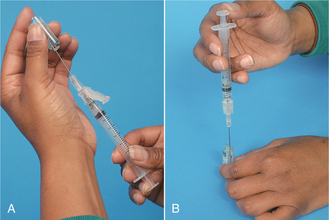
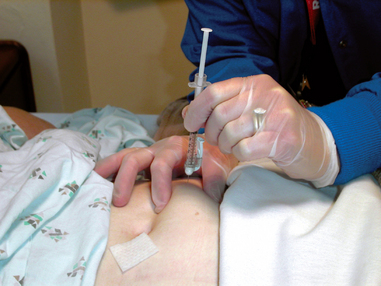
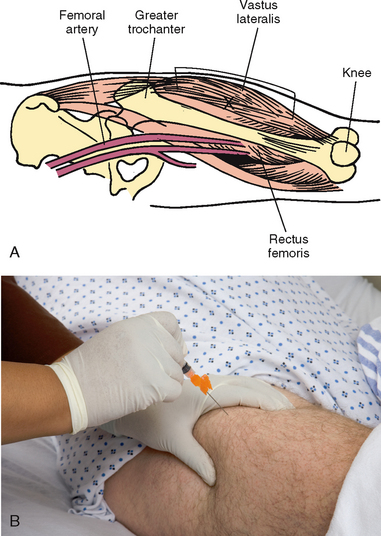
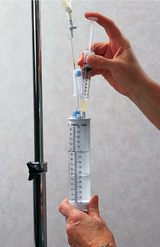
(3)Insert needle quickly at 90-degree angle into muscle. After needle enters site, grasp lower end of syringe barrel with non-dominant hand. Move dominant hand to end of plunger. Avoid moving syringe while slowly pulling back on plunger to aspirate drug (see illustration). If blood appears in syringe, remove needle, discard medication and syringe and repeat procedure.
|
Properly performed injection requires smooth manipulation of syringe parts. Movement of syringe may displace needle and cause discomfort. Aspiration of blood into syringe indicates IV placement of needle; subcut and IM injections are not for IV use (dermis is relatively vascular). |
| Critical decision point: If blood appears in syringe (indicating needle is in the bloodstream rather than into the muscle), remove needle and dispose of medication and syringe correctly. Repeat preparation procedure. |
| |
|
(4)Inject medication slowly.
|
Slow injection reduces pain and tissue trauma. |
| |
|
(5)Smoothly and steadily withdraw needle and release skin.
|
Support of tissues around infection site minimises discomfort during needle withdrawal. Some advocate use of dry gauze to minimise client discomfort associated with alcohol on non-intact skin. |
| |
C. Intradermal |
|
| |
|
(1)With non-dominant hand, stretch skin over site with forefinger or thumb.
|
Needle pierces tight skin more easily. |
| |
|
(2)With needle almost against client’s skin, insert it slowly at a 5- to 15-degree angle until resistance is felt. Then advance needle through epidermis to approximately 3 mm below skin surface. Needle tip can be seen through skin.
|
Ensures needle tip is in dermis. |
| |
|
(3)Inject medication slowly. Normally, resistance is felt. If not, needle is too deep; remove and begin again.
|
Slow injection minimises discomfort at site. Dermal layer is tight and does not expand easily when solution is injected. |
| |
|
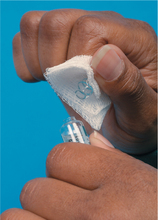
(4)While injecting medication, notice that small bleb approximately 6 mm resembling mosquito bite appears on skin’s surface (see illustration).
|
Bleb indicates medication is deposited in dermis. |
|
|
| 19. Withdraw needle while applying alcohol swab or gauze gently over site. Support of tissue around injection site minimises discomfort during needle withdrawal. |
Some advocate the use of dry gauze to minimise client discomfort associated with alcohol on non-intact skin. |
| 20. Do not massage site after subcut injection of heparin or insulin or after IM or ID injection. |
Massage of site after heparin injection may cause bleeding; massage after insulin injection may increase absorption of insulin. Massage of IM site may cause underlying tissue damage. Massage of ID site may disperse medication into underlying tissue and alter test results. |
| 21. Help client to comfortable position. |
Gives client sense of wellbeing. |
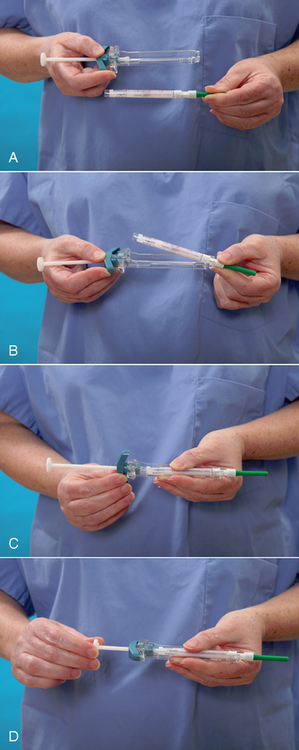
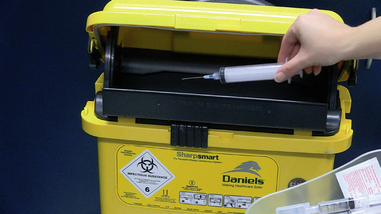
| 22. Discard uncapped needle or needle enclosed in safety shield and attached syringe into puncture and leakproof receptacle. |
Needles should not be recapped before disposal. Safety shields prevent needle-stick injuries. |
| 23. Remove disposable gloves and perform hand hygiene. |
Reduces transmission of microorganisms. |
| 24. Stay with client for 3–5 minutes and observe for any adverse reactions. |
Severe anaphylactic reaction is characterised by dyspnoea, wheezing and circulatory collapse. |
| 25. Ask whether client feels any acute pain, burning, numbness or tingling at injection site. |
Continued discomfort may indicate injury to underlying bones or nerves. |
| 26. Inspect site, noting any bruising or induration. |
Bruising or induration indicates complication associated with injection. Notify nurse in charge or medical officer. Provide warm compress to site. |
| 27. Return to evaluate client’s response to medication in 10-30 minutes. IM medications absorb quickly; undesired effects may also develop rapidly. |
Nurse’s observations determine efficacy of medication action. |
| 28. Ask client to explain purpose and effects of medication. |
Evaluates client’s understanding of information taught. |
| 29. For ID injections, use skin pencil and draw circle around perimeter of injection site. Read site within 48–72 hours of injection. |
Site must be read at various intervals to determine test results. Pencil mark makes site easy to find. |